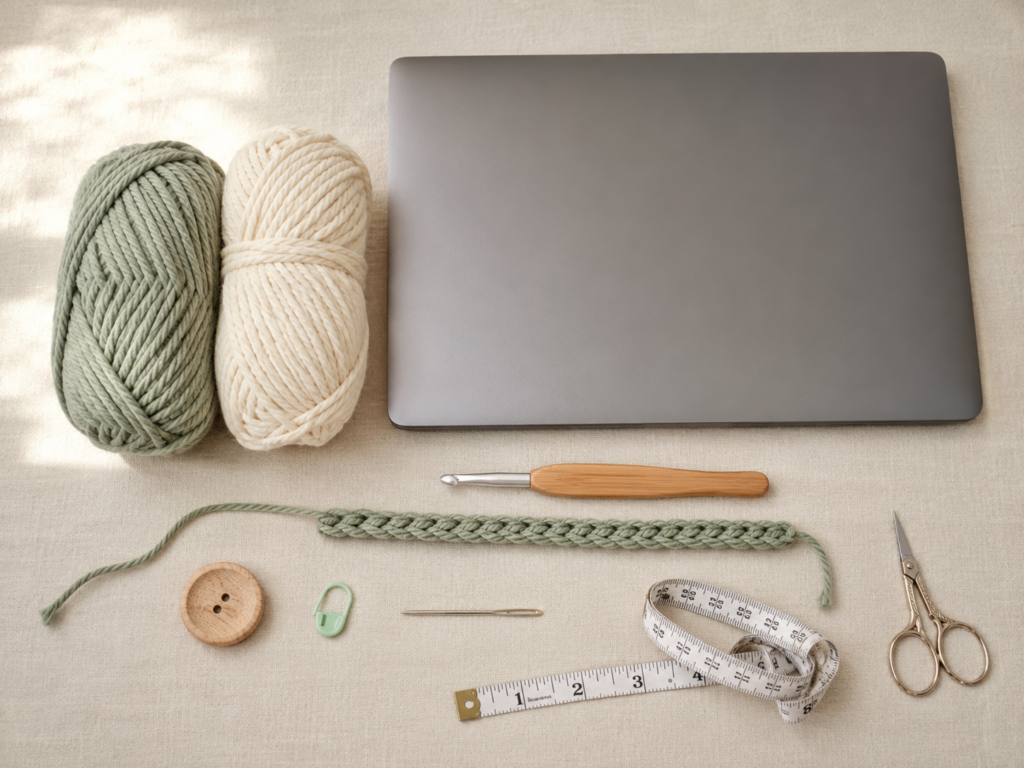
A crochet laptop sleeve is one of the most practical projects you can make once you know the basic stitches. It protects your laptop from light scratches, makes your workspace feel more personal, and gives you a useful handmade item that does not sit forgotten in a drawer.
This beginner-friendly crochet laptop sleeve pattern is designed as a simple, structured pouch worked from the bottom up. You begin with a foundation chain that matches your laptop width, crochet around both sides of that chain to form the base, then continue upward in rounds. The body uses a simple mixed-loop single crochet texture: one stitch worked into the back loop, the next into the front loop, then repeated. That small change gives the sleeve more surface texture than plain single crochet while still staying easy enough for confident beginners.
The closure is made with crochet button loops and large buttons, so there is no zipper installation and no complicated fabric lining required. The construction is especially useful if you want a laptop sleeve that can be adjusted for a tablet, iPad, MacBook, Chromebook, notebook, or e-reader.
This tutorial is original, but the visual research was based on a professional crochet laptop case tutorial from Dreamee Crochet that demonstrates the same general construction logic: starting with a foundation chain, working around both sides of the chain, building the body in rounds, and finishing with button loops.
What You’ll Learn
In this crochet laptop sleeve tutorial, you will learn how to:
- Measure a laptop before starting.
- Make a custom-width foundation chain.
- Crochet into the back bump of a chain.
- Work around both sides of a foundation chain.
- Shape a sleeve base without sewing the bottom seam.
- Use a stitch marker to track continuous rounds.
- Crochet alternating BLO and FLO single crochet texture.
- Check the fit while the sleeve is in progress.
- Make button loops directly into the final edging round.
- Sew buttons securely onto crochet fabric.
- Weave in ends neatly.
- Customize the sleeve for different devices.
Materials You’ll Need
For a 13-inch laptop sleeve, gather:
- Bulky #5 yarn, approximately 180–230 yards total
- 6 mm / J-10 crochet hook
- 2 large buttons, approximately 1–1.25 inches wide
- Locking stitch marker
- Tapestry needle
- Small sewing needle
- Strong matching sewing thread
- Scissors
- Measuring tape
- Your laptop for fit checking
Bulky #5 yarn is a good choice because it creates a dense, cushioned fabric without requiring dozens of tiny rows. The Craft Yarn Council’s standard yarn-weight system identifies bulky yarn as category 5.
For the sample-style version in this article, imagine a calm modern palette:
- Main color: soft sage green
- Contrast color: warm cream
- Buttons: natural matte wood
You can use acrylic, cotton, or a cotton-acrylic blend. Acrylic usually has more stretch, while cotton usually has less stretch and more structure.
Finished Size
This sample is designed for a slim 13-inch laptop.
Approximate finished size when laid flat:
- Width: 13–13.5 inches
- Height: 9.25–9.75 inches
- Closure: 2 crochet button loops
- Fit style: Snug but not stretched tight
Because laptops vary, use the instructions as a sizing method rather than treating the sample measurements as universal.
Crochet Abbreviations Used
This tutorial uses U.S. crochet terminology.
- ch = chain
- sc = single crochet
- sl st = slip stitch
- st/sts = stitch/stitches
- rep = repeat
- BLO = back loop only
- FLO = front loop only
- inc = increase, meaning 2 stitches worked into the same stitch
- RS = right side
- WS = wrong side
The Craft Yarn Council lists standard crochet abbreviations including ch, sc, sl st, BLO, and FLO.
U.S./U.K. terminology note
This tutorial is written in U.S. crochet terms. In U.K. terms, the stitch called single crochet in the U.S. is not named the same way, so beginners should avoid mixing U.S. and U.K. pattern instructions unless they are comfortable translating crochet terms.
Before You Start
Measure your laptop first
Place your laptop on a flat table and measure:
- Width from left to right
- Height from bottom to top
- Thickness at the thickest edge
The foundation chain controls the width of the sleeve. The number of body rounds controls the height.
The selected research source uses a similar sizing principle: make the foundation chain long enough to match the laptop width, then adjust depending on yarn type and stretch.
Choose the right ease
A laptop sleeve should not be huge and loose. It should fit closely enough that the laptop does not slide out easily.
However, it should not be so tight that you have to force the laptop inside.
For bulky acrylic yarn, make your starting chain approximately the same width as the laptop, or slightly smaller if your yarn stretches a lot.
For bulky cotton yarn, make your starting chain slightly wider because cotton usually has less stretch.
Make a small gauge swatch
Crochet a small swatch using single crochet.
Measure how many stitches fit into 4 inches.
This tells you whether your fabric is:
- Too loose
- Too stiff
- Too open
- Too small
- Suitable for a protective sleeve
A laptop sleeve should feel dense. If the holes are large enough that laptop corners easily poke through, use a smaller hook or firmer yarn.
Step-by-Step Crochet Tutorial
Step 1: Make the Foundation Chain
With sage-green yarn, make a slip knot.
Chain until the chain reaches the width of your laptop.
For many slim 13-inch laptops using bulky yarn and a 6 mm hook, this may be around:
Ch 36–42
Do not rely only on the number. Measure the chain against your actual laptop.
Lay the chain flat across the width of the laptop. Do not stretch it aggressively. It should sit approximately from one side edge to the other.
For this original sample, use:
Ch 40
This is only a starting example. Your yarn, hook, laptop thickness, and tension can change the number.
Beginner tip:
Make the chain slightly loose. A tight starting chain makes the first round harder and can pull the bottom edge inward.
Common mistake to avoid:
Do not make the chain as long as the laptop height. The foundation chain controls the sleeve width, not the sleeve height.
Step 2: Work Single Crochet into the Back Bumps
Turn the foundation chain slightly so you can see the small bumps along the underside.
Starting in the second chain from the hook, work:
1 sc into the back bump of each chain across.
If you started with ch 40, you will make 39 single crochet stitches along the first side.
Working into the back bump gives the base a cleaner, stronger edge. It also leaves the opposite loops easier to recognize when you turn around the end.
Beginner tip:
If the back bumps are hard to see, place the chain on a light surface and rotate it toward you. The back bumps look like a row of small horizontal bars.
Common mistake to avoid:
Do not crochet through only random side strands. Try to insert the hook consistently into the same part of each chain so the bottom edge stays even.
Step 3: Turn Around the Foundation Chain
When you reach the final chain, do not turn the work like a normal flat row.
Instead, rotate the chain so you can work along the opposite side.
In the last chain space, work:
2 sc in the same end chain.
This helps the fabric curve around the end of the foundation instead of pulling tightly.
Now begin crocheting into the unused loops along the opposite side of the chain.
Work:
1 sc in each unused loop across.
When you reach the beginning end, work:
2 sc into the first chain area.
You have now crocheted around both sides of the foundation chain and created a long oval base.
If you began with ch 40, your first round should have approximately:
- 39 sc along the first side
- 2 sc at one end
- 39 sc along the second side
- 2 sc at the other end
Total: 82 stitches
Do not worry if your number differs because your starting chain may be different. The most important point is that the two long sides match.
Beginner tip:
Write down your first-round stitch count. Every body round should keep the same count unless you intentionally change the size.
Common mistake to avoid:
Do not accidentally add several stitches around the ends. Too many increases will make the bottom edge flare and wave.
Step 4: Check the Completed Base
Lay the long oval base flat on the table.
It should look like a narrow rounded rectangle, not a wide oval coaster.
Now place it along the bottom edge of your laptop.
Check three things:
- The base is wide enough for the laptop.
- The fabric is not extremely loose.
- The ends are rounded but not wavy.
If the base is too short, pull it out and add more starting chains.
If the base is too long, remove a few starting chains.
This is the best time to correct sizing because only one round has been completed.
Beginner tip:
A snug sleeve should fit close to the laptop, but the base should not look strained before the body has even started.
Common mistake to avoid:
Do not continue for many rounds if the base already looks wrong. Fixing the foundation now saves time.
Step 5: Start the Mixed-Loop Single Crochet Texture
Place a locking stitch marker in the first stitch of the next round.
Now begin the texture pattern.
Round 2:
- BLO sc in the first stitch.
- FLO sc in the next stitch.
- Repeat around, alternating BLO sc and FLO sc.
If your first-round stitch count is even, the alternating loop pattern will line up evenly.
For Round 3, reverse the starting loop:
- FLO sc in the first stitch.
- BLO sc in the next stitch.
- Repeat around.
Continue alternating the starting loop each round.
This creates a subtle woven-looking surface. It is still single crochet, but the fabric looks more polished because the raised loops catch the light.
Beginner tip:
Say the loop placement quietly while working: “back, front, back, front.” It sounds simple, but it helps prevent accidental repeats.
Common mistake to avoid:
Do not insert the hook under both loops during the texture rounds unless you intentionally want plain single crochet. BLO and FLO create the surface pattern.
Step 6: Build the Sleeve Body
Continue in rounds until the sleeve is tall enough to cover your laptop.
A good beginner approach:
- Work 5 rounds.
- Insert the laptop halfway.
- Check width and stretch.
- Continue if the fit feels right.
For a 13-inch laptop, you may need approximately 24–32 total rounds in bulky yarn, depending on your gauge.
Your sleeve should reach just above the laptop’s top edge before you begin the button-loop edging.
Keep moving the stitch marker at the start of every round.
Beginner tip:
Try the sleeve on the laptop while the yarn is still attached. If it is too tight, you can pull back easily. If it is too loose, you can also correct before finishing.
Common mistake to avoid:
Do not make the sleeve much taller than the laptop unless you want a fold-over flap. For this version, the top edge sits near the laptop opening and closes with button loops.
Step 7: Add the Top Edging and Button Loops
When the sleeve body reaches the correct height, switch to warm cream yarn if you want contrast edging.
Slip stitch evenly around the top edge until you reach the first button-loop position.
For a two-button closure, mark two positions across the front upper edge before crocheting the final round.
At the first marked position:
- Sl st into the marked stitch.
- Ch 12–16, depending on button size.
- Sl st back into the same base stitch to form a loop.
- Continue slip stitching across the top edge.
Repeat for the second button loop.
Before finishing, test each loop around the button. The loop should slide over the button without stretching too hard, but it should not be so large that it slips open.
Beginner tip:
Make one test loop before committing. Button thickness matters as much as button width.
Common mistake to avoid:
Do not place the loops randomly. Fold the sleeve flat, mark the positions symmetrically, and only then crochet the loops.
Step 8: Sew on the Buttons
Insert your laptop into the sleeve.
Fold each button loop toward the front of the sleeve and mark where the button should sit.
Remove the laptop before sewing.
Using sewing thread and a sewing needle, attach each button securely to the front layer only. Do not sew through both layers of the sleeve.
After sewing each button, test the closure.
If a loop feels too tight, remove the loop and remake it with more chains.
If a loop feels too loose, remake it with fewer chains.
Beginner tip:
Place a small scrap of cardboard inside the sleeve while sewing the buttons. This helps prevent accidentally stitching the front and back layers together.
Common mistake to avoid:
Do not sew the buttons while the sleeve is empty and unshaped unless you have already checked alignment. The fabric may stretch differently when the laptop is inside.
Step 9: Weave in Ends and Clean the Edge
Thread each yarn tail onto a tapestry needle.
Weave the yarn through stitches on the wrong side of the sleeve.
For bulky yarn, avoid creating lumps. Spread the tail across a longer section instead of hiding it all in one small area.
Trim only after the end feels secure.
Check the top edge again. The button loops should sit neatly and the slip-stitch edging should not pull the sleeve inward.
Beginner tip:
Weave in the end in two directions. This makes it harder for the tail to slip out during use.
Common mistake to avoid:
Do not cut yarn tails too close before weaving. Short tails are difficult to secure.
Step 10: Final Fit Check
Insert your laptop fully.
Close the button loops.
Check:
- The laptop slides in smoothly.
- The sleeve holds the laptop without sagging.
- The corners are not strained.
- The button loops stay closed.
- The fabric feels dense enough for light everyday protection.
This is a crochet sleeve, not a hard protective case. It can help reduce light scratches and minor friction inside a bag, but it is not a shockproof laptop case.
Pattern Notes or Stitch Notes
Turning chain rules
This sleeve is worked in rounds, not flat rows.
After the foundation chain and base round, you do not turn the work.
The final top edging is slip stitched around the opening.
Stitch count
Your exact stitch count depends on your starting chain.
For the sample:
- Starting chain: 40
- First side: 39 sc
- End shaping: 2 sc
- Opposite side: 39 sc
- Beginning-end shaping: 2 sc
- Approximate first-round total: 82 sts
After the first round, keep the same stitch count for every body round.
Repeat pattern
For the body texture:
- Round A: BLO sc, FLO sc; repeat around.
- Round B: FLO sc, BLO sc; repeat around.
Alternate these two starting positions each round.
Row and round notes
The sleeve body is built in continuous or near-continuous rounds.
Use a stitch marker to identify the first stitch.
Right side and wrong side
The textured side facing outward is the right side.
Weave ends and secure button-thread knots on the wrong side.
Size adjustment notes
To make the sleeve wider:
- Add more starting chains.
- Keep the foundation chain close to the laptop width.
- Check after the first round.
To make the sleeve taller:
- Add more body rounds before the final edging.
To make the sleeve shorter:
- Stop when the body reaches the top edge of your device.
For tablets or e-readers:
- Use fewer chains.
- Work fewer body rounds.
- Use one button loop instead of two if the opening is narrow.
Common Beginner Mistakes
1. Starting with the wrong chain length
Problem: The sleeve is too wide or too tight.
Fix: Measure the foundation chain against the actual laptop before continuing. Test again after the first few rounds.
2. Crocheting too loosely
Problem: The sleeve feels floppy and does not protect the laptop well.
Fix: Use a smaller hook or firmer tension. A laptop sleeve should have a dense fabric.
3. Losing the first stitch of the round
Problem: The sleeve leans, twists, or changes size.
Fix: Use a locking stitch marker in the first stitch of every round and move it as you go.
4. Forgetting the BLO/FLO alternation
Problem: The texture becomes uneven or changes randomly.
Fix: Mark the start of each round and remember whether the round begins with BLO or FLO.
5. Adding too many stitches at the base ends
Problem: The bottom edge becomes wavy.
Fix: Use only enough end stitches to turn the corner smoothly. If the base waves badly, pull back and reduce the end increases.
6. Making button loops too large
Problem: The sleeve opens too easily.
Fix: Test the loop around the button before finishing. Remove chains if the loop slips off.
7. Sewing through both sleeve layers
Problem: The laptop cannot slide in properly.
Fix: Put cardboard inside the sleeve while sewing buttons so you only attach them to the front layer.
How to Customize This Crochet Project
Yarn changes
Bulky acrylic makes the sleeve soft and slightly stretchy.
Bulky cotton gives a firmer, more structured sleeve.
Cotton-acrylic blends can balance structure and flexibility.
Avoid slippery novelty yarns for your first version because they make stitch counting harder.
Color changes
Try these laptop sleeve color palettes:
- Sage green with cream edging.
- Charcoal gray with tan buttons.
- Oatmeal with black buttons.
- Dusty rose with ivory loops.
- Navy with brass-colored buttons.
- Terracotta with cream edging.
- School colors for students.
- Neutral beige for office use.
Size changes
For a 15-inch laptop, increase the foundation chain and work more height rounds.
For a tablet, reduce the foundation chain and use one button closure.
For a crochet hook case, make the sleeve narrower and taller.
For a book sleeve, add a slightly looser fit so the book cover slides in easily.
Border options
The simplest border is a slip-stitch edging.
Other options include:
- One round of single crochet.
- Reverse single crochet for a corded edge.
- A contrast-color slip-stitch round.
- A button-loop round with one large central loop.
- Three smaller button loops for a wider laptop.
Texture options
Once you understand the basic construction, try:
- Plain single crochet.
- Waistcoat stitch.
- Moss stitch.
- Half double crochet.
- Thermal stitch.
- Alternating color stripes.
For beginners, the mixed-loop single crochet texture is a strong middle ground because it looks decorative without requiring complicated stitch combinations.
Gift ideas or use cases
This crochet laptop sleeve can be made for:
- Students
- Teachers
- Remote workers
- Digital artists
- College graduates
- Office gifts
- Back-to-school gifts
- Crochet market inventory
- Handmade holiday gifts
Add a matching crochet pencil pouch, tablet sleeve, or cord organizer to make a complete handmade tech-accessory set.
Finishing Instructions
Fastening off
After the final slip-stitch edging round, cut the yarn with a long tail.
Pull the tail through the last loop.
Use a tapestry needle to imitate a clean finishing stitch if desired, or simply weave the tail securely into the wrong side.
Weaving in ends
Weave each tail through several stitches, change direction, then weave back through another section.
Trim only after the tail is secure.
Blocking
Heavy blocking is usually unnecessary for bulky laptop sleeves.
If the sleeve looks uneven, lightly steam-shape it without flattening the texture too aggressively.
Do not apply high heat directly to acrylic yarn.
Shaping
Insert the laptop and gently shape the sleeve around it.
Remove the laptop before storing the sleeve long-term.
Washing and care
Follow the care instructions on your yarn label.
If you use wooden buttons, avoid soaking them for long periods.
Lay the sleeve flat to dry so it keeps its shape.
Quick Printable-Style Summary
Project: Crochet laptop sleeve with button loops
Skill level: Beginner to Easy
Yarn: Bulky #5 acrylic, cotton, or cotton blend
Hook: 6 mm / J-10
Closure: Two crochet button loops and two wooden buttons
Main stitches: Chain, single crochet, slip stitch, BLO single crochet, FLO single crochet
Starting method: Foundation chain measured to laptop width
Sample foundation chain: Ch 40 for a slim 13-inch laptop, adjust as needed
Base: Single crochet along one side of the chain, work extra stitches at the end, single crochet along the opposite side, work extra stitches at the beginning end
Body repeat: Alternate BLO sc and FLO sc in rounds
Height: Work until sleeve reaches laptop height
Finishing: Add slip-stitch top edge, crochet button loops, sew buttons, weave in ends
FAQ
Is a crochet laptop sleeve a good beginner project?
Yes, if you already know how to chain and single crochet. This pattern is beginner-friendly because it uses simple stitches and avoids zipper installation. The main skills are measuring, counting, working around a foundation chain, and keeping rounds even.
What yarn is best for a crochet laptop sleeve?
Bulky acrylic, bulky cotton, or a cotton-acrylic blend works well. The fabric should feel dense, slightly cushioned, and not too stretchy. The Craft Yarn Council’s yarn-weight system is useful for identifying yarn categories such as bulky #5.
Can I make this crochet laptop sleeve for any laptop size?
Yes. Measure your laptop width, make the foundation chain close to that width, then work the body rounds until the sleeve reaches the laptop height.
Should the laptop sleeve be tight or loose?
It should be snug, not tight. The laptop should slide in without force, but the sleeve should not be so loose that the laptop slips out easily.
Can I add a zipper instead of buttons?
Yes, but a zipper requires sewing and more precise alignment. For beginners, crochet button loops are easier and more forgiving.
Can I line a crochet laptop sleeve?
Yes. A fleece or cotton lining can add extra structure and reduce stretching. However, this tutorial keeps the construction simple and unlined.
Will a crochet sleeve protect my laptop from drops?
No. A crochet sleeve can help protect against light scratches and minor friction inside a bag, but it is not a hard case or shockproof cover.
Conclusion
This easy crochet laptop sleeve pattern is practical, adjustable, and satisfying for beginners who want to make something useful. The most important part is sizing: measure your laptop first, match the foundation chain carefully, and test the fit after the first few rounds.
Once the base fits correctly, the rest of the sleeve becomes a relaxing repeat of mixed-loop single crochet. The alternating BLO and FLO texture gives the project a polished look without making the pattern too complicated.
Make the first sleeve in one solid color if you want the easiest version. Then try a second one with contrast edging, stripes, wooden buttons, school colors, or a matching crochet pencil pouch.





