
A favorite journal deserves a little handmade detail, especially when it travels everywhere with you. Whether you use your notebook for daily planning, gratitude journaling, sketching, or collecting creative ideas, a crochet journal strap is a practical way to keep its covers neatly together.
This easy crochet journal strap pattern is a small project that uses basic stitches and only a little yarn. You don’t need to make a full notebook cover, learn complicated shaping, or work with multiple colors. Instead, you’ll crochet one long, narrow strip, add a simple button-loop closure, and fit it around your journal.
The finished strap looks especially pretty on a linen-covered notebook, a leather-look planner, or a simple hardcover journal. It can also be removed whenever you want to change your journal’s appearance.
If you’re new to crochet, this is a good project for practicing neat rows and consistent tension. Because the strap is only five stitches wide, you can concentrate on making each stitch correctly without having to keep track of a complicated pattern.
In this step-by-step tutorial, I’ll show you how to measure your journal, crochet the strap, adjust its length, make a button loop, and finish everything neatly.
The best part? Once you understand the basic construction, you can make matching straps for planners, sketchbooks, notebooks, and handmade gifts.
What You’ll Learn
By the end of this tutorial, you’ll know how to:
- Measure a journal for a custom crochet closure.
- Make a narrow foundation chain without twisting it.
- Work single crochet rows with straight edges.
- Recognize the first and last stitches in each row.
- Adjust the strap length while crocheting.
- Create a small crocheted button loop.
- Sew on a button securely.
- Weave in yarn ends for a tidy finish.
- Customize the strap for different journal sizes.
This pattern is worked flat, so you won’t need to join rounds or use complicated stitch combinations.
Materials You’ll Need
Yarn: Approximately 15–25 yards (14–23 meters) of smooth DK-weight cotton yarn for most journal sizes. The exact amount depends on your gauge and strap length.
Cotton is a useful choice because it has good stitch definition and tends to hold its shape better than very stretchy yarn. A cotton-acrylic blend can also work, although the finished strap may have a little more give.
Crochet hook: 4.0 mm (G/6 US), or a size that produces a firm but flexible fabric.
Button: One flat wooden, resin, or plastic button approximately 15 mm across. A smooth, low-profile button is less likely to catch on other objects.
Other tools: Scissors, a blunt yarn needle, measuring tape, and two optional stitch markers.
Journal: A hardcover notebook or planner. This example uses an A5 journal, approximately 21 × 14.8 cm, although the pattern can be adapted to other sizes.
You do not need elastic, a sewing machine, or any special crochet accessories.
Choosing the best yarn
For a journal strap, yarn texture matters more than softness. A very fluffy yarn may look attractive, but it makes small stitches harder to see and can create a bulky closure.
Smooth cotton in a solid color is the easiest option for beginners. Sage green, dusty blue, cream, terracotta, and muted lavender all work beautifully with neutral-colored journals.
Avoid very loosely spun yarn if you plan to open and close the strap frequently. A tightly twisted cotton yarn will generally withstand repeated handling better.
Crochet Abbreviations Used
This pattern uses US crochet terminology.
| Abbreviation | Meaning |
|---|---|
| ch | Chain |
| sc | Single crochet |
| sl st | Slip stitch |
| st | Stitch |
| sts | Stitches |
| rep | Repeat |
| RS | Right side |
| WS | Wrong side |
US/UK note: US single crochet (sc) is called double crochet (dc) in UK terminology. The stitch itself is identical.
How to make a single crochet
Insert your hook into the indicated stitch. Wrap the yarn over the hook and pull up a loop. You should now have two loops on your hook.
Wrap the yarn over the hook again and pull it through both loops.
That’s one single crochet stitch.
Single crochet creates a relatively dense fabric, making it suitable for a narrow strap that needs to hold its shape.
Before You Start
Measure your journal correctly
Before crocheting, close your journal and make sure any loose papers or inserts are inside.
Wrap a flexible measuring tape around the journal in the direction you want the strap to sit. For this project, the band will run vertically around the journal, crossing the front and back covers and passing over the top and bottom edges.
Measure the complete distance around the closed journal. Don’t pull the tape tightly, because the strap should hold the covers closed without bending them.
For example, your journal might measure 44 cm around its closed circumference. This is only an illustration; your own journal measurement is the one that matters.
The button loop will bridge a small gap between the two ends of the crocheted strip. Therefore, you will generally crochet the body slightly shorter than the full circumference and use the loop to complete the closure.
The exact difference depends on your button, loop size, and fabric tension, so plan to test the fit rather than relying on a fixed subtraction.
Understand crochet gauge
Gauge describes the number of stitches and rows in a measured area.
For this pattern, the exact gauge is not critical because the length is adjustable. However, your stitches should be consistent.
As a starting point, a five-stitch-wide strip made with DK cotton and a 4.0 mm hook may measure approximately 1.5–2 cm across.
If your strap is much wider than you want, use a smaller hook or thinner yarn. If it is very stiff, try a slightly larger hook.
Keep your edges straight
One of the most common beginner problems is accidentally increasing or decreasing the stitch count.
This happens when the first or last stitch is missed, or when the turning chain is mistaken for a regular stitch.
For this pattern, every row contains five single crochet stitches.
The turning chain does not count as a stitch.
Count your stitches after each row until you become comfortable recognizing the edges.
Decide which side is the front
The finished strap will show alternating rows of single crochet. Both faces are suitable for display.
For a consistent finish, choose the side you prefer before attaching the button. The button should be sewn to the outward-facing side of the strap.
Step-by-Step Crochet Journal Strap Tutorial
Step 1: Prepare your yarn and measurements
Place your journal on a flat surface and write down its circumference.
Choose your yarn and crochet hook. Make sure the yarn moves smoothly across the hook without splitting.
Pull out a little yarn from the ball so you have enough slack to begin comfortably.
You can make a tiny practice swatch first if you have never worked single crochet. Even a few rows will help you understand how your chosen yarn behaves.
For the example project, we’re using dusty sage green DK cotton yarn with a 4.0 mm hook.
Beginner tip: Keep your measuring tape nearby. You’ll use it several times while checking the strap length.
Common mistake to avoid: Don’t assume that all A5 journals have the same circumference. Cover thickness and the number of pages can change the required strap length.

Step 2: Make the foundation chain
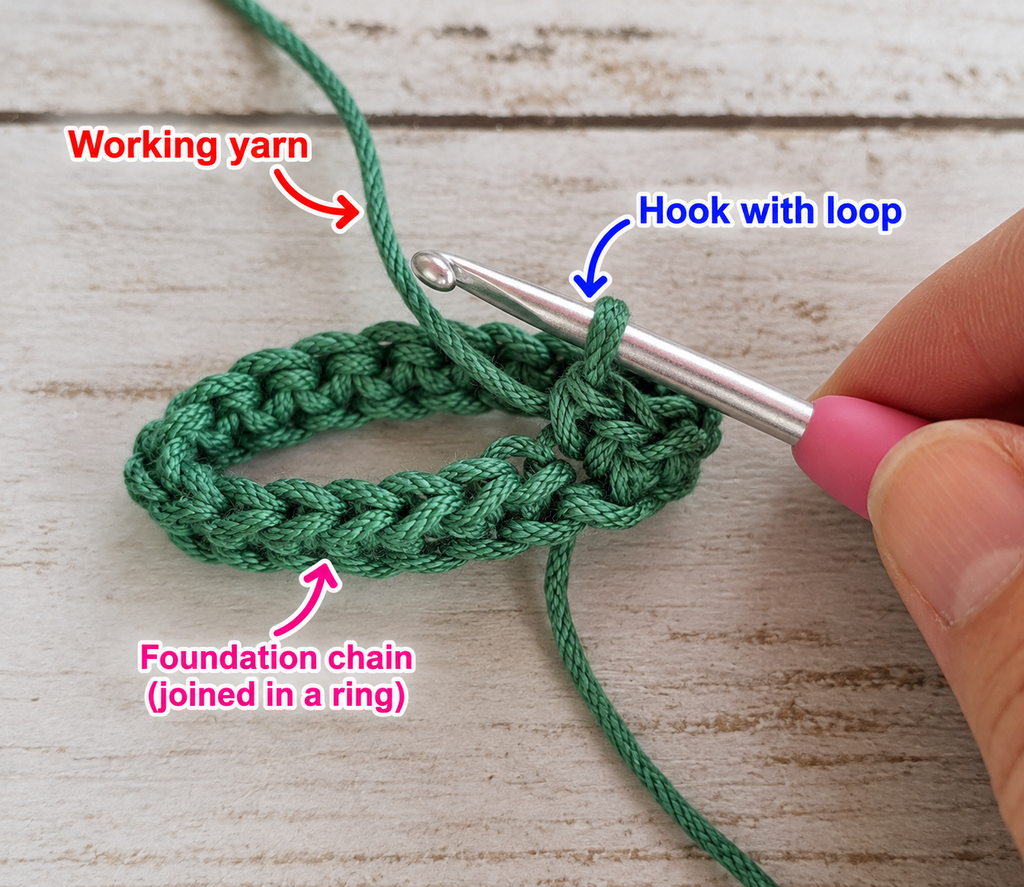
Begin by making a slip knot.
Place the loop on your hook and tighten it gently. The loop should move smoothly along the hook without being loose enough to fall off.
Now make six chain stitches.
To create a chain, wrap the working yarn over your hook and pull it through the loop already on the hook.
Repeat until you have six chains.
Your foundation should look like a short, flexible braid.
Count the chain stitches carefully. The loop currently on your hook does not count as a chain.
Foundation: Ch 6.
The first five working positions will form the width of the strap, while the extra chain allows you to begin the first row.
Beginner tip: If your chains are very tight, make the foundation with a slightly larger hook, then switch back to your 4.0 mm hook for the first row.
Common mistake to avoid: Don’t count the slip knot as a chain stitch.
Step 3: Crochet the first row
Look at your foundation chain and locate the second chain from the hook.
Insert your hook into this chain.
Yarn over and pull up a loop. You should have two loops on the hook.
Yarn over again and pull through both loops.
You’ve completed your first single crochet.
Continue working one single crochet into each remaining chain.
When you reach the end, count your stitches.
You should have exactly five single crochet stitches.
Row 1: Sc in 2nd ch from hook and in each ch across. (5 sc)
This first row establishes the width of your journal strap.
Take a moment to look at the top of your stitches. Each single crochet has a small V-shaped top formed by two loops.
Those are the loops you’ll work into on the following rows.
Beginner tip: If you find it difficult to insert the hook into a chain, turn the foundation slightly toward you so you can see the individual loops.
Common mistake to avoid: Don’t insert the hook into the same chain twice. Doing so will increase the stitch count.
Step 4: Turn your work and crochet Row 2
Now you’ll begin building the strap length.
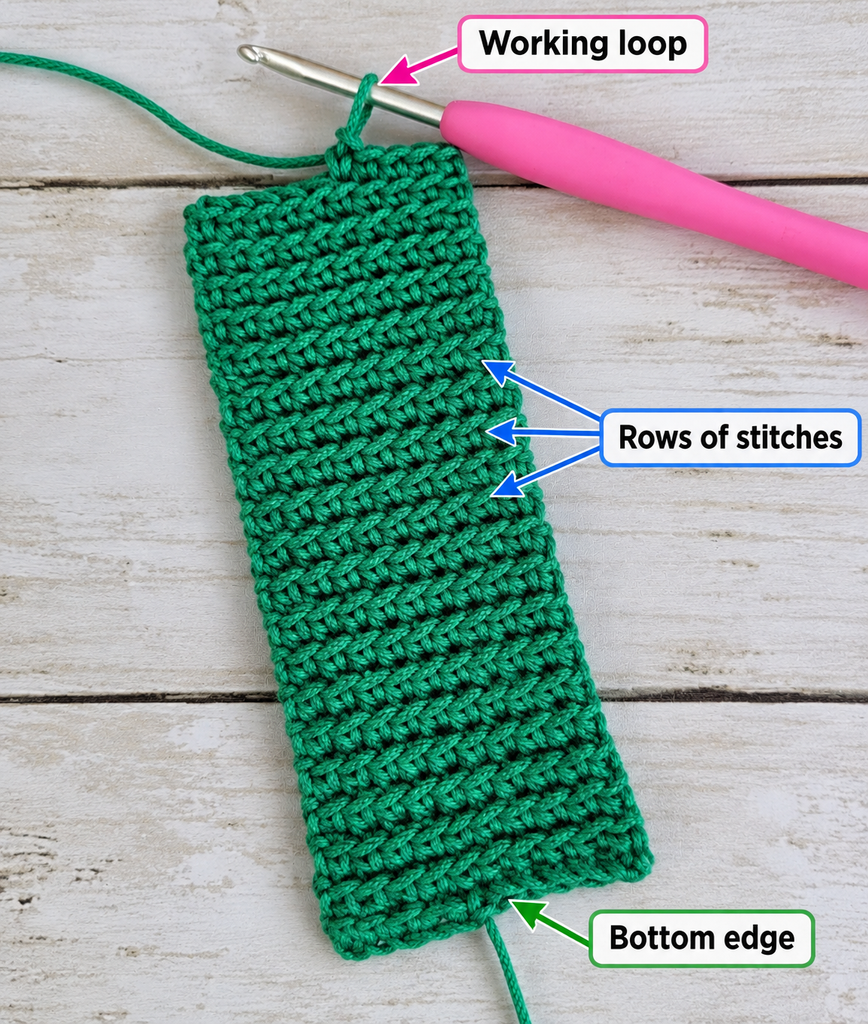
Chain one.
Turn your crochet work so that you can stitch back across the row you just completed.
Find the first single crochet stitch. Insert your hook under both loops at the top of that stitch.
Make one single crochet.
Continue working one single crochet into each stitch across.
At the end, you should still have five stitches.
Row 2: Ch 1, turn, sc in each st across. (5 sc)
The turning chain provides a little height so you can begin the next row comfortably.
It does not count as one of your five stitches.
Beginner tip: Place a stitch marker in the first stitch of a row if you find it difficult to recognize the edge.
Common mistake to avoid: Don’t work into the turning chain at the end of the previous row. Doing so can create an unwanted sixth stitch.
Step 5: Repeat the single crochet rows
Once you have completed the second row, the rest of the strap follows the same simple pattern.
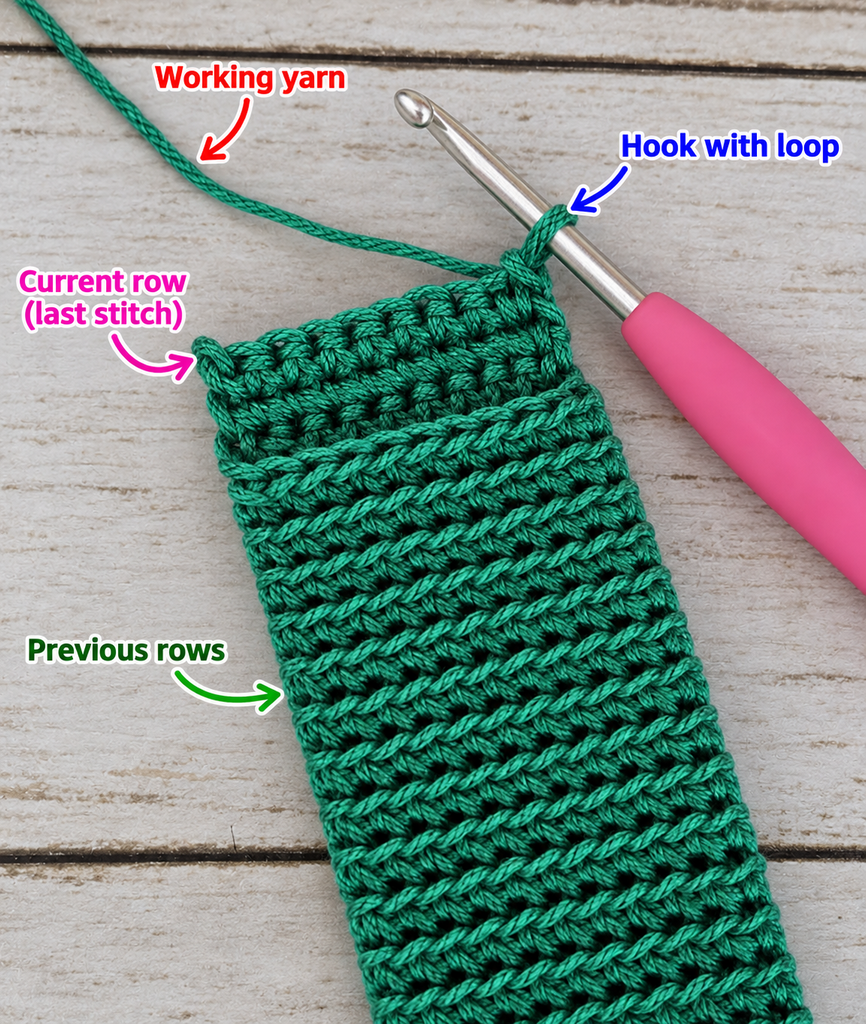
Row 3 and onward: Ch 1, turn, sc in each st across. (5 sc)
Repeat this row until the strap approaches the length you need.
As you crochet, pay attention to the tension of your yarn.
If you pull the yarn too tightly after every stitch, the fabric may become stiff and narrow. If your stitches are very loose, the strap may stretch more than expected.
Aim for stitches that are firm, evenly spaced, and comfortable to work.
After several rows, your fabric should begin to look like a narrow rectangular ribbon.
You may notice a subtle horizontal texture across the surface. This is normal for single crochet worked in turned rows.
Beginner tip: Stop every five or ten rows to count your stitches and check the width.
Common mistake to avoid: If the edges start becoming uneven, count the stitches immediately. It’s easier to undo two incorrect rows than twenty.
Step 6: Continue until the strap reaches the desired length
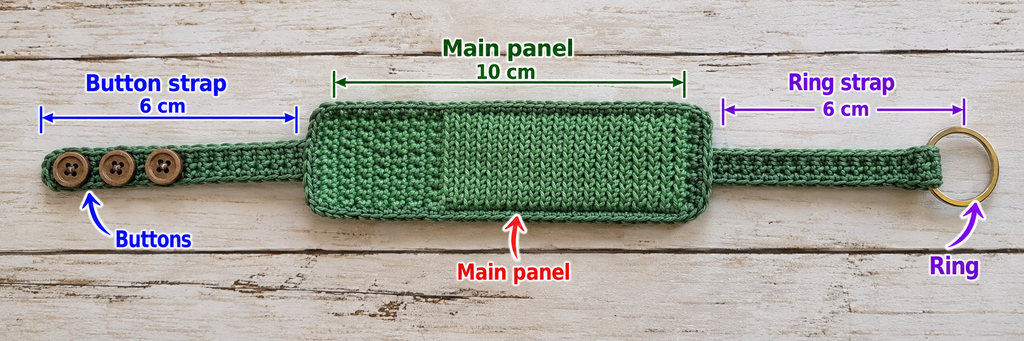
Continue repeating the single crochet row until your strap is long enough to begin checking against the journal.
There’s no fixed row count for this design.
That’s intentional.
A strap for a small pocket notebook will need fewer rows than one for a thick hardcover planner.
Rather than counting toward an arbitrary number, use your actual journal as a guide.
Lay the strip flat occasionally and gently smooth it with your fingers. Don’t stretch it while measuring.
If the edges look straight and the width remains consistent, you’re on the right track.
When your strap is within several centimeters of the length you expect to need, stop crocheting and move to the fitting step.
Do not fasten off yet.
Beginner tip: If your yarn has a slight tendency to twist, let the working yarn hang freely for a moment so the twist can relax.
Common mistake to avoid: Don’t pull the strip lengthwise to make it reach the journal. A stretched strap may tighten too much around the cover.
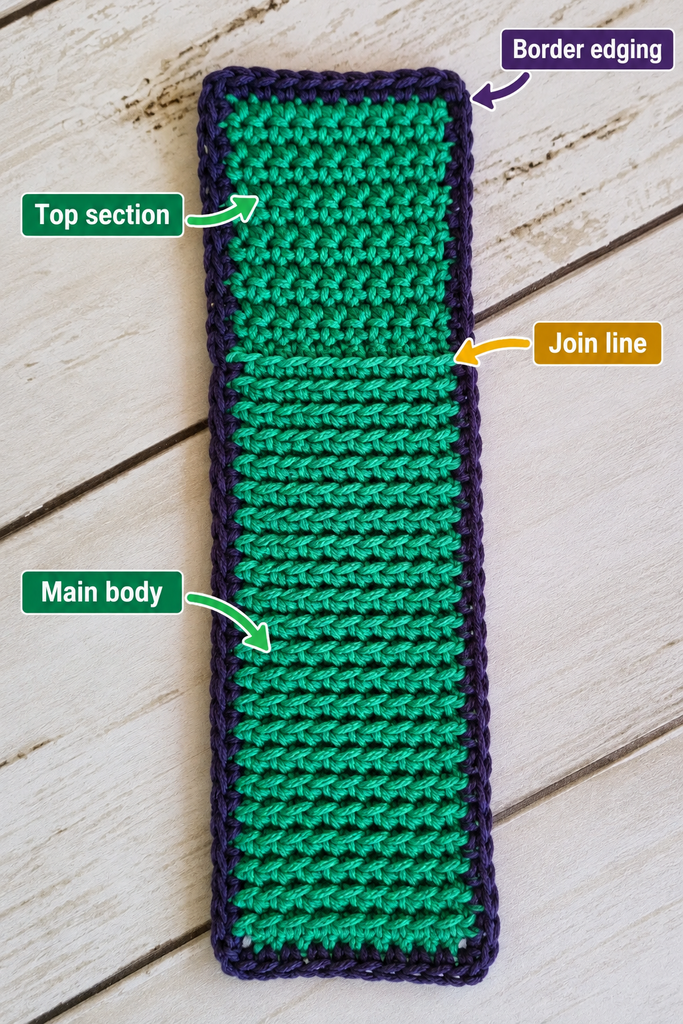
Step 7: Test the strap around your journal
This is one of the most important steps in the entire project.
Close your journal and wrap the crocheted strip around it.
Position the strap where you want it to sit. For a classic notebook closure, the band usually looks best centered across the front cover.
Bring the two ends toward each other.
Remember that you’ll add a small chain loop to one end and a button to the other.
The strip itself should therefore stop slightly short of making a complete circle. The loop will bridge the remaining distance and fasten over the button.
To estimate the correct fit, place your button at the opposite end and imagine the loop stretching just far enough to reach it.
If the gap is too large, crochet several more rows.
If the strap overlaps excessively, undo a few rows.
The goal is a comfortable fit that keeps the journal closed without pressing into the cover or bending the pages.
Once you’re happy with the approximate length, note which side of the strip will face outward.
Beginner tip: Test the fit with the journal filled as you normally use it. A nearly empty notebook may be thinner than one containing cards, notes, or inserts.
Common mistake to avoid: Don’t make the strap extremely tight. Cotton can relax with use, but an overly tight band may damage a delicate journal cover.
Step 8: Crochet the button loop
Now it’s time to turn your narrow crochet strip into a functional closure.
The button loop is made from a short chain attached to one end of the strap.
First, make sure you’re at the end of a completed row.
Chain one and turn your work so you’re positioned to work across the short end.
Single crochet into the first two stitches, then make one single crochet into the third stitch.
From this center stitch, chain approximately six stitches as an initial loop size.
Bring the end of the chain back toward the same center stitch and secure it with a slip stitch.
This creates a small loop that projects from the end of the strap.
Check whether your chosen button can pass through the loop.
If the opening is too small, undo the loop and add another chain or two. If the loop is too large, remake it with fewer chains.
Once the loop fits your button, work one single crochet into each of the remaining two stitches across the end, then fasten off.
Your loop should be centered and secure.
Beginner tip: A button loop should fit over the button with a little resistance, but it should not need to be stretched forcefully.
Common mistake to avoid: Don’t make a large, loose loop. The journal may open accidentally if the button slips out too easily.
Step 9: Sew on the button
Thread your yarn needle with a short length of matching cotton yarn.
Place the button near the center of the opposite short end of the strap.
Before sewing, wrap the strap around your journal again and check where the button needs to sit.
Move the button slightly inward or outward until the closure feels comfortable.
Once you’ve found the correct position, hold the button in place.
Pass the needle through the crocheted fabric and through one of the buttonholes.
Continue sewing through the holes several times, making sure the stitches pass through solid crochet fabric.
Avoid placing the button too close to the very edge, where the yarn may pull out of shape.
When the button is secure, weave the sewing yarn through the reverse side of the strap.
For a four-hole button, use a balanced arrangement of stitches through all four holes.
Beginner tip: A flat button with smooth edges is ideal for a journal that will be placed inside a bag.
Common mistake to avoid: Don’t attach the button using only one loose pass of yarn. Repeated opening and closing can weaken an insecure attachment.
Step 10: Check the completed closure
Before trimming any remaining yarn tails, wrap the strap around your journal one more time.
Bring the chain loop over the button and gently fasten it.
Look at the journal from the front, back, and side.
The strap should lie relatively flat against the cover.
If the closure is too tight, you can move the button slightly closer to the end of the strip or remake the loop a little longer.
If it’s too loose, move the button farther inward or shorten the loop.
A good fit should keep the journal closed while still allowing you to unfasten it easily with your fingers.
Open and close the strap several times to test the construction.
If the button pulls the crochet fabric into a sharp point, the closure may be too tight or the button may need more support.
If the strap slips freely off the journal, shorten the effective circumference.
Beginner tip: Test the strap in the direction you plan to use it. A band that fits vertically may not fit horizontally around the same journal.
Common mistake to avoid: Don’t trim all the yarn tails until you’re satisfied with the fit.
Pattern Notes and Stitch Notes
This journal strap is deliberately simple, but a few technical details make the finished project more reliable.
Turning chain rules
The chain-one turning stitch never counts as a regular stitch.
Every body row should contain five single crochet stitches.
This means your row count remains consistent from beginning to end.
Stitch count
The foundation begins with six chains.
The first row contains five single crochet stitches.
Every following body row also contains five single crochet stitches.
The button-loop section is worked separately after the body reaches the correct length.
Repeat pattern
The main repeat is:
Ch 1, turn, sc in each st across. (5 sc)
Repeat until the strap fits your journal, allowing for the button-loop closure.
Right side and wrong side
Because this pattern uses turned single crochet rows, the fabric has two slightly different faces.
Neither side is structurally required to face outward.
Choose whichever appearance you prefer, then attach the button on that side.
Size adjustments
To make a wider strap, begin with more chains.
For example, a foundation of eight chains creates seven working stitches.
To make a narrower strap, use fewer chains, but avoid making it so narrow that the button has insufficient fabric to attach securely.
For length adjustments, simply add or remove rows.
Yarn substitution
If you substitute a thicker yarn, the strap will usually become wider and bulkier.
You may need fewer foundation stitches or a different hook size.
Always make a short test section before committing to the full project.
Common Beginner Mistakes and How to Fix Them
1. The strap becomes wider as you crochet
This usually happens when an extra stitch is accidentally added at the edge.
Check whether you’re crocheting into the turning chain.
Fix: Count five stitches at the end of every row. Undo the incorrect row and work it again.
2. The strap becomes narrower
If the width decreases, you may be skipping the final stitch of a row.
The last stitch can be difficult to recognize because it sits close to the edge.
Fix: Use stitch markers to identify the first and last stitches.
3. The foundation chain is too tight
A tight foundation can make the starting end narrower than the rest of the strap.
Fix: Remake the foundation using a slightly larger hook, then switch to your regular hook.
4. The crochet strip curls or twists
A small amount of curling can happen with narrow crochet strips, especially when the tension is uneven.
Fix: Relax your tension, check the stitch count, and gently smooth the fabric. Light blocking may help after finishing.
5. The button loop is too loose
An oversized loop can slip off the button while the journal is inside a bag.
Fix: Undo the loop and remake it with fewer chains, or use a slightly larger button if appropriate.
6. The button pulls through the fabric
This can happen if the button is attached near an open edge or with too few sewing passes.
Fix: Move the button inward and secure it through several firm stitches. If needed, reinforce the back with a small piece of sturdy fabric.
7. The strap stretches after use
Some yarns stretch more than others, particularly if the crochet tension is loose.
Fix: Use firmer tension or a smaller hook for future straps. For the current project, reposition the button to improve the fit.
8. The closure feels bulky
A thick button or oversized yarn can create an uncomfortable bump on the front cover.
Fix: Choose a flat button and smooth DK-weight yarn. Avoid attaching bulky decorations directly beneath the closure.
How to Customize This Crochet Project
One of the nicest things about this journal strap pattern is how easily it can be personalized.
Try different yarn colors
For a minimal, natural look, choose cream, oatmeal, sage green, or soft gray.
For something brighter, try mustard yellow, coral, teal, or lavender.
You can even match the yarn to the color of your journal cover.
Add simple stripes
If you want a striped strap, change yarn colors every few rows.
A combination of sage green and ivory creates a gentle, handmade look.
For a bolder accessory, alternate two contrasting colors.
When changing colors, complete the final pull-through of the last stitch using the new yarn. This creates a cleaner transition at the edge.
Weave in all color-change tails carefully.
Make the strap wider
A wider band can look attractive on a large sketchbook or thick planner.
Instead of five single crochet stitches, try seven or nine stitches across.
Remember that a wider band may need a larger button or additional reinforcement at the closure.
Add a decorative border
If you want a more finished appearance, add a simple slip stitch border along the long edges.
Work the border loosely so it doesn’t pull the strap inward.
A contrasting cream border can look especially pretty against dusty sage green cotton.
For a beginner, however, the plain single crochet version is perfectly suitable.
Experiment with texture
Once you’re comfortable with the basic design, try a different stitch texture.
Half double crochet creates a slightly taller stitch and can make the strap faster to complete, although it may also make the fabric more flexible.
Working into the back loop only creates visible ridges, but the resulting stretch may change the fit.
If you experiment with texture, test the finished length before attaching the button.
Add a small embroidered initial
A single embroidered letter can turn the strap into a personalized gift.
Use a blunt needle and contrasting yarn to stitch a small initial near one end.
Keep the embroidery flat so it doesn’t interfere with the closure.
Make a matching gift set
A handmade journal strap pairs beautifully with a small crochet bookmark, a pen sleeve, or a coordinating notebook cover.
You could create a gift set for a teacher, student, writer, planner enthusiast, or someone who enjoys journaling.
For seasonal gifts, choose colors that match the occasion.
Soft pink and cream work nicely for spring, while rust, olive, and mustard create a warm autumn palette.
Finishing Instructions
Once you’re happy with the fit and the button is securely attached, it’s time to finish the project.
Fasten off
After completing the final crochet stitch, cut the working yarn, leaving a tail approximately 10–15 cm long.
Pull the tail through the final loop and tighten gently.
Avoid pulling so hard that the edge becomes distorted.
Weave in the yarn ends
Thread the tail through a blunt yarn needle.
Turn the strap over and pass the needle through several stitches on the reverse side.
Change direction and weave back through another short section to help secure the yarn.
Avoid creating a large knot, which may make the strap uncomfortable against the journal.
Repeat for all remaining yarn ends.
Trim the tails close to the fabric only after they are securely woven in.
Block the strap if necessary
If the edges are slightly uneven, you can gently shape the strap.
Lightly dampen the crochet fabric with water, smooth it flat, and arrange the edges so they are straight.
Allow the strap to dry completely before putting it around your journal.
Don’t overstretch the fabric while blocking, because this can change the fit.
If your yarn has special care requirements, follow the manufacturer’s instructions.
Washing and care
For a cotton strap, gentle handwashing is usually a suitable option, provided the yarn label allows it.
Use cool or lukewarm water and a small amount of mild detergent.
Avoid aggressive twisting or wringing.
Press out excess water with a towel and lay the strap flat to dry.
Remove the strap from your journal before washing it. Never wet a paper journal or leather cover while cleaning the crochet accessory.
If you’ve used a wooden button, avoid prolonged soaking, as moisture may affect its finish.
Final check
Before using the strap regularly, inspect the button, chain loop, and yarn ends.
Make sure there are no loose threads or weak attachment points.
The strap is intended to keep a journal closed. It is not designed to carry the journal by itself.
Frequently Asked Questions
1. Is a crochet journal strap suitable for beginners?
Yes. This pattern uses chain stitches, single crochet, and a slip stitch. The body is a simple rectangle with the same stitch count on every row, so there is no complicated shaping.
The most important beginner skills are maintaining even tension and counting stitches correctly.
2. How long should a crochet journal strap be?
The length depends on the journal’s size and thickness.
Measure around the closed journal in the direction the strap will wrap. Crochet the strip slightly shorter than that measurement, leaving enough space for the button loop to bridge the gap.
Always test the fit before fastening off.
3. What yarn is best for a crochet notebook strap?
Smooth cotton yarn is an excellent option because it produces visible stitches and a relatively stable fabric.
DK-weight cotton is particularly useful for a narrow strap that should remain flexible without becoming bulky.
A cotton-acrylic blend can also work, but it may stretch differently.
4. Can I make a crochet journal strap without a button?
Yes. You could make a longer strip and tie the ends into a small bow.
Another option is to sew the ends together to form a continuous band, although the finished circumference must be carefully measured and the band may be less convenient to remove.
If you want an elasticated closure, you can also explore adding elastic, but that requires a different construction approach.
5. How do I stop the strap from stretching?
Use smooth, firm yarn and maintain consistent tension.
A slightly smaller hook can produce a denser fabric, but avoid making the strap so stiff that it becomes difficult to fasten.
A secure button attachment and properly fitted loop also help the closure stay in place.
6. Can I use this pattern for a planner or sketchbook?
Absolutely.
The construction works for many rectangular books and notebooks, provided the strap is measured to fit.
For a larger planner, you may want to make the band wider to create a more balanced appearance.
For a small pocket journal, a narrow band is usually sufficient.
7. Can I sell crochet journal straps made with this pattern?
This is an original pattern provided here for personal use and making finished items. You may sell physical straps you make from these instructions, subject to any applicable local requirements.
Use your own product photographs and descriptions. Do not reuse reference photographs from other designers without permission.
Conclusion
A crochet journal strap is a small project, but it teaches several useful skills that you’ll use again in larger crochet projects.
You’ll practice making a foundation chain, working straight rows, controlling tension, adjusting measurements, and finishing a handmade accessory with a functional closure.
Once you’ve made your first strap, try experimenting with different yarn colors, button styles, and widths. You might find yourself making a matching band for every notebook on your desk.
And if you enjoy practical crochet accessories, a simple bookmark or crochet pen holder would be a lovely next project.
Save this crochet journal strap pattern to your Pinterest crochet board so you can find it again whenever you need a quick handmade gift or a simple weekend project.





