A tiny cheerleader with a fluffy pair of pom-poms, colorful sneakers and a handmade uniform is the kind of crochet project that instantly brings personality to your craft table.
This easy crochet cheerleader doll pattern is a fun way to practice amigurumi while making something special for a sports-loving friend, a cheer team member or a handmade gift collection.
The best part? You don’t need complicated stitches or advanced doll-making skills. Most of this project uses simple single crochet stitches, gentle increases and decreases, and a little sewing at the end.
We will make the shoes and legs first, connect them into one body, crochet a separate rounded head, add the hair, and finish with a skirt and two miniature pom-poms.
The original design in this tutorial features a dusty rose and ivory cheerleading uniform, but you can easily switch those colors to match a school, sports team or favorite combination.
This tutorial includes written round instructions, beginner explanations, stitch counts and planned step-by-step photographs so you can follow the construction from the first stitch to the finished doll.
What You’ll Learn
By completing this crochet cheerleader doll, you will learn how to:
- Start small amigurumi pieces with a magic ring.
- Crochet shoes, socks and legs using continuous rounds.
- Join two crochet legs to create a seamless lower body.
- Shape a torso and rounded doll head.
- Make two small arms and attach them in a cheerleading pose.
- Crochet a simple flared uniform skirt.
- Embroider facial features and add a ponytail.
- Create and attach miniature yarn pom-poms.
- Stuff and assemble an amigurumi doll neatly.
You can use the same techniques later for other small sports dolls, ballerinas, school-themed dolls or handmade characters.
Materials You’ll Need
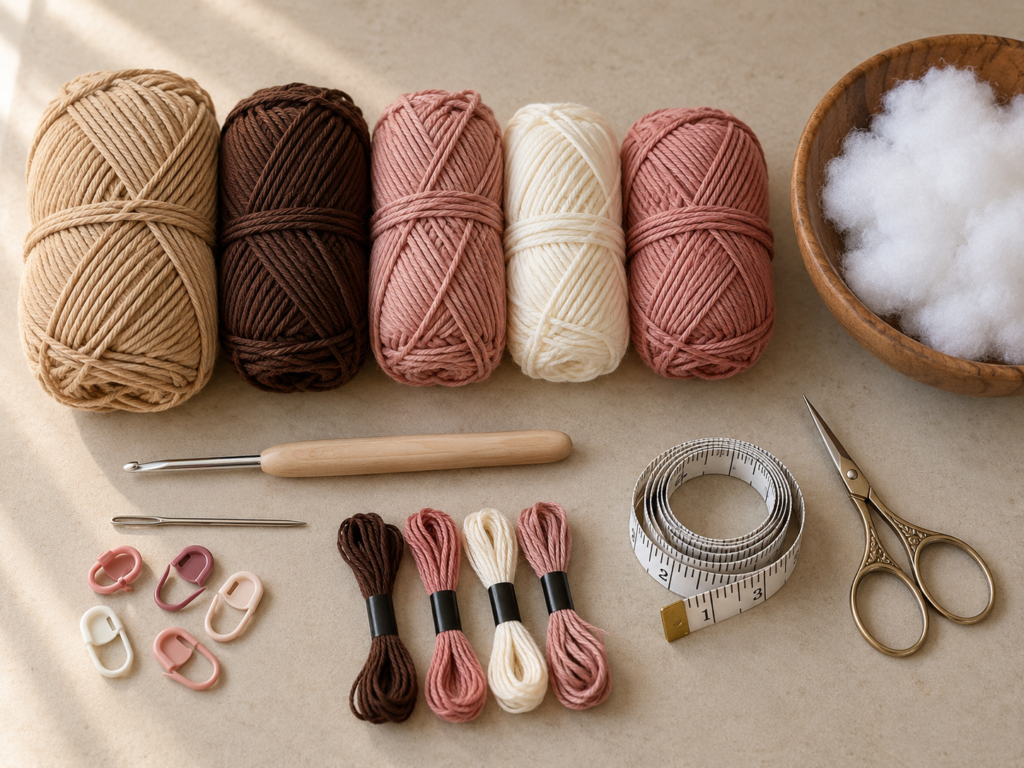
You won’t need a large amount of yarn for this project. Small leftover balls from other crochet projects are often enough, provided the yarn weights are similar.
| Material | Recommended amount or type |
|---|---|
| Skin-tone yarn | 35–45 g DK cotton |
| Dusty rose yarn | 20–30 g DK cotton |
| Ivory yarn | 15–20 g DK cotton |
| Dark brown yarn | 15–20 g DK cotton |
| Muted rose yarn | Small amount for shoes |
| Crochet hook | 2.75 mm |
| Fiberfill | Approximately 20–30 g |
| Yarn needle | Blunt tapestry needle |
| Stitch markers | 2–3 removable markers |
| Scissors | Small sharp craft scissors |
| Embroidery thread | Brown, pink and optional ivory |
| Measuring tape | Optional |
| Straight pins | For assembly, removed before completion |
Why choose cotton yarn? Cotton gives the small stitches good definition and produces a clean surface for sewing on the face and uniform details. A smooth cotton-acrylic blend also works well.
Avoid very fuzzy yarn for your first doll. Fuzzy fibers can hide the stitch loops, making it difficult to count increases or locate the correct places for attaching the arms.
Crochet Abbreviations Used
This crochet doll pattern uses US terminology.
| Abbreviation | Meaning |
|---|---|
| MR | Magic ring |
| ch | Chain |
| sc | Single crochet |
| hdc | Half double crochet |
| dc | Double crochet |
| sl st | Slip stitch |
| st / sts | Stitch / stitches |
| inc | Increase: 2 sc in one stitch |
| dec | Invisible decrease over 2 stitches |
| BLO | Back loop only |
| FLO | Front loop only |
| rep | Repeat |
| Rnd | Round |
| FO | Fasten off |
In UK terminology, a US single crochet is called a double crochet. Keep this distinction in mind when following the pattern.
Before You Start
Understanding amigurumi tension
Amigurumi is usually made with a smaller hook than the yarn label recommends. This creates a tight fabric that keeps fiberfill inside the doll.
Use the 2.75 mm hook as your starting point. If your stitches are so tight that the hook struggles to enter them, try 3.0 mm. If white stuffing shows between stitches, reduce the hook size slightly.
There is no strict gauge requirement for this toy because the body parts are made to fit one another. However, consistent tension matters. Changing hooks or yarn thickness halfway through could leave one leg larger than the other.
As a rough reference, a small 6-round single crochet circle with 36 stitches should measure approximately 5–6 cm across when flattened without stretching, although individual tension varies.
How to count your rounds
Most pieces are crocheted in continuous spirals, meaning you do not join every round with a slip stitch.
Place a stitch marker in the first stitch of each round, then move it up as you work.
For example, if a round says:
(4 sc, inc) × 6 (36)
You crochet four single crochet stitches, place an increase in the next stitch, and repeat this sequence six times. You should finish with 36 stitches.
The number in parentheses at the end of each round is your checkpoint.
Prepare the uniform colors
For a coordinated cheerleader doll, use one main uniform color and one contrasting accent.
In this tutorial:
- Dusty rose is the main team color.
- Ivory is the secondary uniform color.
- Muted rose is used for the shoes.
- Dark brown is used for the hair.
- Warm beige is used for skin.
Keep those colors beside you so you can check the correct yarn during each section.
Beginner safety note
This design uses embroidered eyes instead of plastic safety eyes. Embroidered facial details are preferable for dolls that might be handled by young children.
Secure every yarn tail, hair strand and pom-pom firmly. Avoid buttons, beads, wires, glued-on parts or other small detachable decorations. No handmade toy should be considered automatically suitable for an infant; construction and age suitability still require careful assessment.
Step-by-Step Crochet Cheerleader Doll Tutorial
We will construct the doll in manageable pieces. Finish each section before beginning the next, and keep any long sewing tails until assembly.
Step 1: Crochet the First Shoe
Begin with your muted rose shoe yarn.
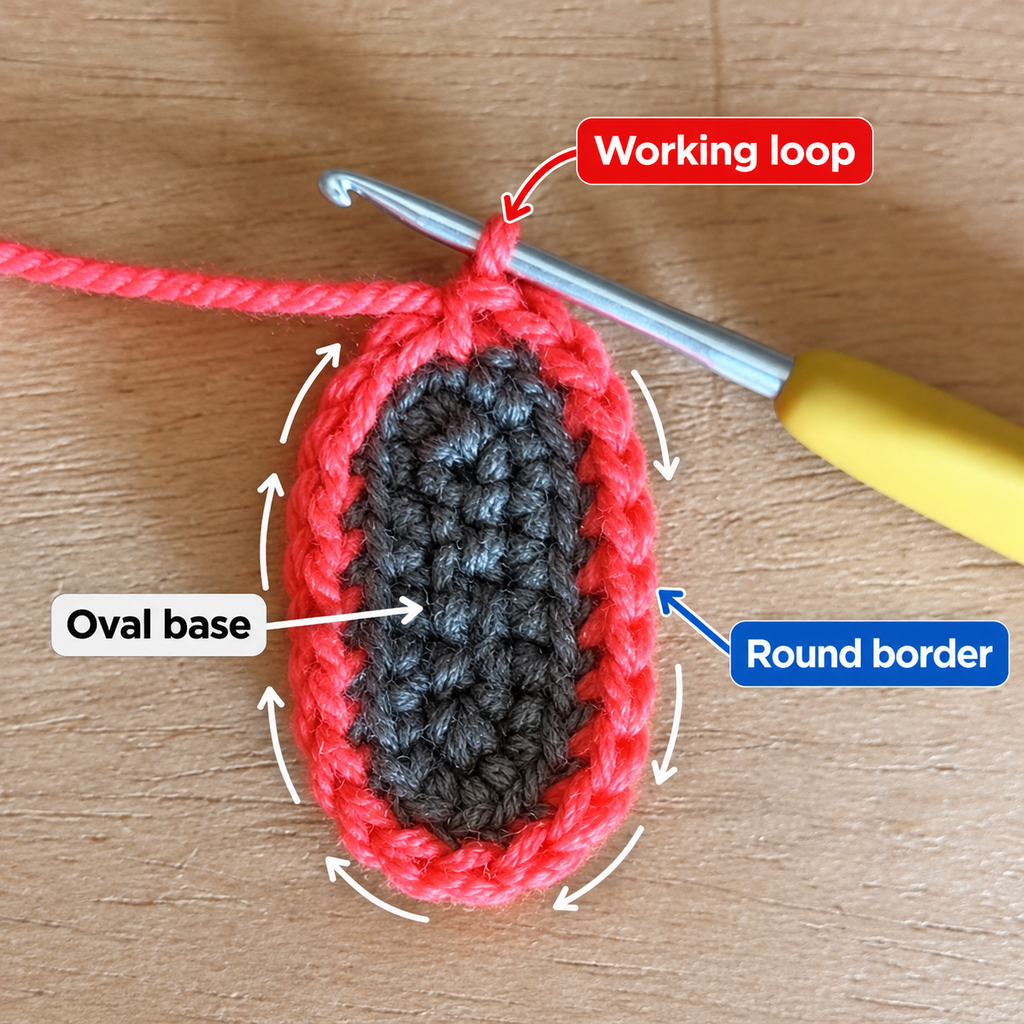
The shoe is a small rounded base. Unlike larger crochet shoes that use an oval sole, this simplified pattern starts with a magic ring, making it easier for beginners to keep track of stitches.
Shoe and lower leg — make two:
- Rnd 1: Work 6 sc into a magic ring. (6)
- Rnd 2: Inc in every stitch. (12)
- Rnd 3: Sc in BLO all the way around. (12)
- Rnd 4: Sc in every stitch. (12)
After Round 2, gently pull the magic-ring tail until the center hole closes. You should have a small circle with 12 stitches around its edge.
Round 3 is worked into the back loops only. This allows the shoe to turn upward rather than continue spreading out into a flat circle.
By the end of Round 4, you should have a short rounded shoe shape.
Do not fasten off because the sock and leg will be worked directly above the shoe.
Beginner tip: If you struggle to make a magic ring, start with a chain of two and work your six single crochet stitches into the second chain from the hook.
Common mistake to avoid: Don’t accidentally add an extra stitch where the rounds meet. Count 12 stitches before changing colors.
Step 2: Add the Sock and Crochet the Leg
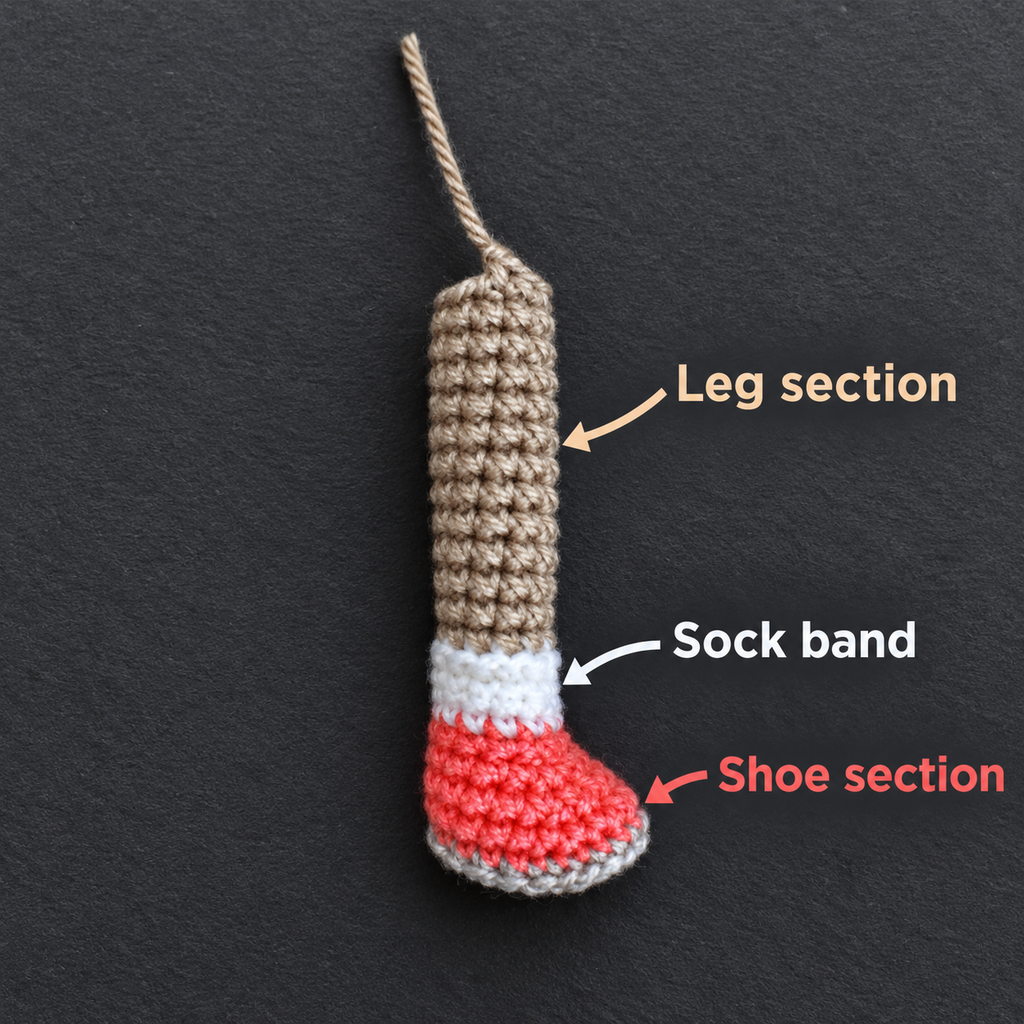
The next section continues directly from the shoe.
Switch to ivory yarn to create a small athletic sock.
- Rnd 5: With ivory, sc around. (12)
- Rnd 6: Sc around. (12)
Now switch to your skin-tone yarn.
- Rnd 7: Sc around. (12)
- Rnds 8–16: Sc in every stitch. (12 per round)
You will now have one straight, narrow crocheted leg.
The shoe should remain at the bottom, followed by a short ivory sock and the longer beige leg.
Begin stuffing the lower part using small pinches of fiberfill. Push the filling gently down toward the shoe with the blunt end of your hook or another safe stuffing tool.
You want the leg to hold its shape, but not become stiff.
Leave the upper opening accessible because you will need it to join both legs.
Beginner tip: Stuff a little at a time. Adding a large amount at once can stretch the crochet fabric and create uneven bulges.
Common mistake to avoid: Do not pull your color-change yarn too tightly. A tight transition can make the leg narrow at the sock.
Step 3: Make the Second Leg
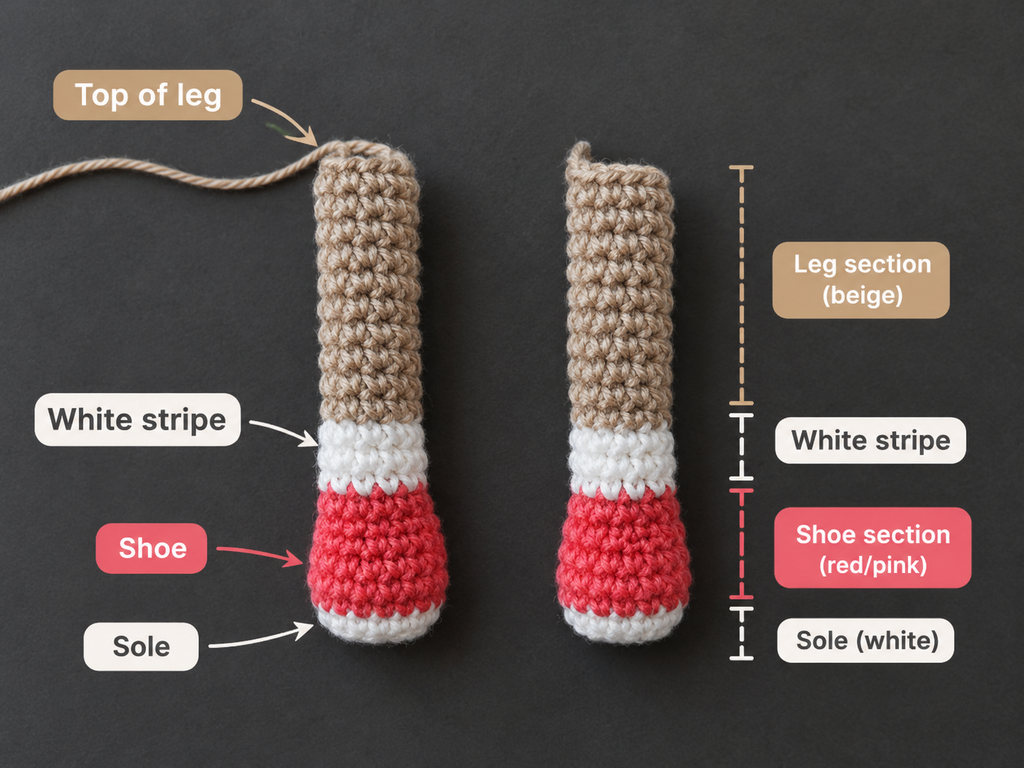
Repeat Steps 1 and 2 to create a second leg.
Both legs must have the same number of rounds and stitches. Lay them next to each other before joining and compare their height.
If one appears longer, check whether it has an additional round. If the stitch counts match but the difference is small, you may simply have worked one leg with slightly different tension.
Fasten off the first leg, leaving its upper opening unclosed. On the second leg, keep the yarn attached after finishing Round 16.
Position both legs so the less tidy yarn-color transitions face the back.
The toes should point in the same direction.
Beginner tip: A removable marker placed on the front of each shoe makes it easier to keep both legs properly aligned.
Common mistake to avoid: Joining one leg backward can make the feet point in opposite directions. Check the shoe fronts before beginning the body.
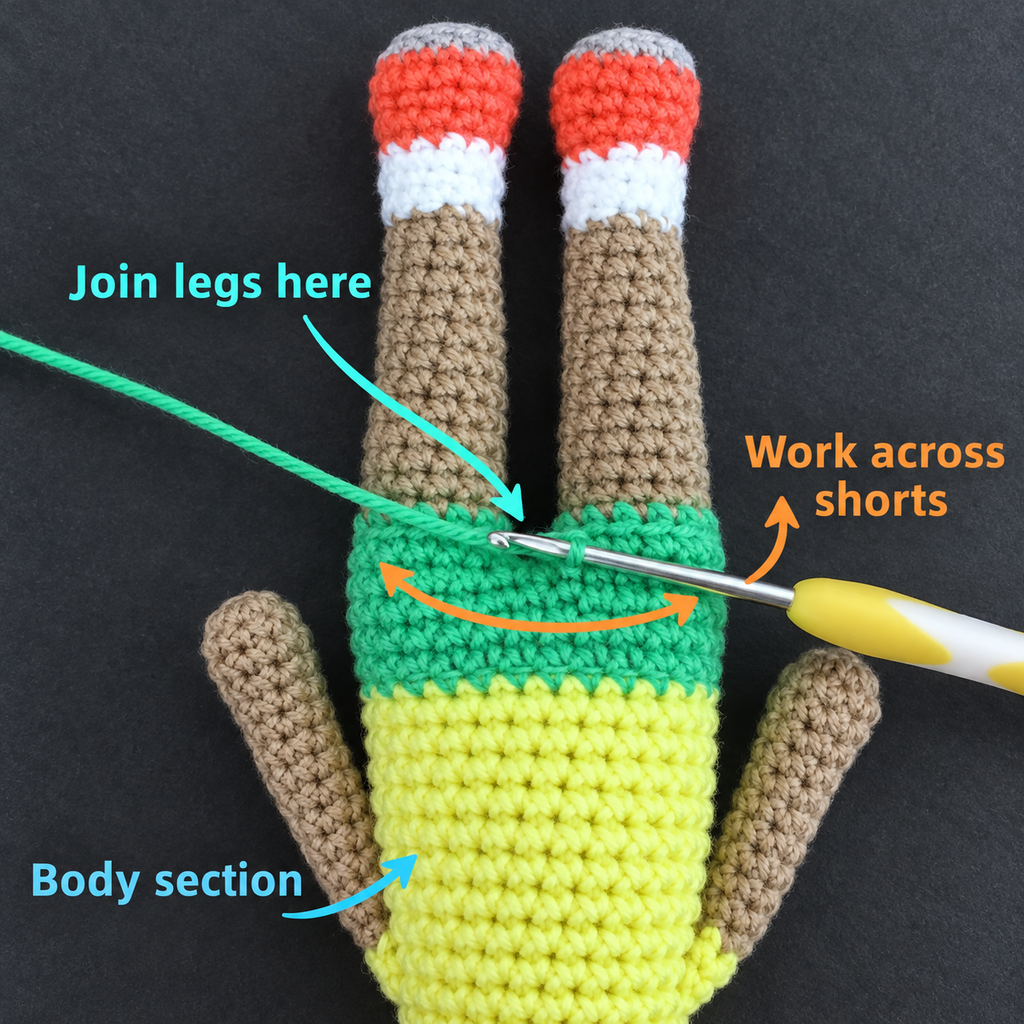
Step 4: Join the Legs and Form the Body
This step may feel slightly tricky the first time, but the stitch count makes it easy to verify your work.
Hold both legs upright with the toes pointing forward and the working yarn on the second leg.
If necessary, work a few additional single crochet stitches around the second leg until the working loop is at the inner edge.
Chain 2.
Insert your hook into the inner stitch of the first leg and begin crocheting around its opening.
Body Round 1:
Work 12 sc around the first leg, 2 sc into one side of the chain bridge, 12 sc around the second leg, and 2 sc into the remaining side of the bridge.
You should now have 28 stitches.
Place a stitch marker in the first stitch of the next round.
A small opening may remain between the legs. This is normal. Sew it closed later using the yarn tail from the first leg.
Continue the lower body in dusty rose.
- Rnd 2: (6 sc, inc) × 4. (32)
- Rnds 3–6: Sc around. (32)
The lower torso should look like a small cylinder attached to two narrow legs.
Switch to ivory for the top of the cheerleading uniform.
- Rnd 7: Sc in BLO around. (32)
- Rnds 8–10: Sc around. (32)
- Rnd 11: (6 sc, dec) × 4. (28)
- Rnd 12: Sc around. (28)
- Rnd 13: (5 sc, dec) × 4. (24)
- Rnd 14: Sc around. (24)
- Rnd 15: (2 sc, dec) × 6. (18)
- Rnd 16: (1 sc, dec) × 6. (12)
Fasten off, leaving a long tail.
Round 7 was deliberately made in the back loops. The front loops remain available for attaching the skirt later.
Stuff the torso gradually before the opening becomes too narrow.
Beginner tip: Check the reserved loops around the waist immediately after Round 7. They should form a visible horizontal ridge.
Common mistake to avoid: Don’t accidentally work into both loops on Round 7. That would eliminate the convenient attachment line for the skirt.
Step 5: Crochet Two Small Arms
Now we will create the arms that hold the pom-poms.
Use skin-tone yarn and make two matching pieces.
- Rnd 1: 6 sc in a magic ring. (6)
- Rnd 2: (2 sc, inc) × 2. (8)
- Rnds 3–10: Sc around. (8)
- Rnd 11: Switch to ivory and sc around. (8)
- Rnd 12: Sc around. (8)
Fasten off, leaving a long sewing tail.
Stuff only the hand and lower portion of each arm very lightly. Leave the upper arm soft enough to flatten the opening for sewing.
The ivory rounds create the appearance of small uniform sleeves.
Use pins to position the arms at the upper sides of the torso. For a classic cheerleading pose, angle them outward and upward.
You can also create a lower pose, where the hands sit near the hips.
Do not attach the pom-poms until the final assembly stage.
Beginner tip: Make the arms before crocheting the head, then pin them onto the torso while the upper body is still easy to handle.
Common mistake to avoid: Overstuffed arms can look rigid and may stick straight out instead of following the intended pose.
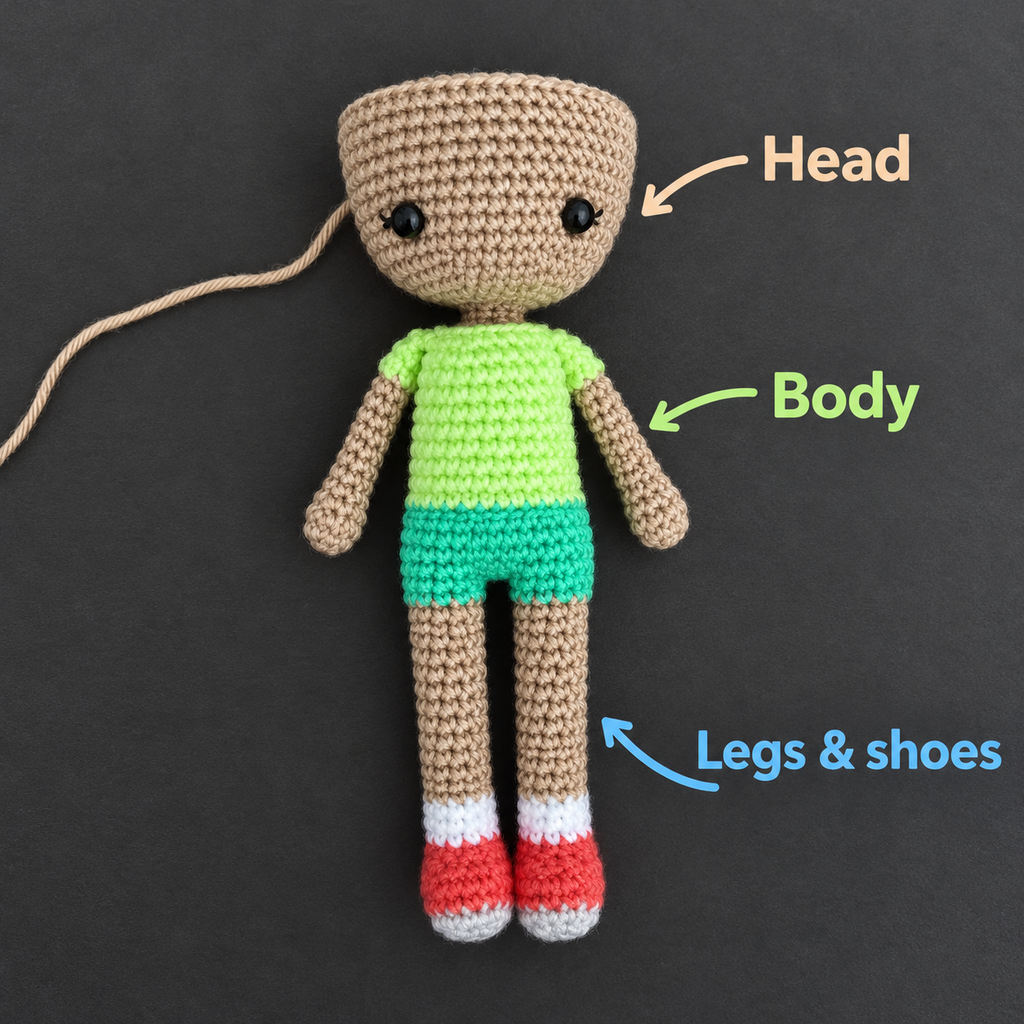
Step 6: Crochet the Rounded Doll Head
This doll has a separately crocheted head, making it easier to work the face before final assembly.
Begin with skin-tone yarn.
- Rnd 1: 6 sc in a magic ring. (6)
- Rnd 2: Inc in every stitch. (12)
- Rnd 3: (1 sc, inc) × 6. (18)
- Rnd 4: (2 sc, inc) × 6. (24)
- Rnd 5: (3 sc, inc) × 6. (30)
- Rnd 6: (4 sc, inc) × 6. (36)
- Rnds 7–13: Sc around. (36)
- Rnd 14: (4 sc, dec) × 6. (30)
- Rnd 15: (3 sc, dec) × 6. (24)
- Rnd 16: (2 sc, dec) × 6. (18)
- Rnd 17: (1 sc, dec) × 6. (12)
Pause here to embroider the facial features if you have not already done so, then add enough stuffing to create a smooth rounded head.
Do not close the opening. Leave a long tail for joining the head to the neckline of the body.
The final opening has 12 stitches, which matches the 12-stitch neckline we created on the torso.
This matching stitch count makes it easier to align the two pieces.
Beginner tip: A little additional stuffing near the lower part of the head can help prevent the chin from collapsing.
Common mistake to avoid: If you pack all the stuffing against the top of the head, the face may look stretched while the neckline becomes too soft.
Step 7: Embroider the Face
Facial embroidery is one of the most enjoyable parts of making an amigurumi doll.
It also gives your cheerleader her own personality.
Before stitching anything permanently, mark the center front of the head using a short piece of contrasting yarn.
For this 36-stitch head, begin by positioning the eyes approximately between Rounds 9 and 10, about five or six stitches apart. Adjust the placement visually because stitch tension affects how the face appears.
Use dark brown embroidery thread to sew small eyes. A few short horizontal or slightly curved stitches are enough.
Create a tiny nose with one or two beige or light-brown stitches.
For the mouth, use a fine strand of muted pink embroidery thread.
A small curved smile is especially suitable for the cheerful character.
If you prefer a simpler look, embroider two closed smiling eyes rather than circular eyes.
You can also add tiny pink cheek stitches, but avoid making them too large.
Once the face is complete, secure the thread ends inside the head before finishing the stuffing.
Beginner tip: Use pins or removable yarn markers to test facial spacing before committing to embroidery.
Common mistake to avoid: Eyes placed too close together can make the face appear crowded. Check the expression from straight ahead rather than only from above.
Step 8: Make the Hair Cap and Ponytail
A high ponytail is a playful hairstyle for this doll and works especially well with a cheerleading bow.
Begin by crocheting a simple hair cap in dark brown yarn.
Hair cap:
- Rnd 1: 6 sc in a magic ring. (6)
- Rnd 2: Inc around. (12)
- Rnd 3: (1 sc, inc) × 6. (18)
- Rnd 4: (2 sc, inc) × 6. (24)
- Rnd 5: (3 sc, inc) × 6. (30)
- Rnd 6: (4 sc, inc) × 6. (36)
- Rnds 7–9: Sc around. (36)
Try the hair cap over the head. It should cover the crown while leaving the eyes and forehead visible.
If you want a slightly lower hairline, add one extra round of single crochet.
Fasten off and leave a tail for sewing.
For the ponytail, cut approximately 18–24 strands of dark brown yarn, each around 14–16 cm long.
Fold the strands in half and tie them securely together at their center using another strand of yarn.
Attach the bundle to the upper back of the hair cap, creating a ponytail that falls behind the head.
Secure the bundle with several stitches through the hair cap rather than relying on one knot.
You can braid the strands, leave them loose, or divide them into two small ponytails.
Add a small dusty rose bow using a short folded yarn chain or securely stitched yarn ribbon.
Beginner tip: Make the ponytail longer than you think you need, then trim it gradually after attaching it.
Common mistake to avoid: Hair that is attached using only one loose knot may pull free. Always stitch through the cap several times to secure the bundle.
Step 9: Crochet the Cheerleader Skirt
Now comes one of the defining details of this pattern: the uniform skirt.
Locate the unused front loops around the waist from Body Round 7.
Turn the doll upside down so the legs point upward.
Attach dusty rose yarn to one of the available loops at the back.
Make sure the crochet fabric is facing outward as you begin the skirt.
Skirt rounds:
- Rnd 1: Ch 1, sc in each reserved front loop around the waist, sl st to first sc. (32)
- Rnd 2: Ch 2, dc in each stitch, join with sl st. (32)
- Rnd 3: Ch 2, (3 dc, 2 dc in next st) × 8, join. (40)
- Rnd 4: Ch 2, dc in each stitch around, join. (40)
- Rnd 5: Switch to ivory, ch 1, sc in each stitch around, join. (40)
The beginning chains do not count as stitches in these rounds.
Fasten off and weave in the ends.
Turn the doll right side up and gently smooth the skirt downward.
The increases in Round 3 allow the skirt to flare away from the legs, creating a sporty skirt silhouette.
The ivory finishing round adds contrast and makes the hem appear more polished.
For a more obvious pleated appearance, you can add a few narrow vertical surface stitches in ivory from waist to hem, evenly spaced around the skirt. Keep these decorative lines light so they do not distort the flare.
Beginner tip: If your skirt is curling upward, first check that you have 40 stitches after the increase round. Gently shape the fabric with your fingers before deciding whether it needs adjustment.
Common mistake to avoid: Working into the body stitches instead of the reserved front loops will prevent the skirt from hanging independently.
Step 10: Add the Uniform Details
A few small decorative details can make the doll instantly recognizable as a cheerleader.
Using dusty rose yarn, embroider a short stripe around the ivory neckline. You can make this with simple surface stitches or sew a small chain around the neck opening.
For sleeve accents, sew one short line of dusty rose yarn near the edge of each ivory sleeve.
You may also embroider a single letter on the front of the uniform.
Choose a letter representing a school, team, favorite name or general sporty theme.
Use duplicate stitch or simple backstitch embroidery, keeping the letter small enough to fit the torso.
For a cleaner result, plan the letter using a few temporary pins before sewing.
Keep the front of the top relatively simple. Too many details can make a small amigurumi doll look cluttered.
If you plan to give the doll as a gift, a matching uniform color combination often feels more personal than extra decorations.
Beginner tip: Embroider small design elements using thin yarn or embroidery floss rather than thick DK yarn.
Common mistake to avoid: Do not pull embroidered lines tightly across the torso. This can compress the stuffing and wrinkle the surface.
Step 11: Make Two Miniature Cheerleader Pom-Poms
The pom-poms complete the cheerleader look.
You can make them entirely from yarn without learning an additional crochet stitch.
For each pom-pom, cut approximately 30–40 short strands of dusty rose and ivory yarn, each around 6–8 cm long.
Keep the two colors mixed evenly.
Stack the strands into a small bundle and tie the middle tightly using another length of yarn.
Make a double knot, then add a second wrap around the center for security.
Fold the bundle around its center, bringing the loose ends together.
Trim the strands gradually until you achieve a compact, fluffy pom-pom around 2.5–3.5 cm across.
Make a second pom-pom using the same technique.
Leave the central tying strands long. You will use them to sew the pom-poms to the hands.
If you prefer a denser appearance, add more strands before tying.
Beginner tip: Trim both pom-poms together, comparing their sizes every few cuts.
Common mistake to avoid: Do not cut the center tie when trimming. This is the strand that holds the pom-pom together.
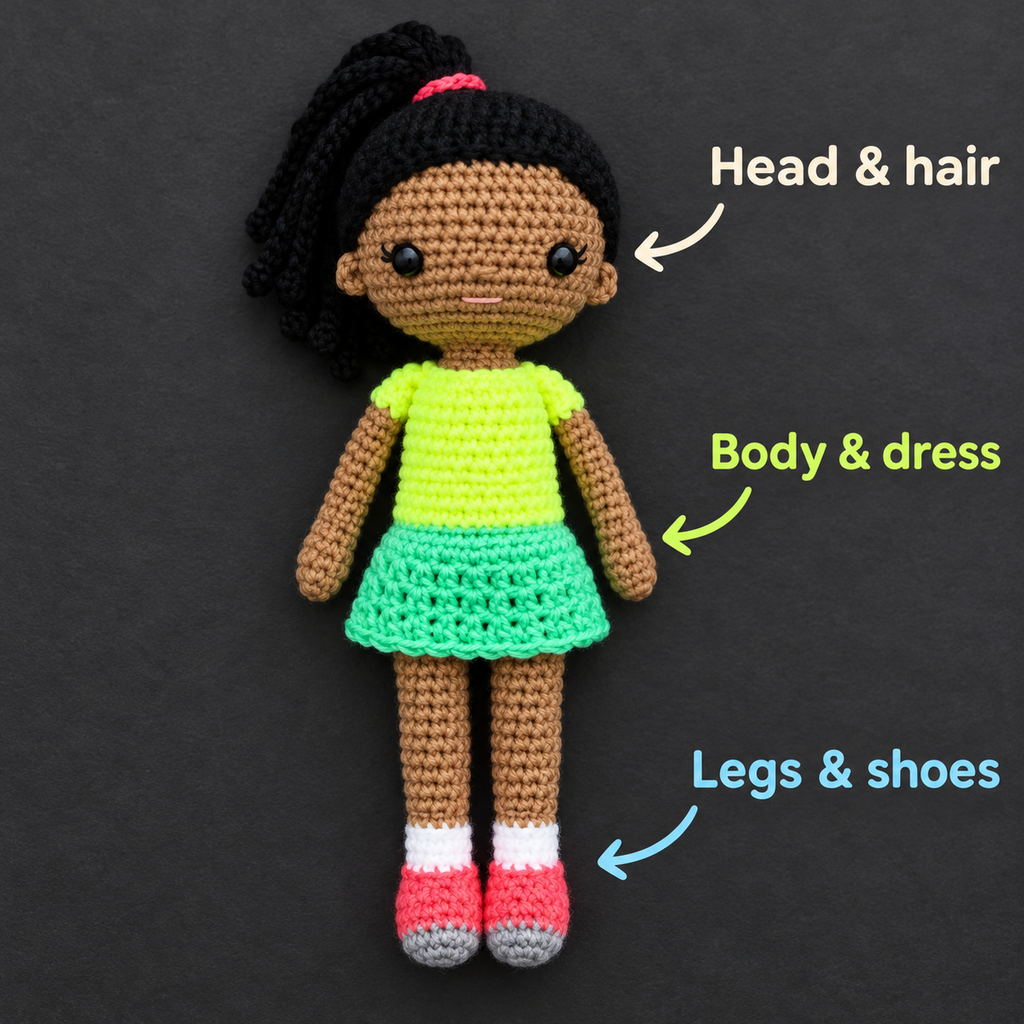
Step 12: Assemble the Cheerleader Doll
Now all the main pieces are ready.
Before sewing, arrange them on your work surface and check that every piece is present.
Start with the head.
Align the 12-stitch opening at the bottom of the head with the 12-stitch neckline at the top of the torso.
Thread the long yarn tail through a blunt tapestry needle.
Using small whip stitches, sew through one head stitch and one corresponding neckline stitch at a time.
Work all the way around the neck.
Before tightening the final stitches, check that the face is looking straight ahead.
The head should sit upright and feel secure.
Next, attach the arms near the top corners of the uniform.
Use the long sewing tails to fasten each flattened upper arm to the torso. Position the hands pointing outward and slightly upward.
Try to make both sides symmetrical.
Once the arms are secure, attach the pom-poms.
Sew the central tying strands through the end of each crocheted hand, passing through multiple stitches before knotting the strands securely inside or behind the hand.
Attach the hair cap if you haven’t already done so.
The front edge should rest above the eyebrows, and the ponytail should sit behind the head.
Finally, use the remaining yarn tails to close the small gap between the legs and tidy any visible joining seams.
Beginner tip: Photograph the pinned doll before sewing. Looking at a photo can make uneven arms or a tilted head easier to notice.
Common mistake to avoid: Do not depend on one or two loose stitches to hold the head or pom-poms in place. These are areas that require particularly secure attachment.
Pattern Notes and Stitch Counts
A few technical notes will help keep your finished doll balanced.
Continuous versus joined rounds
The legs, body, head, arms and hair cap are worked in continuous spiral rounds. Do not join these rounds unless instructed.
The skirt is different. It uses joined rounds, with a slip stitch at the end of each round.
For the skirt, the beginning chain is used only to lift the yarn to the correct height. It does not count as a stitch.
Stitch count checkpoints
| Piece | Important stitch count |
|---|---|
| Each shoe | 12 sts after Round 2 |
| Each leg | 12 sts through Round 16 |
| Joined lower body | 28 sts in first body round |
| Waist | 32 sts before skirt attachment |
| Neckline | 12 sts |
| Each arm | 8 sts through upper rounds |
| Widest head round | 36 sts |
| Head opening | 12 sts |
| Skirt attachment | 32 sts |
| Skirt after increases | 40 sts |
Right side and wrong side
For most amigurumi pieces, keep the smoother side of the single crochet stitches facing outward.
The inside of your piece should contain the loose yarn tails and stuffing.
When attaching the skirt, temporarily invert the doll to access the reserved waist loops more easily, then check that the new skirt falls outward and downward.
How to adjust the size
The easiest way to create a larger doll is to use thicker yarn and a hook suitable for tight amigurumi.
For a smaller version, use thinner yarn and a smaller hook.
Remember that the yarn thickness should remain consistent across all doll components.
If you change the stitch counts themselves, you will also need to recalculate the shaping of the waist, neckline, skirt and head.
Common Beginner Mistakes and How to Fix Them
1. Stuffing shows through the stitches
This usually means the stitches are too loose, the hook is too large or the piece is overstuffed.
Try using a slightly smaller hook. Also remove a little stuffing and reshape the piece.
2. The two legs are different lengths
Count the completed rounds in each leg.
Both legs should have 16 rounds, with the same color transitions and stitch counts.
If one leg is noticeably taller, check whether you accidentally added an extra round rather than trying to stretch the shorter piece.
3. The head looks too large or tilts forward
A slightly oversized head is normal for cute amigurumi dolls, but it must still be attached firmly.
Add sufficient stuffing around the neck and sew the opening securely all the way around.
A soft, loose neckline can allow the head to lean forward.
4. The skirt curls or becomes ruffled
A little flare is expected, but dramatic rippling can be caused by extra increases.
Check the stitch counts carefully.
If the hem still curls, reshape it by hand or lightly dampen the skirt and allow it to dry in the desired position.
5. The pom-poms lose yarn strands
The central tie may not be tight enough.
Untie and remake the pom-pom if necessary, using a strong doubled yarn strand around the middle.
After attaching it to the hand, gently tug each side to check that the strands are secure.
6. The face looks uneven
Facial placement is easier when the head has been partially stuffed.
Remove any uneven embroidery before closing the head, and use temporary markers to check both sides.
7. The hair looks too bulky
Using too many long yarn strands can overwhelm a small doll head.
Begin with a modest ponytail bundle, then add strands gradually until the hairstyle looks balanced.
How to Customize Your Crochet Cheerleader Doll
One of the nicest features of this project is how easily you can adapt the design.
Change the team colors
Replace dusty rose and ivory with traditional school colors such as navy and gold, red and white, purple and silver, or green and white.
For the most cohesive design, use the same accent yarn for the skirt edging, shoes, hair bow and pom-poms.
Create different hairstyles
The ponytail can be replaced with two pigtails, a short bob, loose curls or a braided hairstyle.
For a curly look, crochet several short chains and work multiple stitches into each chain to create spirals. Attach the spirals securely to the hair cap.
Make a longer skirt
Add one or two additional double crochet rounds before the ivory border.
Keep the same stitch count if you want a straighter shape, or add a few evenly spaced increases for more flare.
Add texture to the uniform
A narrow surface slip stitch stripe along the neckline or skirt edge can make the design more detailed without significantly increasing the difficulty.
Personalize the doll as a gift
Use the recipient’s favorite colors or embroider a small initial on the top.
This doll can be a thoughtful handmade keepsake for a cheerleader, coach, sports fan or school celebration. For a display-only collectible, you could also make a matching stand or decorative display mat.
Finishing Instructions
Once everything is attached, spend a few minutes checking the final details.
Look at the doll from the front, back and both sides.
Make sure the head is centered, the uniform sits smoothly and the arms appear balanced.
Use a blunt yarn needle to weave any remaining yarn tails through several stitches inside the fabric. Change direction before trimming so the tails are less likely to work loose.
Gently adjust the stuffing with your fingers to smooth out uneven areas.
Check the skirt hem. If it needs shaping, lightly mist the fabric with water, arrange it on a clean towel and allow it to air-dry completely. Avoid soaking the stuffed body.
Trim the ends of the ponytail and pom-poms carefully.
For washing, follow the yarn manufacturer’s care instructions. Because this doll contains stuffing, embroidered details and multiple sewn components, gentle spot-cleaning is a practical default. If it becomes wet, allow it to dry thoroughly.
Inspect the attachments again after cleaning, especially if the doll will be handled frequently.
Quick Printable-Style Summary
Crochet Cheerleader Doll — Project Summary
| Detail | Instructions |
|---|---|
| Skill level | Advanced beginner |
| Approximate size | 8–10 inches |
| Yarn | DK cotton/cotton blend |
| Hook | 2.75 mm |
| Main stitches | sc, hdc, dc, sl st, inc, dec |
| Starting method | Magic ring |
| Legs | Make 2, 16 rounds each |
| Body | Join using 2 chains, shape to 12-st neck |
| Arms | Make 2, 12 rounds each |
| Head | Separate, 36-st widest point |
| Skirt | Attach to reserved waist loops |
| Hair | Crochet cap plus yarn ponytail |
| Pom-poms | Two tied yarn bundles |
| Finishing | Stuff, embroider, sew, weave in tails |
Assembly order: Shoes and legs → body → arms → head → face → hair → skirt → uniform details → pom-poms → final sewing and shaping.
Frequently Asked Questions
Is this crochet cheerleader doll pattern suitable for beginners?
Yes, if you already know how to single crochet and make basic increases and decreases. A completely new crocheter may want to practice a small amigurumi ball first.
The most challenging parts are joining the legs, attaching the skirt and assembling the head neatly. None requires advanced stitches, but patience and stitch counting are important.
What is the best yarn for an amigurumi cheerleader doll?
Smooth DK-weight cotton or cotton-blend yarn works well because it makes the small stitches easy to see and helps the body keep a neat shape.
Acrylic yarn can also be used, provided the stitches are tight enough to contain the stuffing.
Can I make the doll without a magic ring?
Yes. Chain two, then work the required starting stitches into the second chain from the hook.
This is a useful alternative when the adjustable magic ring feels difficult.
You may need to close the center opening afterward using the starting yarn tail.
How do I make the pom-poms stay attached?
Tie each bundle securely at the center, then use the long tying strands to sew the pom-pom through multiple stitches in the doll’s hand.
Avoid relying on glue. After attaching, gently test whether the strands or the whole pom-pom can be pulled loose.
Can I change the cheerleader uniform colors?
Absolutely. This project is ideal for school and sports-themed customization.
Choose one main color for the skirt and one contrasting color for the top, trim and pom-poms.
How long does it take to crochet a cheerleader doll?
Plan approximately six to nine hours, depending on your experience.
The legs and torso usually take the most crocheting time. Facial embroidery, hairstyling and assembly may also take longer if you enjoy working carefully on small details.
Can I sell finished dolls made using this tutorial?
The written design presented here is original, rather than a reproduction of the selected reference pattern. Before selling handmade dolls, you should still consider applicable product safety requirements, including secure components, appropriate labeling and age suitability.
Do not reproduce or redistribute the selected source’s photographs or written pattern without permission.
Conclusion
Your handmade crochet cheerleader doll is now ready to celebrate!
With her tiny sneakers, flared uniform, friendly embroidered face and colorful pom-poms, she brings together several useful amigurumi techniques in one creative project.
The same foundation can be adapted into dolls with different school uniforms, hairstyles and accessories, so this is a pattern you can return to whenever you need a personalized handmade gift.
Save this crochet cheerleader doll pattern to your Pinterest crochet board so you can find the steps again when you’re ready to make another one.





