A small crochet mascot can turn a few scraps of yarn into a memorable handmade gift. You can make one for a school club, sports team, small business, special event, or simply as a cheerful desk companion. The best part is that you can personalize its colors, facial expression, scarf, and embroidered badge without needing complicated crochet stitches.
This beginner-friendly crochet mascot plush pattern creates a rounded character with a separate head and body, small arms, folded ears, little feet, and an embroidered face. The construction uses familiar amigurumi techniques and includes stitch counts to help you keep track of each round.
You do not need advanced shaping skills or expensive materials. You only need basic single crochet, increases, decreases, a little stuffing, and patience when sewing the pieces together.
The pattern below is an original, simple mascot design. The reference website listed earlier is for visual research only; its pattern and photographs are not reproduced here.
What You’ll Learn
- How to start small amigurumi pieces with a magic ring.
- How to increase and decrease stitches to shape a rounded head and body.
- How to make matching arms, ears, and feet.
- How to stuff the pieces without making them lumpy.
- How to sew the pieces together symmetrically.
- How to embroider a friendly face and personalize your mascot.
- How to avoid common mistakes that affect the shape of a plush toy.
Materials You’ll Need
Choose smooth yarn for your first mascot because it makes individual stitches easier to see.
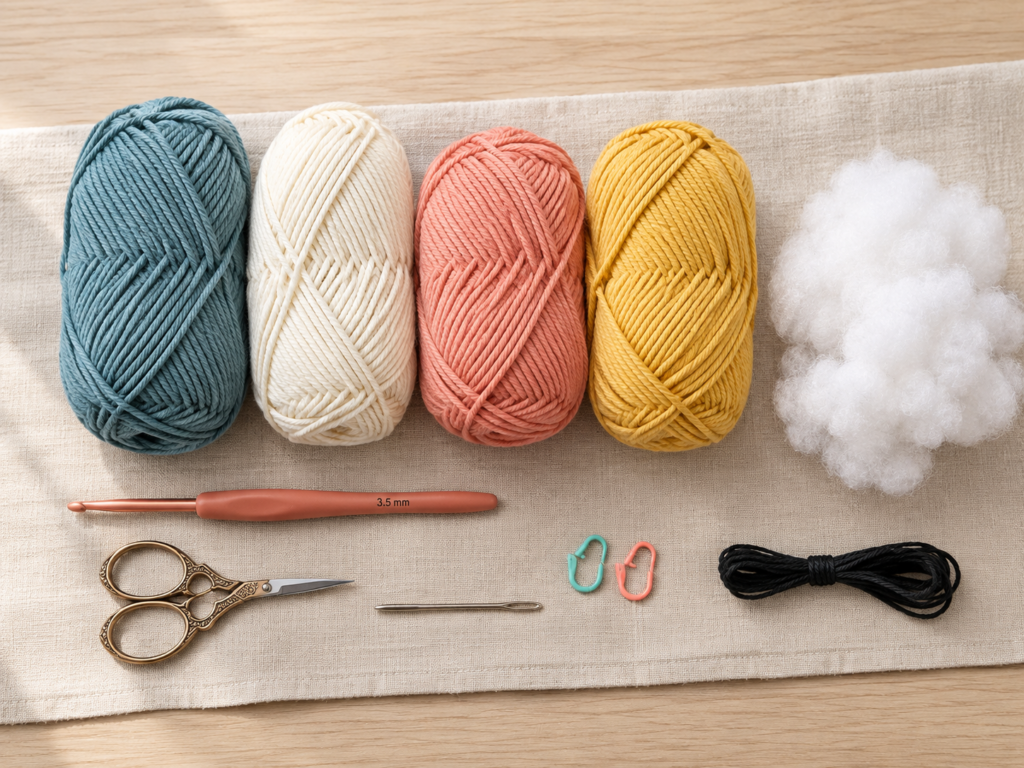
- Main yarn: Approximately 25–40 g of worsted-weight yarn in muted teal or your preferred main color.
- Accent yarn: Small amounts of warm cream, soft coral, and mustard yellow.
- Hook: A 3.5 mm crochet hook. Use a smaller hook if your stitches leave visible gaps.
- Stuffing: Polyester fiberfill.
- Tapestry needle: For sewing pieces together and weaving in ends.
- Scissors: For trimming yarn tails.
- Stitch markers: At least one marker for the beginning of each round.
- Embroidery thread or fine black yarn: For the eyes, nose, and smile.
- Optional: A measuring tape and removable sewing pins to help position the parts.
Crochet Abbreviations Used
This tutorial uses US crochet terminology. The Craft Yarn Council provides a useful reference for standard crochet abbreviations and differences between US and UK terminology.
Welcome to the Craft Yarn Council
| Abbreviation | Meaning |
|---|---|
| MR | Magic ring |
| ch | Chain |
| sc | Single crochet |
| inc | Increase: work 2 sc into the same stitch |
| dec | Decrease: combine 2 stitches into 1 |
| sl st | Slip stitch |
| st/sts | Stitch/stitches |
| rnd | Round |
| FO | Fasten off |
| rep | Repeat |
US/UK terminology note: US single crochet (sc) is called double crochet (dc) in UK terminology. The stitch counts in this article use US terms throughout.
Before You Start
Choose a hook that creates tight stitches
Amigurumi is usually worked with a smaller hook than you might choose for a loose scarf. A tighter fabric helps keep the stuffing inside the mascot. Start with a 3.5 mm hook and check the first few rounds. If you can see large gaps between the stitches, try a smaller hook.
Hook sizes can vary between manufacturers, so use the millimeter measurement on the hook rather than relying only on its letter or number. The Craft Yarn Council explains hook sizing and recommends checking your tension against the pattern requirements.
Welcome to the Craft Yarn Council
Learn to count your stitches
Place a stitch marker in the first stitch of every round. Move it up each time you begin a new round. After each round, compare your stitch count with the number in parentheses.
An increase adds one stitch to your total because you work two single crochet stitches into one existing stitch. A decrease reduces the total by one because you work two stitches together.
Keep your yarn tension even
Avoid pulling the yarn so tightly that your hook becomes difficult to move. Very tight stitches can make the project tiring to crochet, while loose stitches can expose the stuffing. Aim for small, consistent stitches that still allow your hook to pass through the loops.
Understand continuous rounds
The head, body, arms, and feet are worked in continuous spiral rounds. Do not join the end of every round with a slip stitch unless a step specifically tells you to do so. This creates a smoother surface without a prominent seam.
Choose your colors before beginning
Use one main color for the head and body, a lighter color for the muzzle and feet, and a contrasting color for the scarf. If you are making a team mascot, use the team’s general colors rather than trying to reproduce a protected logo or complicated emblem.
Step-by-Step Crochet Tutorial
Step 1: Crochet the two small feet
Make two feet using warm cream yarn.
Round 1: Make a magic ring and crochet 6 sc into it. (6 sts)
Round 2: Work 2 sc into every stitch around. (12 sts)
Rounds 3–4: Crochet 1 sc into every stitch around. (12 sts per round)
Round 5: Work 6 decreases around. (6 sts)
Add a tiny amount of stuffing to each foot. Fasten off, leaving a long tail for sewing. Close the remaining hole by threading the tail through the front loops of the six stitches and pulling gently.
Repeat these instructions for the second foot.
The feet should look like small, rounded ovals rather than large balls. Avoid overstuffing them because you will attach them to the bottom front of the body.
Beginner tip: Make both feet before sewing either one onto the body. Comparing them side by side makes it easier to keep their sizes consistent.
Common mistake to avoid: If one foot is larger, check that you completed the same number of rounds and increases on both pieces.
Step 2: Crochet the body
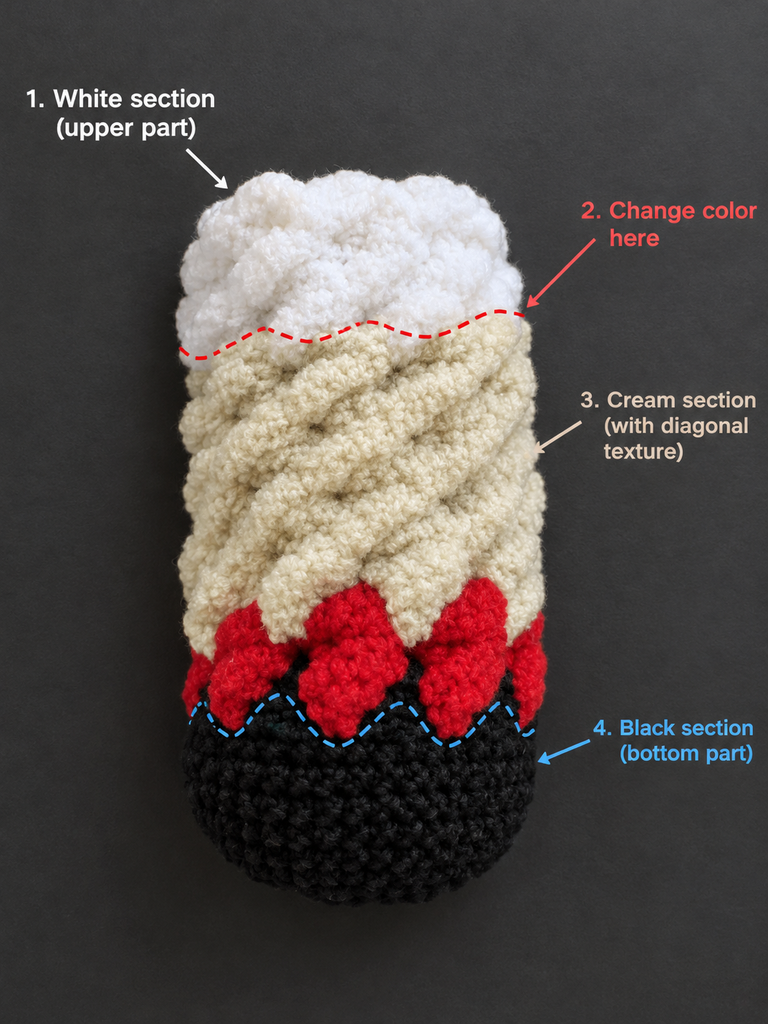
The body is worked from the bottom upward. Use your main color, muted teal in this example.
Round 1: Make a magic ring and work 6 sc into it. (6 sts)
Round 2: Work 2 sc into every stitch around. (12 sts)
Round 3: Repeat 1 sc, inc six times. (18 sts)
Round 4: Repeat 2 sc, inc six times. (24 sts)
Rounds 5–7: Work 1 sc into every stitch around. (24 sts per round)
Round 8: Repeat 2 sc, dec six times. (18 sts)
Rounds 9–10: Work 1 sc into every stitch around. (18 sts per round)
Round 11: Repeat 1 sc, dec six times. (12 sts)
You now have a tapered body with a wider bottom and a smaller opening at the top. Add stuffing through the opening. Use small pieces of fiberfill rather than one large clump, and push them gently into the lower corners.
Keep the top twelve stitches open. You will sew this opening to the lower part of the head later.
Fasten off, leaving a long tail for assembly.
Beginner tip: If the body looks twisted, lay it flat and check that the decreases are spaced evenly around the round.
Common mistake to avoid: Do not close the twelve-stitch opening. It is needed to attach the head securely.
Step 3: Crochet the head
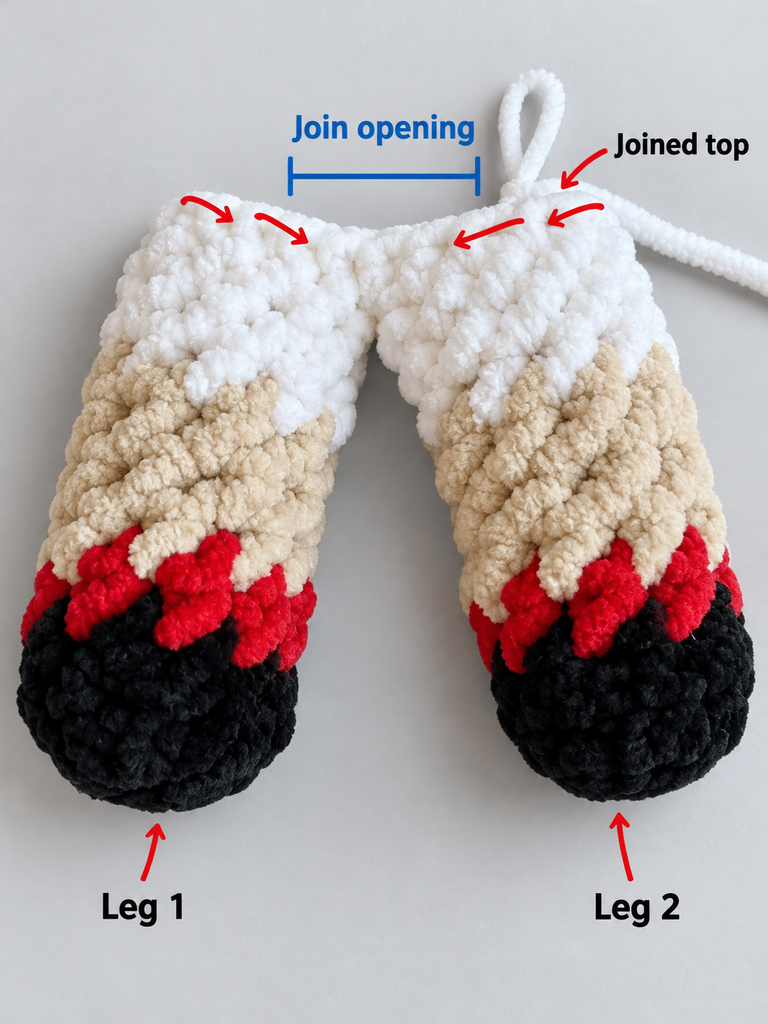
Use the main color again. The head is a rounded piece that is worked separately from the body.
Round 1: Make a magic ring and work 6 sc into it. (6 sts)
Round 2: Work 2 sc into every stitch around. (12 sts)
Round 3: Repeat 1 sc, inc six times. (18 sts)
Round 4: Repeat 2 sc, inc six times. (24 sts)
Round 5: Repeat 3 sc, inc six times. (30 sts)
Rounds 6–10: Work 1 sc into every stitch around. (30 sts per round)
If you plan to use safety eyes, position them between rounds 8 and 9, leaving approximately five or six stitches between them. Check the placement from the front before securing the backs.
For a toy intended for a young child, embroidered eyes are preferable to small detachable parts, but all features and seams must still be secured properly.
Round 11: Repeat 3 sc, dec six times. (24 sts)
Round 12: Repeat 2 sc, dec six times. (18 sts)
Begin adding stuffing. Shape the head gently with your fingers as you work.
Round 13: Repeat 1 sc, dec six times. (12 sts)
Add enough stuffing to create a firm, rounded shape without stretching the stitches.
Round 14: Work 6 decreases around. (6 sts)
Fasten off. Thread the yarn tail through the remaining front loops and pull the opening closed.
The head should feel evenly filled, not rock-hard. Leave the twelve-stitch round near the bottom visible because it will help you position the body.
Beginner tip: Use small tufts of stuffing and rotate the head as you fill it. This helps prevent lumps.
Common mistake to avoid: Do not insert the eyes after you have completely closed and stuffed the head if you are using safety eyes; their fastening backs need access to the inside.
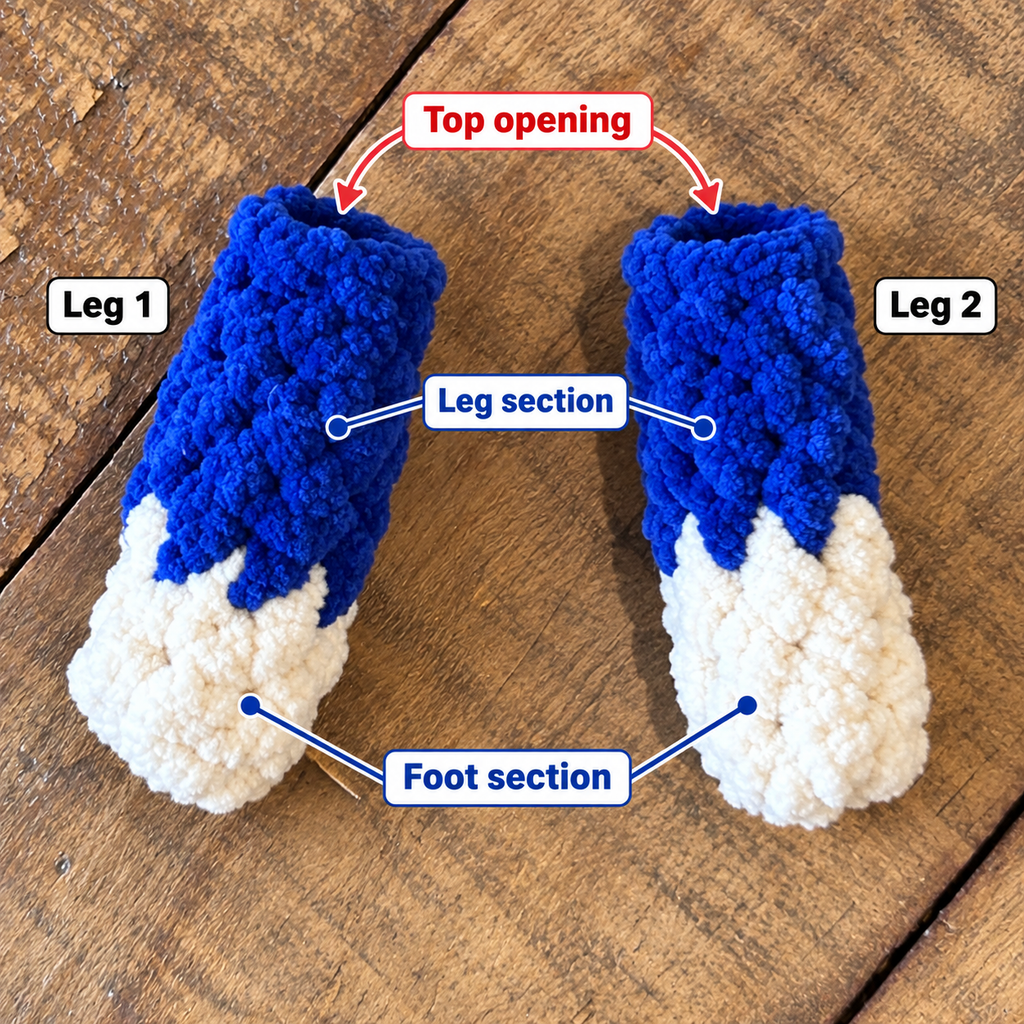
Step 4: Make the arms
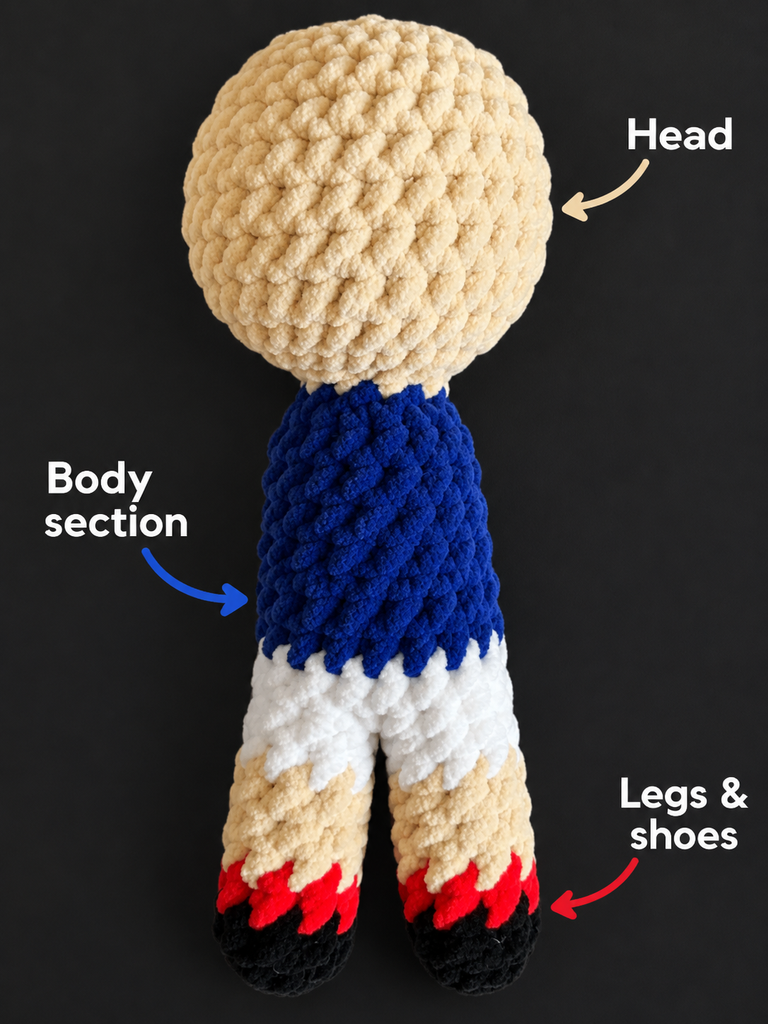
Make two matching arms. Start with the main color.
Round 1: Make a magic ring and work 6 sc into it. (6 sts)
Rounds 2–4: Work 1 sc into every stitch around. (6 sts per round)
Round 5: Change to your accent color if you want contrasting sleeves, then work 1 sc into every stitch around. (6 sts)
Round 6: Work 1 sc into every stitch around. (6 sts)
Fasten off, leaving a long tail. Add only a tiny amount of stuffing near the hand end, if desired. Flatten the top opening so the six stitches form three pairs, then sew the opening closed.
The arms should be short enough to sit naturally beside the body rather than extending far below the feet.
Beginner tip: Place both arms beside the body before attaching them. This gives you a quick visual check that their lengths match.
Common mistake to avoid: Avoid filling the arms too firmly. Overstuffed arms become stiff and can stick out awkwardly from the body.
Step 5: Make the ears
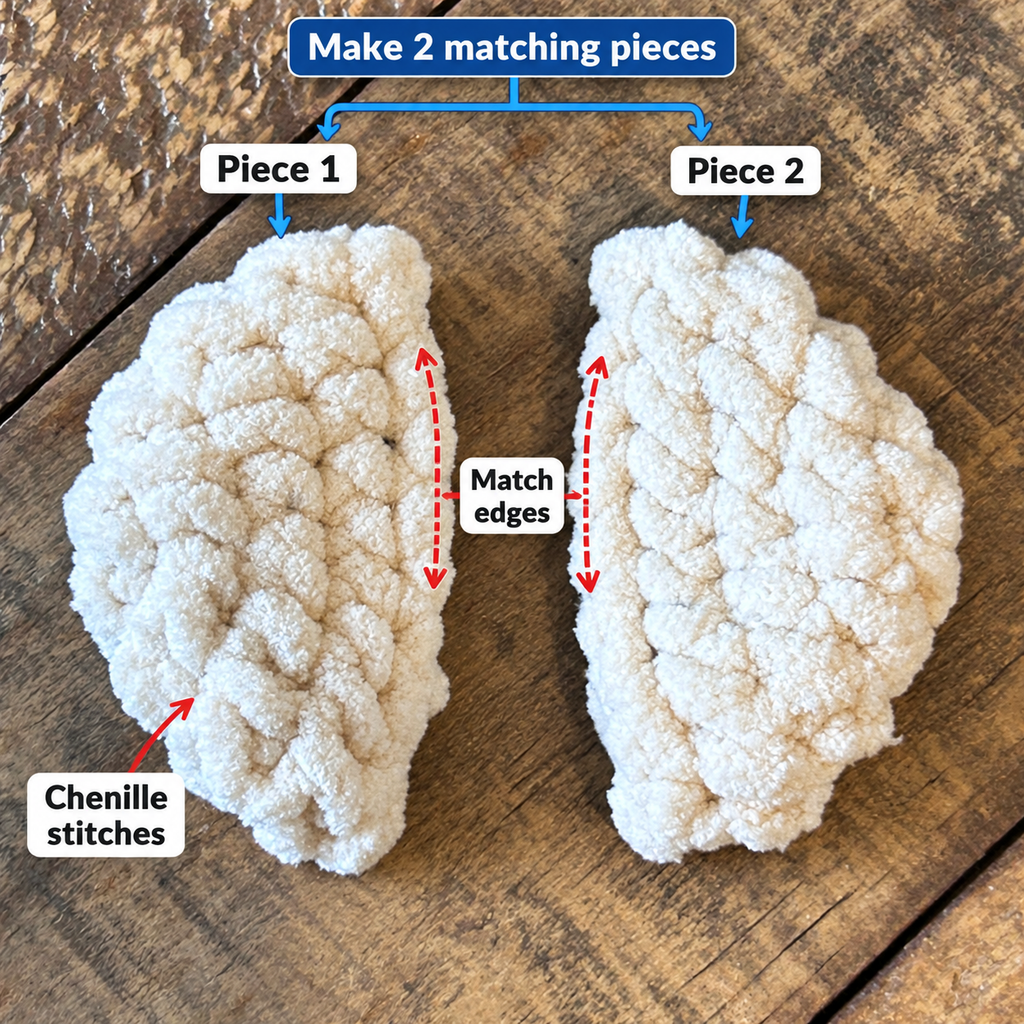
Make two ears using the main color.
Round 1: Make a magic ring and work 6 sc into it. (6 sts)
Round 2: Work 2 sc into every stitch around. (12 sts)
Round 3: Repeat 1 sc, inc six times. (18 sts)
Fasten off, leaving a long sewing tail. Flatten each circle gently in half to form a rounded semicircle. You do not need to stuff the ears.
If you want a teddy-style mascot, use these rounded ears. For a different character, you can make the ears smaller or replace them with a crocheted cap, tuft, or other simple decoration.
Beginner tip: Pin the ears temporarily to the head before sewing them. Look at the mascot from the front and side to check that they are balanced.
Common mistake to avoid: Sewing one ear higher than the other can make the face look unintentionally crooked. Compare their positions before fastening off.
Step 6: Assemble the head and body
This is the stage where your separate pieces become a recognizable mascot. Take your time with the positioning.
- Place the head above the body’s narrow opening.
- Align the body’s twelve top stitches with the twelve stitches in round 13 at the lower part of the head.
- Use the long yarn tail from the body and a tapestry needle to sew around the join.
- Take small, even stitches through both pieces, checking that the head remains centered.
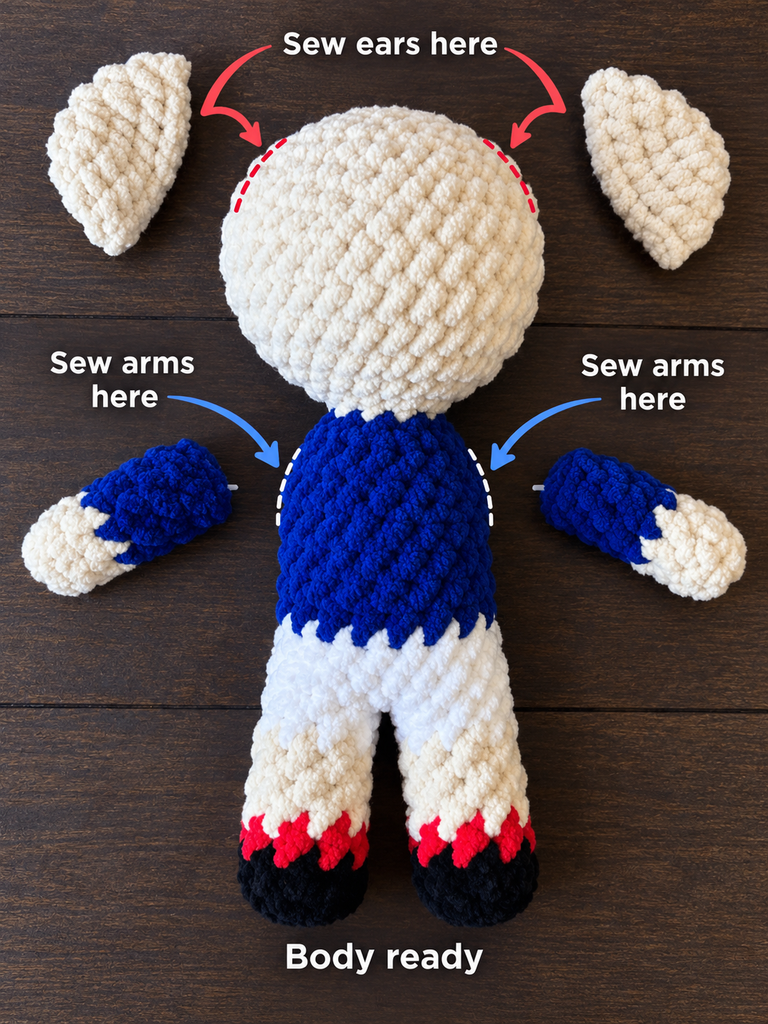
- Sew the two arms to opposite sides of the upper body, just below the head.
- Attach the feet to the lower front of the body, leaving enough space between them for the mascot to sit upright.
- Sew the folded ears onto the upper sides of the head.
Do not pull the sewing yarn so tightly that the fabric puckers. Keep the tension firm enough to close gaps, but loose enough for the mascot to retain its rounded shape.
Beginner tip: Before sewing each part permanently, use removable pins to check the position from the front, back, and side.
Common mistake to avoid: Do not rely on the first position that looks correct from above. A head can appear centered from one angle but lean to one side when viewed from the front.
Step 7: Add the muzzle and embroidered face
Use warm cream yarn to create a small oval muzzle.
Round 1: Make a magic ring and work 6 sc into it. (6 sts)
Round 2: Work 2 sc into every stitch around. (12 sts)
Round 3: Work 1 sc into every stitch around. (12 sts)
Fasten off, leaving a long tail. Flatten the piece gently and sew it to the front of the head, below the eyes. A small amount of stuffing is optional, but the muzzle should remain fairly flat.
Thread your tapestry needle with black embroidery thread or fine black yarn. Add two small embroidered eyes if you have not used safety eyes. Stitch a small triangular nose in the center of the muzzle, then add a curved smile underneath.
For the most balanced result, mark the center of the face before embroidering. Use short stitches and check the expression after every few passes.
Beginner tip: Start with a simple face. Tiny eyes and a short smile usually look clearer on a small plush than complicated facial details.
Common mistake to avoid: Long, loose embroidery strands can catch on fingers or clothing. Secure the thread ends inside the head and trim excess yarn.
Step 8: Make a scarf and add a badge
A simple scarf is an easy way to make your mascot feel personal without changing the basic pattern.
With soft coral yarn, chain 26.
Row 1: Work 1 sc into the second chain from the hook and into each chain across. (25 sts)
Row 2: Ch 1, turn, and work 1 sc into each stitch across. (25 sts)
Fasten off and weave in the ends. Wrap the scarf around the mascot’s neck and secure it with a few small stitches at the back so it cannot slip off easily.
For the badge, use mustard yarn to embroider a small star, heart, or simple initial onto the front of the body. You can also add a small stripe or color detail to represent a club or event. Keep the design simple enough to remain visible on the small surface.
Avoid using a protected team or company logo unless you have the necessary permission.
Beginner tip: Pin the scarf in place before sewing it down. Check that the ends sit naturally and do not cover the face.
Common mistake to avoid: A thick, bulky scarf can hide the neck and make the mascot look top-heavy. Use a narrow strip and secure it lightly.
Pattern Notes and Stitch Notes
Turning chains
The head, body, arms, ears, feet, and muzzle are worked in continuous rounds. You do not need a turning chain or a joining slip stitch at the end of each round. The scarf is worked in rows, so you use a chain 1 to turn at the start of the second row.
Stitch counts
The numbers in parentheses show the total stitches after each round. Count the stitches before beginning the next round, particularly after increases and decreases.
If your stitch count is wrong, correct it before moving forward. Adding an extra stitch early can make the head or body uneven later.
Right side and wrong side
The right side of amigurumi usually has a neat, consistent stitch texture. Keep the right side facing outward as you crochet and stuff the pieces. If the fabric begins to curl in the wrong direction, gently turn the piece back so the right side is on the outside.
Size adjustments
The finished size will depend on your yarn, hook, and tension. To make a smaller mascot, use finer yarn and a smaller hook while keeping the stitch counts the same. To make a larger mascot, use thicker yarn and an appropriately sized hook.
Remember that a larger mascot will need more stuffing and stronger, more secure seams.
Common Beginner Mistakes
1. Visible gaps between stitches. Use a smaller hook or tighten your tension slightly. The fabric should be dense enough to keep stuffing inside.
2. Losing track of the first stitch. Place a stitch marker in the first stitch of every round and move it up as you work.
3. An uneven head. Check that the increases and decreases are distributed evenly. Add stuffing in small amounts and shape the head with your fingers.
4. A lumpy body. Spread the stuffing into the bottom and sides instead of pushing one large clump into the center.
5. Arms or ears that do not match. Make both pieces in the same sitting when possible. Compare their size before sewing them onto the mascot.
6. A crooked face. Mark the center line of the head and temporarily position the muzzle and eyes before embroidering or sewing them.
7. Loose seams. Use small, consistent sewing stitches and secure the yarn ends inside the plush. Check every attached piece gently before finishing.
How to Customize Your Crochet Mascot
The basic pattern can become many different characters with just a few small changes.
- Change the yarn colors: Choose school colors, club colors, favorite shades, or a simple neutral palette. Keep the head and body in one main color for a coordinated look.
- Change the expression: Embroider a cheerful smile, a small surprised mouth, or a sleepy expression using short, secure stitches.
- Add a scarf or collar: A narrow strip of single crochet is easy to customize and can be made in one or two colors.
- Try different ears: Make smaller rounded ears, longer ears, or a little top tuft to change the character’s silhouette.
- Add a badge: Embroider a heart, star, initial, or simple geometric shape onto the body.
- Make a larger plush: Use thicker yarn and a hook that produces a dense fabric. Keep the proportions consistent and increase the stuffing as needed.
- Use it as a gift: A personalized mascot can be a thoughtful present for a team member, a school celebration, a handmade gift exchange, or a small business event.
For a keychain or bag charm, attach a suitable ring through a securely reinforced loop at the top of the head. Check that the attachment is firm and that the hardware cannot easily detach.
Finishing Instructions
Before calling your mascot finished, check the seams and make sure the head sits upright. Add a little more stuffing only if you can do so without stretching the stitches or creating a hard lump.
Weave in all loose yarn ends with a tapestry needle, passing the needle through several stitches on the inside of the piece before trimming the excess. Avoid cutting too close to the fabric.
You generally do not need to block a small stuffed amigurumi toy. Instead, shape it gently with your hands and adjust the position of the feet, arms, ears, and scarf.
Follow the care instructions for your yarn. If the label recommends gentle washing, use that guidance and allow the mascot to dry thoroughly before storing it. Avoid harsh heat that could distort synthetic fibers or damage embellishments. The Craft Yarn Council’s care-symbol guide explains common washing and drying symbols found on yarn labels.
Welcome to the Craft Yarn Council
For toys intended for young children, avoid detachable eyes, buttons, loose decorations, and poorly secured hardware. Small parts can present a choking hazard, and children’s toys may be subject to specific safety requirements. Embroidered features reduce the use of hard components, but secure construction is still essential.
Quick Printable-Style Summary
- Skill level: Beginner with basic crochet knowledge
- Finished size: Approximately 12–14 cm, depending on yarn and tension
- Materials: Worsted-weight yarn, 3.5 mm hook, stuffing, tapestry needle, scissors, stitch marker, embroidery thread
- Stitches: Magic ring, chain, single crochet, increase, decrease, slip stitch
- Starting method: Magic ring with 6 single crochet stitches
- Head: Increase to 30 stitches, work even rounds, then decrease gradually
- Body: Increase to 24 stitches, work even rounds, then taper to 12 stitches at the top
- Assembly: Sew the head, arms, feet, ears, and muzzle securely
- Finishing: Embroider the face, add a scarf or badge, weave in ends, and check all seams
Frequently Asked Questions
1. Is this crochet mascot plush pattern suitable for beginners?
Yes. The pattern uses basic amigurumi techniques, including single crochet, increases, decreases, stuffing, and sewing. If you are new to working in continuous rounds, practice the magic ring and a small circle before starting the head.
2. How long does it take to crochet a mascot plush?
Allow approximately two to four hours for your first mascot. The actual time depends on your crochet speed, yarn choice, and how much detail you add to the face and accessories. A second mascot will often take less time because the construction becomes familiar.
3. Can I use plush or chenille yarn?
Yes, but smooth worsted-weight yarn is easier for a first project because you can see each stitch. Chenille yarn creates a softer, fluffier mascot, but it can make increases, decreases, and stitch counting harder to see. Practice with smooth yarn first if you are not comfortable working with plush yarn.
4. How do I stop the stuffing from showing?
Use a smaller hook if your stitches leave gaps. Keep your tension even and add stuffing gradually. If you can clearly see the stuffing between the stitches, change to a smaller hook or adjust your tension before continuing.
5. Can I make this mascot in my team’s colors?
Absolutely. Change the main yarn, scarf, and badge colors to suit your team, school, club, or event. The same basic shape works with many color combinations. For a polished result, choose two or three complementary colors and keep the facial features simple.
6. Can I sell finished mascot plushies made from this tutorial?
This article provides an original basic design. If you sell finished toys, make sure your materials, construction, labeling, and intended use meet the requirements applicable in your location. Avoid protected logos or branded characters unless you have permission. Requirements for toys intended for young children can be particularly important.
7. Can I make the mascot safe for a young child?
Use embroidered facial features instead of detachable plastic eyes or buttons, secure the seams and all decorative elements, and inspect the toy regularly. However, embroidered features alone do not establish that a toy is safe for an infant or toddler. Toys intended for very young children may be subject to specific safety standards and testing requirements.
U.S. Consumer Product Safety Commission +1
Conclusion
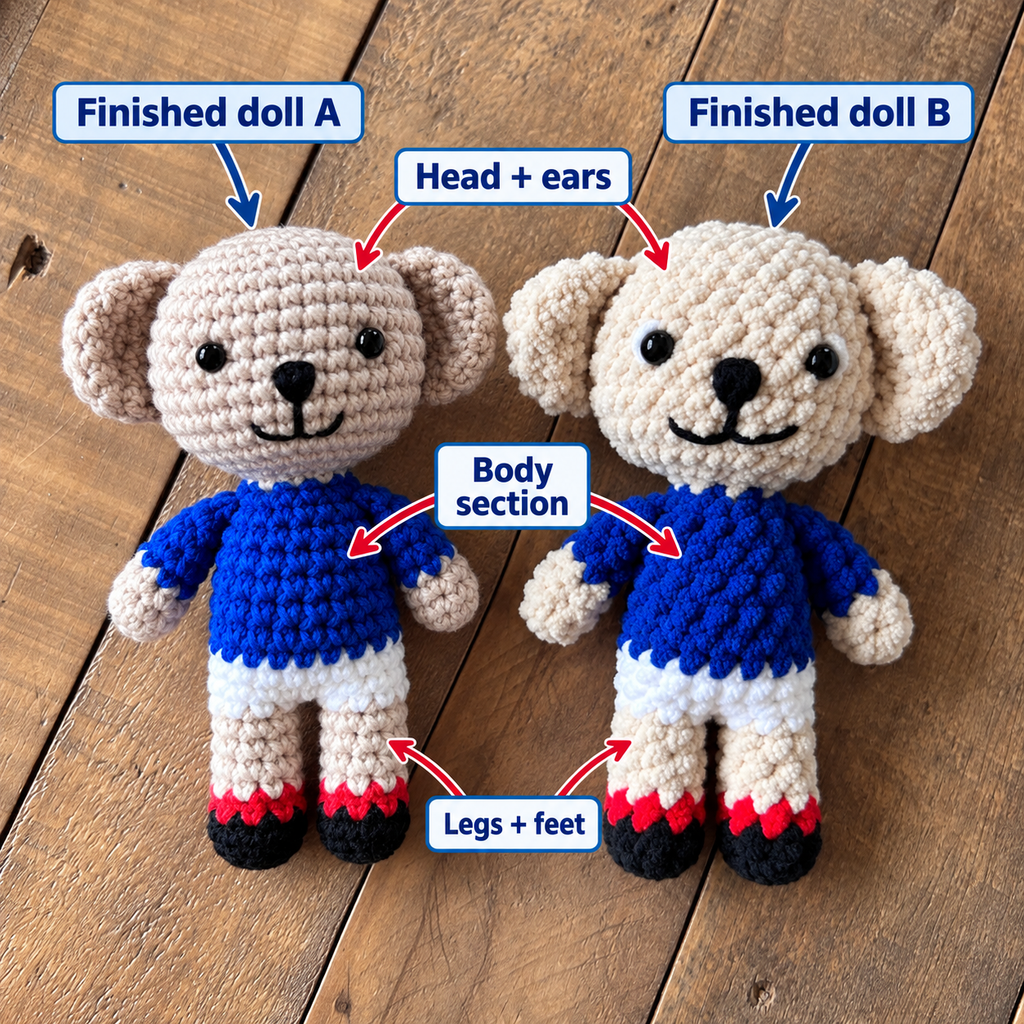
Making a crochet mascot plush is a practical way to learn amigurumi shaping while creating something personal. With a rounded head, tapered body, small arms, folded ears, and a simple embroidered face, you can make a recognizable character without complicated stitches.
Take your time with stitch counts, keep your stuffing even, and position the pieces before sewing them permanently. Once you understand the basic construction, experiment with colors, scarves, badges, and different expressions to give each mascot its own personality.
Save this tutorial for your next crochet session, and consider making a matching mini mascot for a friend, team member, or handmade gift collection.





