
Crochet alphabet letters can turn an ordinary handmade project into something personal. A single initial can decorate a tote bag. A short name can become nursery bunting. A complete alphabet can become a classroom wall hanging, learning blanket, or set of soft letter panels.
The difficulty is not usually making the crochet stitches. It is keeping every letter the same size, placing the color changes correctly, and making curved or diagonal letters readable.
This beginner-friendly crochet alphabet letters pattern solves those problems with a simple system: every letter is drawn on a compact 5 × 7 grid, centered inside a 9 × 9 mini corner-to-corner panel. Each square on the chart becomes one small crochet tile. You use cream tiles for the background and teal tiles for the letter.
You will begin with a small practice swatch, learn how to increase and decrease mini C2C rows, practice a clean color change, and then crochet any uppercase letter from A to Z. The article includes an original compact glyph key rather than reproducing another designer’s alphabet pattern.
What You’ll Learn
- How a crochet letter is converted into a pixel graph
- How to make a mini C2C tile with half double crochet
- How to increase and decrease a square panel
- How to introduce the letter color cleanly
- How to read the graph in diagonal rows
- How to manage multiple yarn bobbins
- How to keep every letter panel the same size
- How to block and join finished letters
- How to use the panels for names, banners, blankets, and wall art
Materials You’ll Need
- Smooth worsted-weight #4 yarn in a background color
- Smooth worsted-weight #4 yarn in a contrasting letter color
- Optional third accent color
- 5.0 or 5.5 mm crochet hook
- Scissors
- Blunt tapestry needle
- Locking stitch markers
- Small yarn bobbins or clothespins
- Graph paper and pencil
- Ruler or measuring tape
- Blocking mat
- Rustproof T-pins
- Optional steamer suitable for the chosen yarn fiber
Choose smooth yarn rather than eyelash, chenille, boucle, or heavily textured yarn. Clean stitch definition makes each small tile visible and helps the letter retain crisp edges. The Craft Yarn Council places most worsted-weight yarn in category #4 and gives 4.5–5.5 mm as a typical crochet-hook range, although the correct hook is always the one that produces the fabric you need
Crochet Abbreviations Used
- ch = chain
- hdc = half double crochet
- sc = single crochet
- sl st = slip stitch
- st/sts = stitch/stitches
- rep = repeat
- CC = contrasting color
- MC = main or background color
- C2C = corner to corner
- RS = right side
- WS = wrong side
These instructions use standard US crochet terminology. In UK terminology, the US half double crochet is called a half treble crochet. The Craft Yarn Council maintains a standardized crochet-abbreviation list and a US/UK term comparison.
Before You Start
Gauge and finished size
Exact gauge is not essential when you are making one independent initial. It becomes important when several panels will be joined together.
Make a small mini C2C practice swatch and measure the width of three tiles. Then use the same yarn, hook, and tension for every letter.
A 9 × 9 panel made with worsted-weight yarn and a 5.5 mm hook will generally produce a small decorative square, but the exact measurement depends on your yarn and tension. Record the measurement of your first blocked panel and match every later panel to it.
How to count C2C tiles
Each small block is one tile or pixel. In this tutorial, one tile contains:
- A chain-2 space
- Three half double crochet stitches
Do not count the three half double crochets as three chart squares. The complete group is one chart square.
How to keep the edges straight
At the beginning of an increasing row, make a new tile before joining it to the previous row.
At the beginning of a decreasing row, do not make that new edge tile. Slip stitch across the existing edge tile until you reach its chain space, then begin the first working tile.
Missing this distinction is the most common reason a square becomes a trapezoid.
How to avoid curling
Keep the chain-2 spaces relaxed. If they are much tighter than your half double crochet stitches, the fabric can cup.
A slightly smaller hook can create crisp letters, but going too small makes the panel stiff and difficult to block. Practice until the tiles are compact but still flexible.
Choosing colors
Select two colors with strong value contrast. A dark teal letter on a cream background will be easier to read than a pale aqua letter on white.
Photograph the yarn in grayscale before beginning. When the two colors still look different in grayscale, the contrast is usually strong enough for a readable letter.
Reading the graph
The original letter key later in this article uses:
Xfor the letter color.for the background color
Each glyph is five squares wide and seven squares tall. To create a 9 × 9 panel:
- Add one complete background row above the glyph.
- Add one complete background row below it.
- Add two background squares to the left of every glyph row.
- Add two background squares to the right of every glyph row.
Step-by-Step Crochet Tutorial
Step 1: Prepare Your Letter Chart
Choose the letter you want to make from the original glyph key below.
Copy its seven rows onto graph paper. Add the top, bottom, left, and right background margins to produce a 9 × 9 square.
For example, the original 5 × 7 letter A is:
.XXX.
X...X
X...X
XXXXX
X...X
X...X
X...X
After adding the background border, your working grid becomes:
.........
...XXX...
..X...X..
..X...X..
..XXXXX..
..X...X..
..X...X..
..X...X..
.........
Use one pencil color for the background and another for the letter. Draw diagonal guide lines across the chart and number them from 1 through 17. A 9 × 9 C2C square has nine increasing diagonal rows followed by eight decreasing rows.
Beginner tip: Mark each completed chart square with a light pencil tick. A magnetic pattern board or removable highlighter tape can also help you track the active diagonal.
Common mistake to avoid: Do not read the graph in ordinary horizontal rows while crocheting C2C. The fabric grows diagonally, so each crochet row crosses a diagonal line of chart squares.
Step 2: Crochet the First Mini C2C Tile
Using the background color, make a slip knot.
- Chain 5.
- Work one half double crochet in the third chain from the hook.
- Work one half double crochet in each of the final two chains.
You now have one mini C2C tile containing three half double crochets and a chain-2 space.
This is diagonal Row 1.
Beginner tip: Place a locking stitch marker in the chain-2 space. It helps you distinguish the chain space from the tops of the half double crochet stitches.
Common mistake to avoid: Working into the second chain rather than the third chain leaves only a chain-1 space. That changes the tile structure and can make later joins difficult.
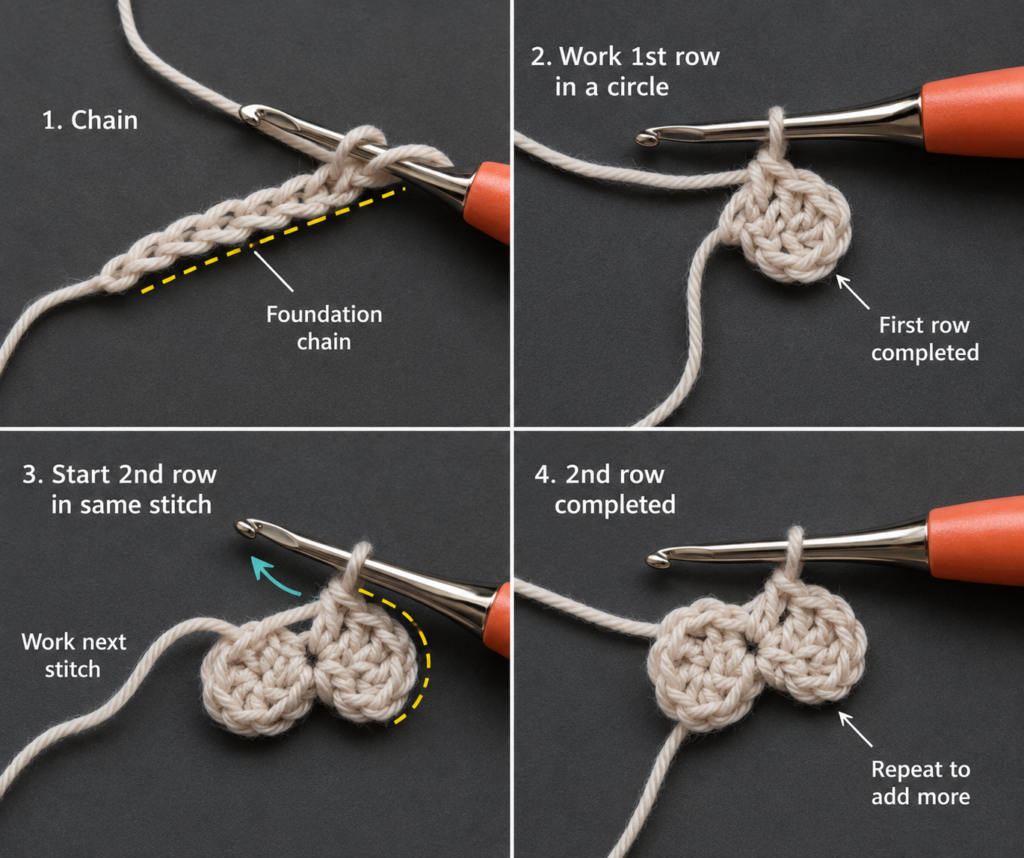
Step 3: Increase the Diagonal Rows
To begin diagonal Row 2:
- Chain 5.
- Work one hdc in the third chain from the hook.
- Work one hdc in each of the next two chains.
- Turn or flip the new tile toward the first tile.
- Slip stitch into the first tile’s chain-2 space.
- Chain 2.
- Work 3 hdc into that same chain-2 space.
You now have two connected tiles.
For the next increasing row:
- Chain 5.
- Work 3 hdc across the final three chains.
- Turn the new tile.
- Slip stitch into the next available chain-2 space.
- Chain 2 and work 3 hdc into that space.
- Continue joining and making tiles across the row.
Each increasing row contains one more tile than the previous row:
- Row 1: 1 tile
- Row 2: 2 tiles
- Row 3: 3 tiles
- Continue to Row 9: 9 tiles
Beginner tip: Count the tiles before starting every new row. Correcting a missed tile is much easier immediately than several rows later.
Common mistake to avoid: Do not work the joining slip stitch into the top loops of an hdc. Insert it into the open chain-2 space between tile groups.

Step 4: Change Colors for the Letter
When the next graph square changes from background to letter color, change yarn during the final half double crochet of the current tile.
To make a clean change:
- Yarn over with the current color.
- Insert the hook and pull up a loop.
- Yarn over with the current color and pull through the first two loops.
- Before completing the stitch, drop the current color.
- Place the new color over the hook.
- Pull the new color through the remaining loops.
- Use the new color for the next chain 2 and tile.
Changing color before the stitch is completely finished gives the next tile a cleaner color edge. The selected website’s companion tutorial also demonstrates changing color on the last portion of the active stitch rather than after the tile is finished.
Beginner tip: Gently tighten both yarns after changing color, but do not pull hard enough to shrink the edge of the tile.
Common mistake to avoid: If you finish the complete tile in cream and only attach teal afterward, a cream loop may appear along the top of the first teal tile.
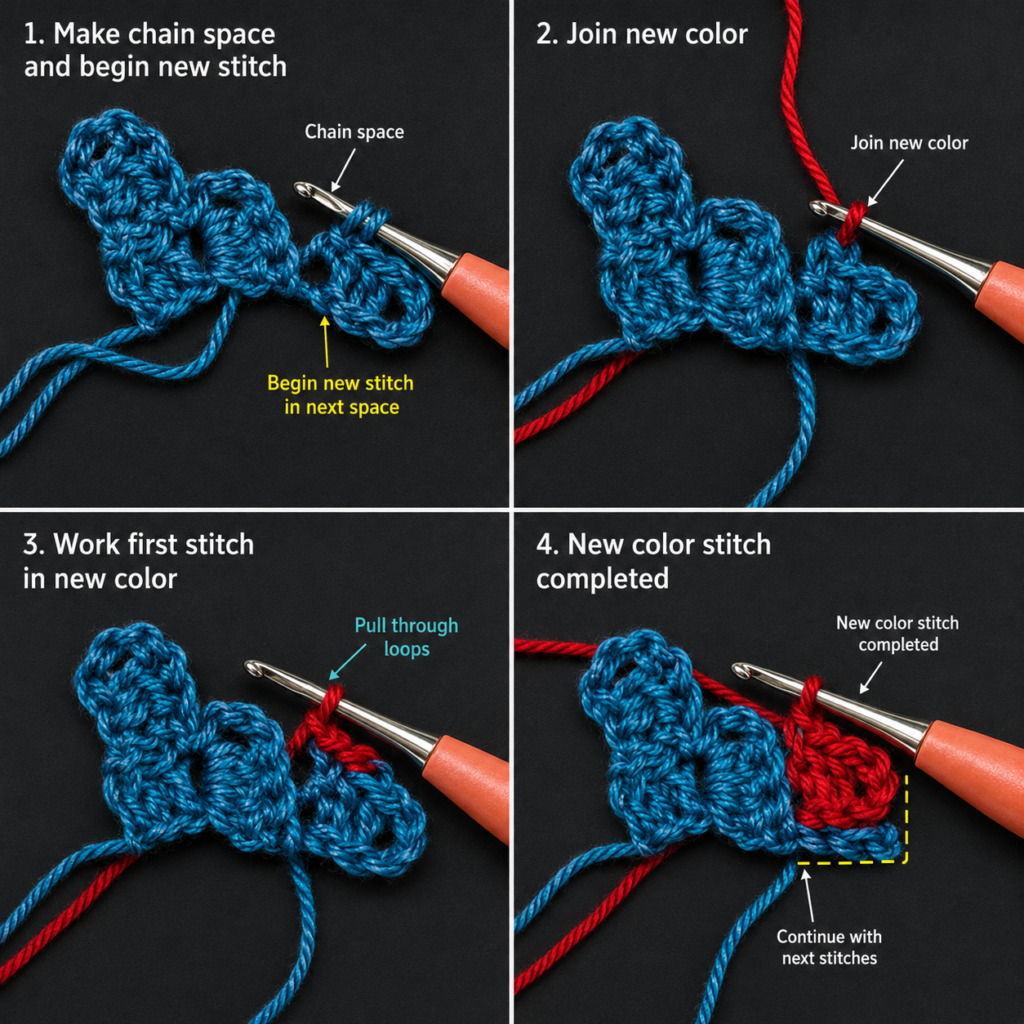
Step 5: Follow the Letter Chart One Diagonal at a Time
Lay the chart beside your work with the starting corner oriented correctly.
For each diagonal:
- Count the chart squares in that diagonal.
- Note the color of every square.
- Crochet one tile for every square.
- Change color before the first tile of a new color section.
- Mark the diagonal complete.
- Turn the work and read the following diagonal in the opposite direction.
Because the work turns after every row, the graph-reading direction alternates. One diagonal may be read from lower left to upper right; the following diagonal will be read from upper right to lower left.
Do not worry when the letter looks backward from the working side. Turn the panel so the chosen right side faces you before evaluating the finished letter.
Beginner tip: Write a small arrow beside every graph diagonal. This prevents accidentally reading two consecutive rows in the same direction.
Common mistake to avoid: Do not judge the letter too early. The shape often looks abstract until more than half of the colored tiles are complete.
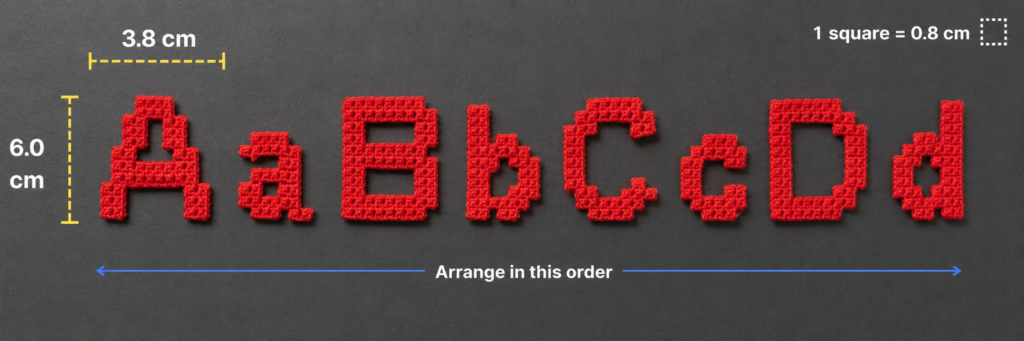
Step 6: Manage Separate Color Sections
Some letters contain separated color areas in the same diagonal row. The letter A, for example, may have a teal tile on one side, several cream tiles in the center, and another teal tile on the opposite side.
Carrying one teal strand behind a large cream area can create:
- Visible floats
- Tight fabric
- Dark color showing through the background
- Tangled strands
- Uneven tension
Use a separate bobbin for a distant color section.
Attach each bobbin only where needed. Keep it close to its active section and turn the work carefully after every row.
You may carry yarn beneath one adjacent tile when the color will be needed immediately again. Avoid carrying it under several light-colored tiles.
Beginner tip: Arrange the bobbins in the same left-to-right order as the active sections before beginning each diagonal row.
Common mistake to avoid: Do not turn the panel repeatedly in the same direction. Alternate the direction in which you turn the work to reduce twisting.
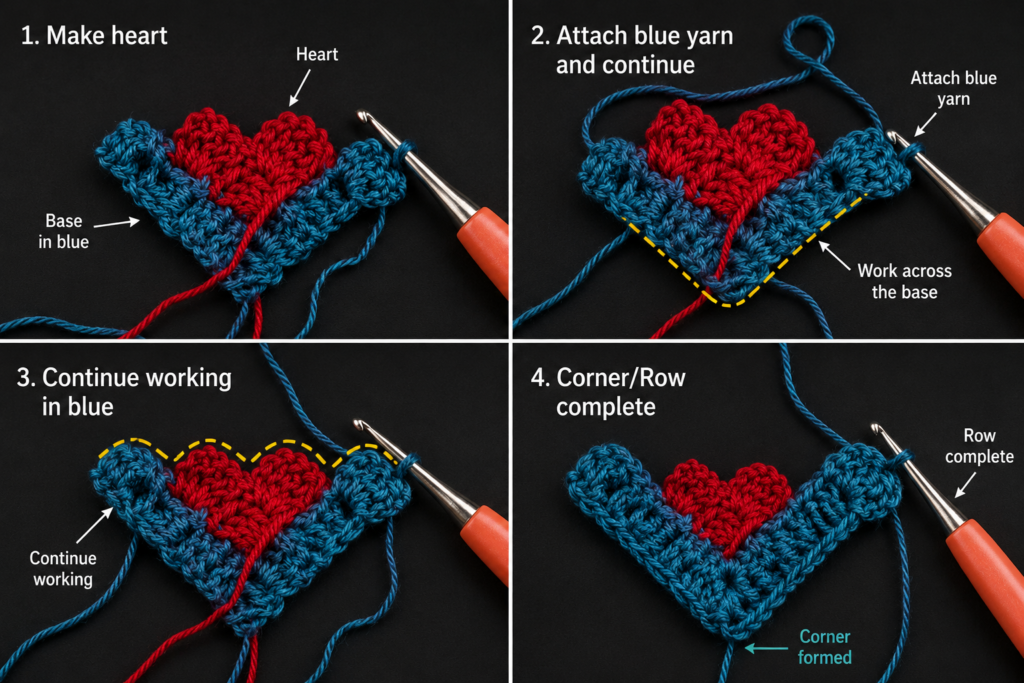
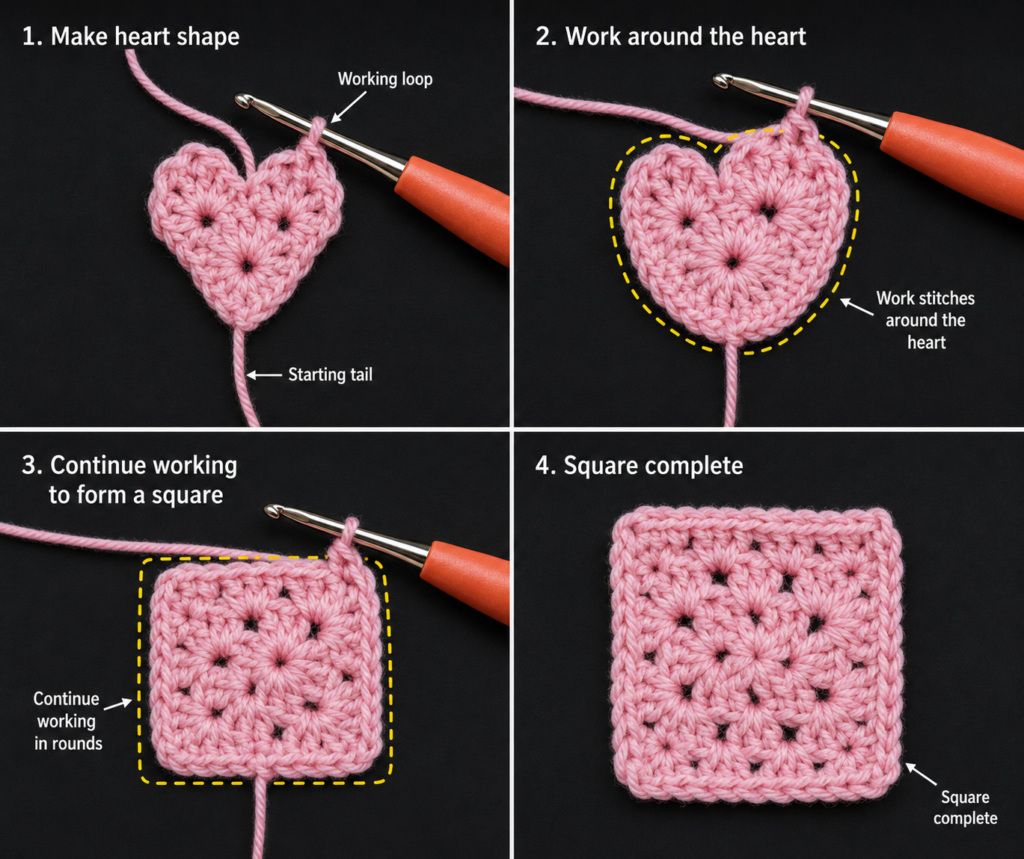
Step 7: Decrease to Complete the Square
After completing diagonal Row 9, the panel has reached its maximum width. Begin decreasing on both edges.
At the beginning of the next row:
- Turn the work.
- Do not chain 5.
- Slip stitch across the three hdc stitches of the edge tile.
- Slip stitch into its chain-2 space.
- Chain 2.
- Work 3 hdc into that chain space.
- Continue across the row as usual.
- Stop before making a new tile beyond the opposite edge.
Each row now contains one fewer tile:
- Row 10: 8 tiles
- Row 11: 7 tiles
- Row 12: 6 tiles
- Continue to Row 17: 1 tile
Fasten off after the final tile.
Beginner tip: Place a marker in both outside corners when you begin decreasing. The markers make it easier to see where the panel edges should end.
Common mistake to avoid: A chain 5 at the beginning of a decreasing row creates an unwanted extra tile and prevents the square from narrowing.
Step 8: Weave In the Ends
Turn the panel to the wrong side.
Thread each yarn tail through a tapestry needle. Weave it through the dense base of several matching-color stitches. Change direction once and weave through another short section.
Avoid pulling the tail straight across an open chain space. It may become visible from the front.
Trim the end only after checking that the yarn remains secure when the fabric is stretched gently.
For washable projects, leave a slightly longer woven path than you would for a decorative wall hanging.
Original 5 × 7 Crochet Alphabet Glyph Key
These compact uppercase glyphs were created for this tutorial. Each line contains seven horizontal rows separated by /.
Use X for the letter color and . for the background.
A  .XXX./X...X/X...X/XXXXX/X...X/X...X/X...X
B  XXXX./X...X/X...X/XXXX./X...X/X...X/XXXX.
C  .XXXX/X..../X..../X..../X..../X..../.XXXX
D  XXXX./X...X/X...X/X...X/X...X/X...X/XXXX.
E  XXXXX/X..../X..../XXXX./X..../X..../XXXXX
F  XXXXX/X..../X..../XXXX./X..../X..../X....
G  .XXXX/X..../X..../X.XXX/X...X/X...X/.XXX.
H  X...X/X...X/X...X/XXXXX/X...X/X...X/X...X
I  XXXXX/..X../..X../..X../..X../..X../XXXXX
J  ..XXX/....X/....X/....X/....X/X...X/.XXX.
K  X...X/X..X./X.X../XX.../X.X../X..X./X...X
L  X..../X..../X..../X..../X..../X..../XXXXX
M  X...X/XX.XX/X.X.X/X.X.X/X...X/X...X/X...X
N  X...X/XX..X/XX..X/X.X.X/X..XX/X..XX/X...X
O  .XXX./X...X/X...X/X...X/X...X/X...X/.XXX.
P  XXXX./X...X/X...X/XXXX./X..../X..../X....
Q  .XXX./X...X/X...X/X...X/X.X.X/X..X./.XX.X
R  XXXX./X...X/X...X/XXXX./X.X../X..X./X...X
S  .XXXX/X..../X..../.XXX./....X/....X/XXXX.
T  XXXXX/..X../..X../..X../..X../..X../..X..
U  X...X/X...X/X...X/X...X/X...X/X...X/.XXX.
V  X...X/X...X/X...X/X...X/.X.X./.X.X./..X..
W  X...X/X...X/X...X/X.X.X/X.X.X/XX.XX/X...X
X  X...X/.X.X./..X../..X../..X../.X.X./X...X
Y  X...X/.X.X./..X../..X../..X../..X../..X..
Z  XXXXX/....X/...X./..X../.X.../X..../XXXXX
Pattern Notes
- Every glyph is five tiles wide and seven tiles tall.
- Add one background row above and below.
- Add two background tiles on each side.
- The completed graph is 9 × 9 tiles.
- A 9 × 9 C2C square contains 81 tiles.
- The square uses 17 diagonal rows.
- Rows 1–9 increase.
- Rows 10–17 decrease.
- The chain 2 at the beginning of a tile forms its joining space.
- Turning chains are structural and are not separate graph pixels.
- Choose one side as the right side and keep that orientation consistent when joining letters.
- Block every panel to the same dimensions before assembly.
Common Beginner Mistakes
1. Reading horizontal graph rows
Problem: The colors appear in the wrong order.
Fix: Number the diagonal rows and alternate the reading direction after every row.
2. Changing color after finishing the tile
Problem: A loop of the old color appears at the top of the new tile.
Fix: Introduce the new color during the final yarn-over of the last stitch before the color change.
3. Carrying dark yarn across a large cream section
Problem: The dark strand shows through or pulls the panel inward.
Fix: Use separate yarn bobbins for distant color sections.
4. Adding a tile during the decrease section
Problem: The panel remains wide or develops a step on one edge.
Fix: Slip stitch across the edge tile at the start of every decreasing row instead of chaining 5.
5. Tight chain spaces
Problem: The panel curls or the tiles are difficult to join.
Fix: Make each chain 2 slightly more relaxed than the working loops on the hook.
6. Inconsistent panels
Problem: Some letters are larger than others.
Fix: Use the same yarn, hook, tile recipe, and blocked measurement for the entire set.
7. Evaluating the panel before blocking
Problem: A readable letter looks distorted or the edges appear uneven.
Fix: Finish the ends and block the panel before deciding whether it needs to be remade.
How to Customize This Crochet Project
Change the yarn weight
Use sport or DK yarn with a smaller hook for compact appliqué-style panels.
Use bulky yarn and a larger hook for oversized classroom letters, floor cushions, or wall décor.
Always make one complete test panel before purchasing yarn for the full alphabet.
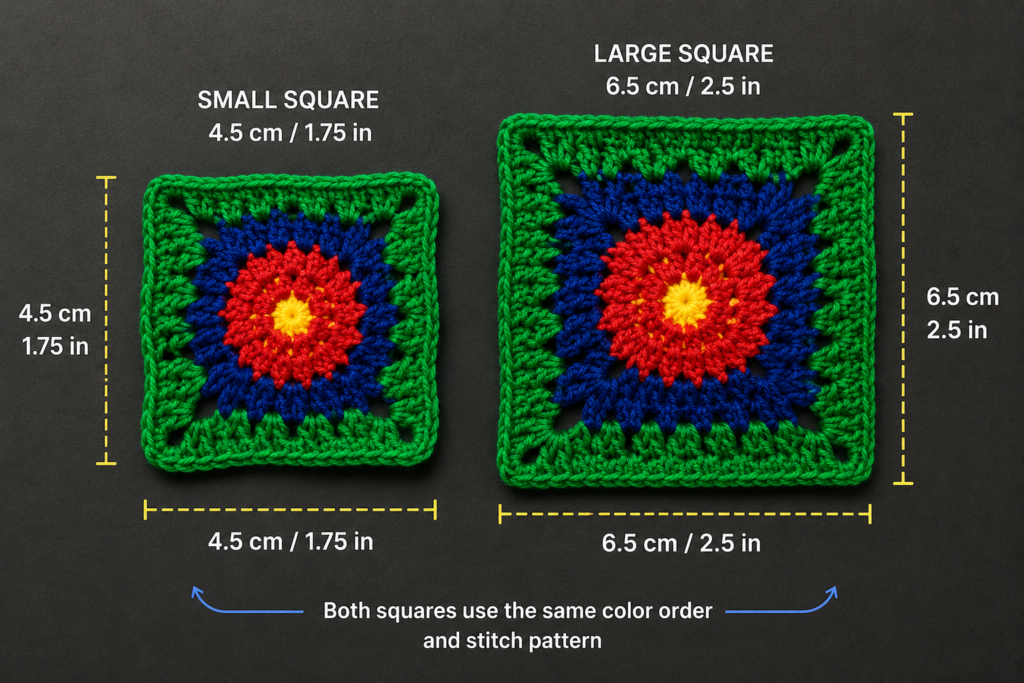
Change the panel size
For less background around each letter, place the 5 × 7 glyph inside a 7 × 9 grid by adding one background tile on each side.
For more negative space, center it inside an 11 × 11 grid.
Do not enlarge a letter merely by changing each X into a block of four tiles unless you are prepared for a much larger project. Doubling both dimensions multiplies the total tile count substantially.
Use several letter colors
Try:
- One color family from light to dark
- A rainbow alphabet
- School colors
- Pastel nursery colors
- Seasonal combinations
- A different color for vowels
- One accent color for the first letter of a name
Keep the background consistent if the panels will be joined.
Add a border
A single crochet border can make individual panels easier to sew together.
Work one round of sc around the blocked square. Place approximately one or two stitches along each tile edge as needed to keep the border flat. Work three sc in each corner.
Count the border stitches on the first panel and repeat that count on every later panel.
Add texture
Use ordinary mini C2C tiles for the background and surface crochet around the completed letter.
You can also embroider small flowers, stars, dots, or leaves onto selected panels after blocking.
Avoid highly raised decorations on a baby blanket because they can snag during washing or use.
Project and gift ideas
- Baby-name blanket
- Nursery wall hanging
- Classroom alphabet display
- Birthday bunting
- Initial pillow
- Monogram tote
- Library reading corner banner
- Personalized storage-basket labels
- Holiday word garland
- Teacher gift
- Family-name wall art
- Soft spelling-game panels
For a child’s learning set, avoid adding unsecured magnets, buttons, beads, or other small detachable pieces.
Finishing Instructions
Fasten off
After completing the final tile, cut the yarn with a tail at least 6 inches long. Pull the tail through the active loop and tighten gently.
Weave in the ends
Weave each tail through stitches of the same color on the wrong side. Change direction once. Avoid placing a teal tail behind cream stitches where it could show through.
Block the panel
Check the yarn label before using heat or steam.
For acrylic yarn, place the panel on a blocking mat and pin it to the target dimensions. Keep any steamer above the surface rather than pressing it directly against the yarn. Excessive heat can permanently flatten or damage synthetic fibers.
For cotton, lightly wet the panel, press out excess moisture in a towel, pin it square, and allow it to dry completely.
The Craft Yarn Council recommends following the care information supplied on the yarn label; including that label with a handmade gift also helps the recipient care for it correctly.
Join several panels
Arrange all blocked letters on a large flat surface before joining. Confirm:
- The spelling
- Letter orientation
- Right-side direction
- Panel order
- Color placement
- Equal spacing
For a flat join, place two panels side by side with right sides facing upward. Use matching background yarn and mattress stitch through corresponding edge loops.
Work several stitches loosely, then pull the joining yarn gently so the edges meet. Do not pull so tightly that the seam puckers.
The selected reference project also uses blocking before joining separate C2C sections, and its companion mattress-stitch tutorial shows how alternating between corresponding edge loops closes the seam.
Washing and care
Wash according to the yarn label.
Acrylic and many cotton-acrylic blends are practical for frequently handled classroom or children’s projects. Place small appliqués or delicate banners inside a laundry bag. Lay flat or reshape after washing when necessary.
Store the unused yarn label with the finished project so you retain the fiber, dye-lot, and care information.
Quick Printable-Style Summary
Skill level: Confident beginner
Project: Modular uppercase crochet alphabet panels
Yarn: Smooth worsted-weight #4 yarn in background and letter colors
Hook: 5.0–5.5 mm
Stitches: Chain, slip stitch, half double crochet, optional single crochet
Tile recipe: Chain 2 plus 3 half double crochet stitches
Letter grid: 5 × 7 glyph
Finished working graph: 9 × 9 tiles after adding the background border
Starting method: Chain 5; hdc in the third, fourth, and fifth chains
Increasing rows: Diagonal Rows 1–9
Decreasing rows: Diagonal Rows 10–17
Color change: Introduce the new color during the final yarn-over of the preceding tile
Finishing: Fasten off, weave in ends, block square, then join or attach
FAQ
Can a complete beginner crochet alphabet letters?
A new crocheter should first be comfortable making chains, half double crochet stitches, and slip stitches. Practice a plain mini C2C square before introducing letter color changes. After the basic tile becomes familiar, the alphabet panels are manageable.
What is the easiest way to crochet letters?
Pixel-based methods are among the most systematic because each chart square corresponds to one repeatable crochet unit. Mini C2C creates a flexible fabric and allows letters to be planned on ordinary graph paper.
Can I use single crochet instead of C2C?
Yes. Use each chart square as one or more single crochet stitches. Tapestry crochet produces a denser, flatter panel, but the width-to-height proportions may differ. Make a swatch and adjust the graph if necessary.
How can I make smaller crochet letters?
Use DK, sport, or fingering-weight yarn with an appropriately smaller hook. You can also remove some background border tiles, but keep the 5 × 7 letter itself intact or readability may suffer.
Why does my letter look backward?
C2C panels are turned after each diagonal row. You may be viewing the wrong side or using the graph from the opposite starting corner. Choose the preferred front after finishing, then position every later panel the same way.
Should I cut the yarn at every color change?
Not always. Carry yarn across one nearby tile when it will be needed immediately and will not show. For separated sections or long gaps, use independent bobbins. Cutting after every tile creates many unnecessary ends.
Do crochet letters need blocking?
Blocking is strongly recommended when letters will be joined, displayed, or attached in a straight line. It evens the edges, corrects minor distortion, and helps all panels reach matching dimensions.
Conclusion
A crochet alphabet becomes much easier when every letter follows the same grid, tile size, border, and finishing process. Start with one letter rather than the complete alphabet. Practice the first tile, make a small plain square, and then try an uncomplicated letter such as I, L, T, or U.
Once the chart-reading rhythm feels natural, move to letters with separated sections, such as A, M, N, R, or W. Keep your first blocked panel nearby as a size reference for the rest of the set.
The finished letters can remain as individual panels, form a short name banner, or grow into a complete alphabet sampler.





