A classroom does not need expensive decorations to feel cheerful, creative, and welcoming. A handful of yarn scraps can become something much more personal: a row of handmade crochet apples hanging above a reading corner, bulletin board, teacher desk, classroom door, or supply shelf.
This easy crochet apple classroom garland is designed for crocheters who already know—or are ready to learn—a few basic stitches. Each apple begins as a simple circle worked from a magic ring. A final shaping round creates the recognizable apple outline, then a tiny stem and leaf complete the motif. Make five apples, attach them to a long crochet chain, and you have a reusable classroom decoration that can return every school year.
The broader keyword crochet classroom decor patterns can include pencil banners, alphabet bunting, crayons, number garlands, wall hangings, baskets, and seasonal motifs. For this step-by-step tutorial, however, we are focusing on one complete project so that every stage can be explained properly and photographed as a consistent sequence.
The resulting garland is especially suitable for back-to-school displays, reading areas, teacher gifts, fall classroom decorating, library corners, and homeschool spaces.
The Craft Yarn Council describes projects using basic stitches with simple shaping or color work within its lower skill categories, making this type of motif-based project appropriate for an adventurous beginner who is comfortable counting stitches.
What You’ll Learn
By the end of this tutorial, you will know how to:
- Start a flat crochet motif with a magic ring.
- Crochet evenly in joined rounds.
- Increase a circle without excessive ruffling.
- Transform a simple circle into an apple shape.
- Make a small crochet stem.
- Crochet around both sides of a foundation chain to form a leaf.
- Add optional embroidered surface details.
- Sew crochet components together neatly.
- Repeat motifs in a consistent size.
- Crochet a simple hanging cord.
- Space five apples evenly to create classroom bunting.
- Adjust the colors, number of motifs, and finished garland length.
Materials You’ll Need
For one five-apple classroom garland approximately 50–55 inches long, gather:
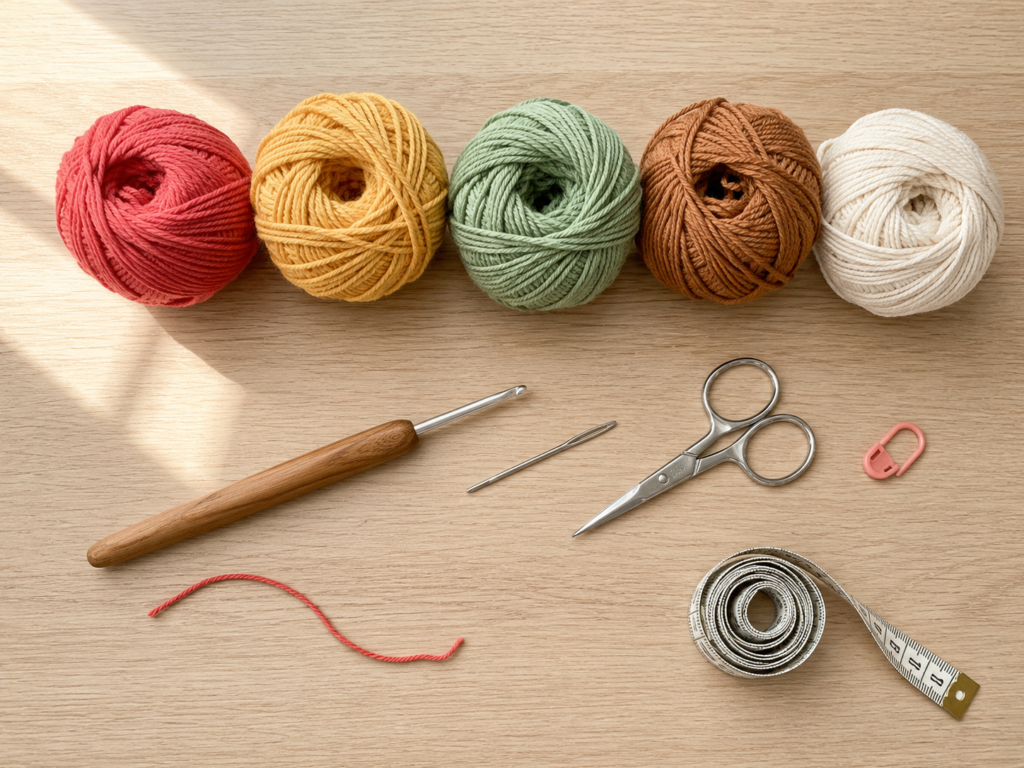
- Approximately 70–90 yards of medium-weight #4 yarn in deep coral red.
- Approximately 45–60 yards of medium-weight #4 yarn in muted golden yellow.
- Approximately 15 yards of sage-green yarn for leaves.
- Approximately 10 yards of warm caramel-brown yarn for stems.
- Approximately 25–35 yards of creamy ivory yarn for the hanging cord and optional decorative highlights.
- 4.0 mm / G-6 crochet hook.
- Tapestry needle.
- Scissors.
- Locking stitch marker, optional.
- Measuring tape.
- Rustproof pins and blocking mat, optional.
Smooth cotton produces crisp stitch definition and a relatively structured motif. A smooth acrylic can also work well. The Craft Yarn Council classifies medium yarn as category #4, although exact thickness and recommended hook sizes can vary among individual yarn products.
For this tutorial, the slightly firm 4.0 mm hook-and-yarn combination helps the apples hold a neat flat shape. Adjust the hook if your individual yarn produces fabric that feels extremely stiff or very loose.
Finished Size
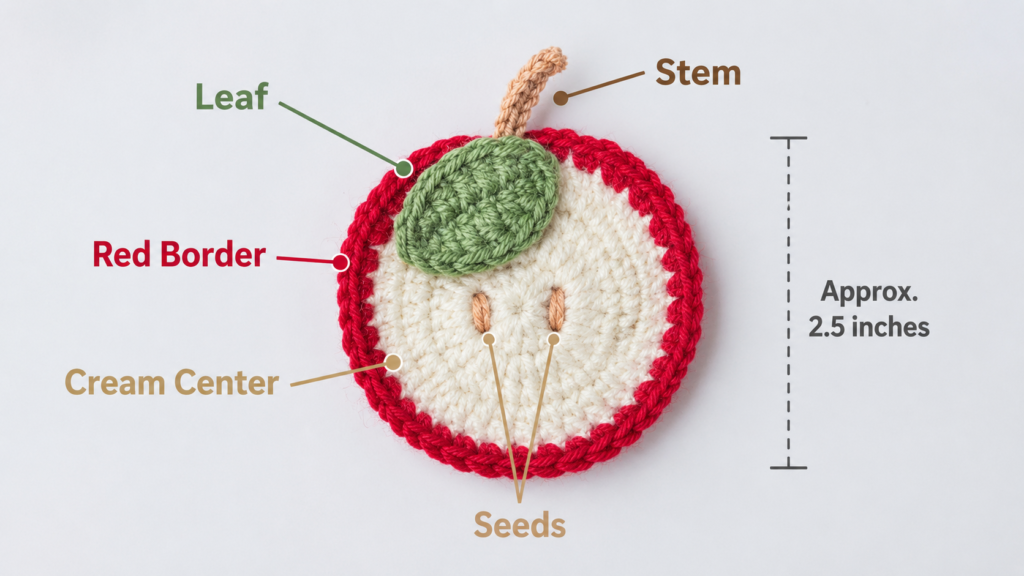
Using medium #4 yarn and a 4.0 mm hook, each apple should measure approximately:
4–4.5 inches / 10–11.5 cm wide
and approximately:
4 inches / 10 cm high including the stem and leaf.
The complete five-apple garland will measure approximately:
50–55 inches / 127–140 cm long
depending on your tension and the number of chains used for the cord.
Exact gauge is not essential because this is a decorative project rather than a fitted garment. The important goal is consistency: all five apples should be approximately the same size.
Crochet Abbreviations Used
This tutorial uses U.S. crochet terminology:
- ch = chain
- sc = single crochet
- hdc = half double crochet
- dc = double crochet
- sl st = slip stitch
- st/sts = stitch/stitches
- rep = repeat
- inc = increase by placing more than one stitch in the same stitch
- MR = magic ring
- rnd/rnds = round/rounds
- RS = right side
- WS = wrong side
The Craft Yarn Council publishes a standardized master list of U.S. crochet abbreviations for commonly used pattern terminology.
Before You Start
Gauge and tension
Exact gauge does not determine whether this decorative garland will fit, but tension still matters.
Aim for stitches that are:
- Firm enough to hold the apple flat.
- Loose enough that your hook enters stitches comfortably.
- Consistent from the first apple through the fifth.
Make the first apple completely before beginning the others. Measure it and use it as your size reference.
How to count stitches
At the top of every crochet stitch, look for a small horizontal V. Each complete V normally represents one stitch.
When a pattern says to place two double crochets in the next stitch, both new stitches enter beneath the same top V.
Count after every round rather than waiting until the apple is finished.
How to avoid excessive curling or ruffling
A small amount of movement in a flat motif is normal before blocking.
However:
- Severe cupping often indicates too few stitches, unusually tight tension, or a tight starting ring.
- Strong ruffling often means too many stitches or unusually loose tension.
Before restarting, place the motif flat and gently smooth it with your fingers. Slight waviness may disappear during finishing.
How to choose classroom-friendly colors
You do not have to make every apple bright red.
A coordinated classroom palette may include:
- Coral red and muted gold.
- Red, green, and cream.
- Rainbow apples.
- School colors.
- Soft neutral apples for a modern classroom.
- Pastels for a nursery or early-years room.
The most polished garlands usually repeat a deliberate palette rather than using every unrelated leftover yarn color.
Beginner note
Complete one test apple from beginning to end first.
Once you are satisfied with its size and shape, make the remaining four using exactly the same:
- Yarn weight.
- Hook size.
- Stitch count.
- Personal tension.
That simple habit makes a repeated-motif garland look much more professional.
U.S./U.K. terminology note
This pattern uses U.S. terms. The U.S. sc, hdc, and dc have different names in standard U.K. terminology, so verify terminology before beginning if you usually follow U.K.-written patterns.
Step-by-Step Crochet Tutorial
Step 1: Start the Apple With a Magic Ring
Choose either coral red or golden yellow for your first apple.
Create a magic ring.
Round 1
Ch 1. Work 10 hdc into the magic ring. Pull the ring closed. Sl st to the first hdc to join. (10 sts)
The beginning chain does not count as a stitch.
Your work should resemble a small flat disc.
Beginner tip:
Before pulling the magic ring completely closed, count your 10 half double crochets. It is easier to identify and recount them while there is still a small opening in the center.
Common mistake to avoid:
Counting the beginning chain as a stitch.
For this tutorial, only the actual half double crochets count toward the stated stitch total.

Step 2: Expand the Flat Apple Base
The next two rounds enlarge your small center into a flat circular base.
Round 2
Ch 1. Work 2 hdc in every stitch around. Sl st to the first hdc. (20 sts)
You are increasing in every stitch.
Round 3
Ch 1. *Hdc in the next st, 2 hdc in the following st.* Repeat from * to * around. Sl st to the first hdc. (30 sts)
Stop and count.
You need exactly 30 stitches before beginning the apple-shaping round.
The piece will still look more like a simple circle than an apple. That is correct. The recognizable shape comes next.
Beginner tip:
Use a stitch marker every five or ten stitches while counting. This prevents you from repeatedly starting the count from zero.
Common mistake to avoid:
Putting both stitches of every increase into separate stitches.
An increase means placing two complete stitches into the same base stitch.
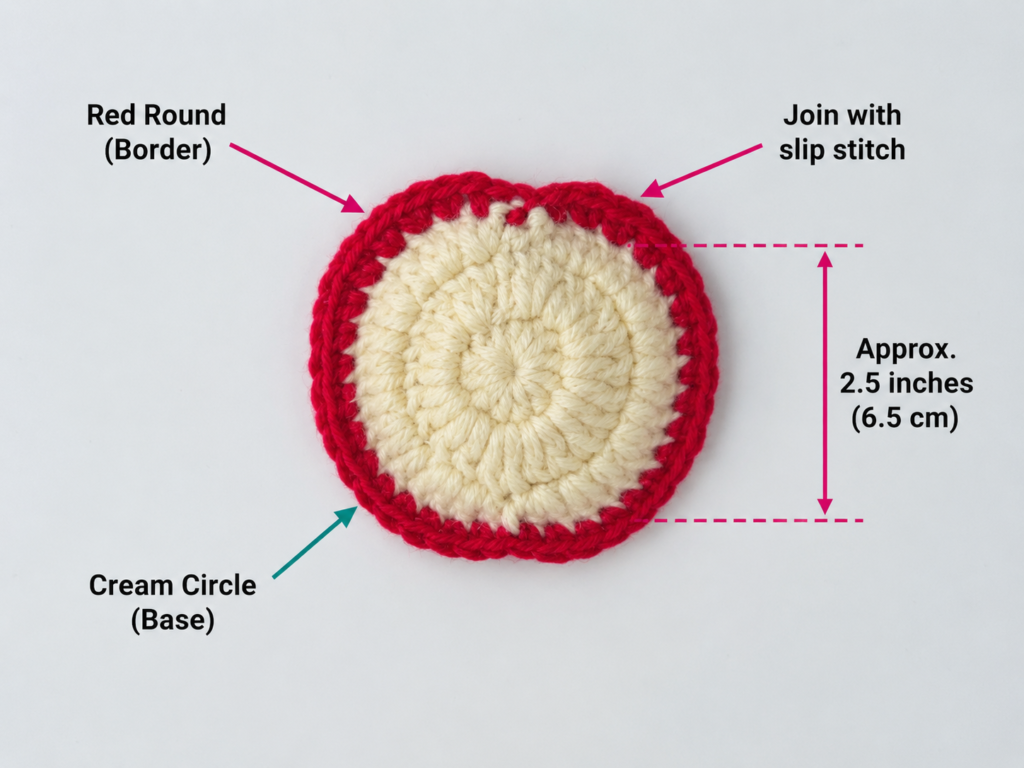
Step 3: Shape the Circle Into an Apple
Now you will change stitch heights around the 30-stitch circle. Taller stitches build fuller sides, while short slip stitches create the upper and lower indentations.
Do not turn.
Shaping Round
Beginning at the top of the apple:
- Sl st in next st.
- Sc in next st.
- Hdc in next 2 sts.
- Dc in next 3 sts.
- 2 dc in each of next 2 sts.
- Dc in next 3 sts.
- Hdc in next 2 sts.
- Sc in next st.
- Sl st in next st.
You have reached the lower center.
Continue around the opposite side:
- Sc in next st.
- Hdc in next 2 sts.
- Dc in next 3 sts.
- 2 dc in each of next 2 sts.
- Dc in next 3 sts.
- Hdc in next 2 sts.
- Sc in next st.
- Sl st in the final st.
Join neatly to the beginning and fasten off, leaving a tail long enough to weave in.
Place the apple on a flat surface and gently arrange the stitches with your fingers.
You should see:
- A small top indentation.
- Two rounded shoulders.
- Full curved sides.
- A subtle lower dip.
Beginner tip:
Lay the apple down before deciding the shape is wrong. Crochet motifs often look uneven while held in the hand but settle into their intended shape once placed flat.
Common mistake to avoid:
Adding extra increases to make the apple larger.
Changing the number or position of increases can create uneven ruffling. For a larger apple, using thicker yarn and a larger compatible hook is generally simpler than randomly adding stitches.
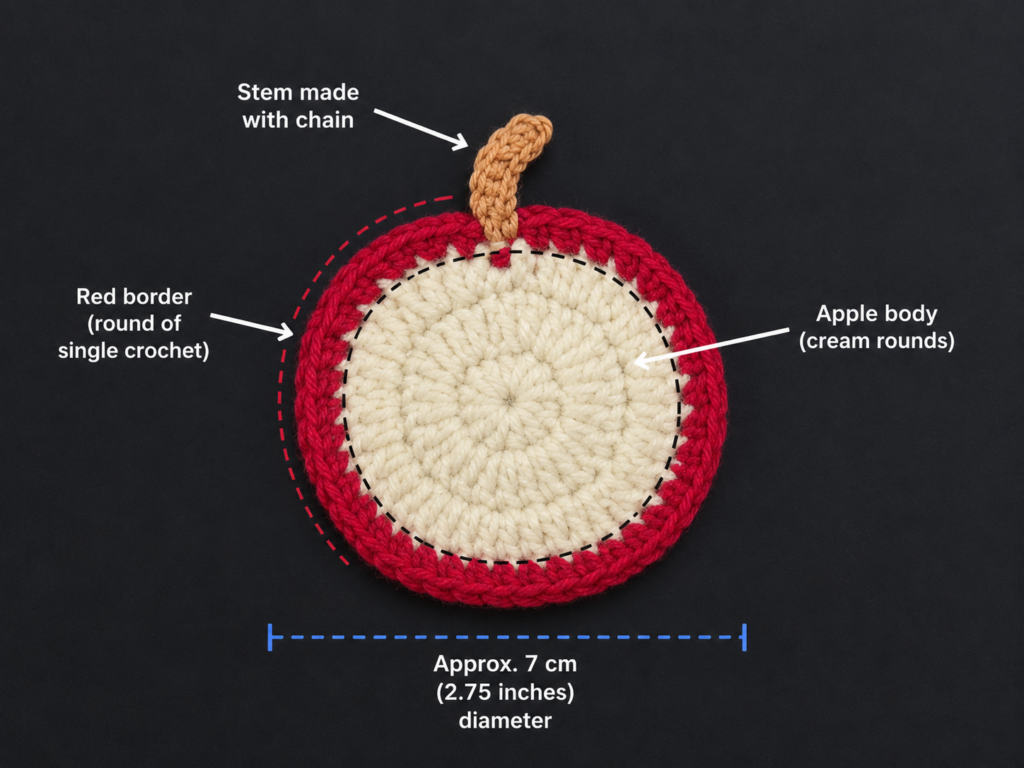
Step 4: Crochet the Apple Stem
With caramel-brown yarn, insert the hook into the small indentation at the top of the apple.
Join the brown yarn.
Ch 7.
Beginning in the second chain from the hook:
Sc in each of the next 6 chains.
Bring the stem back toward the apple and slip stitch into the same area where the stem began.
Fasten off and weave the tails into the wrong side.
The short strip should extend naturally upward from the apple.
You can leave it perfectly straight or give it a slight curve with your fingers.
Beginner tip:
The stem does not need to be mathematically centered. Moving it slightly left or right can make the finished apple look more organic.
Common mistake to avoid:
Using a very long foundation chain.
An oversized stem can dominate a small flat appliqué. For this version, six single crochet stitches create a balanced proportion.
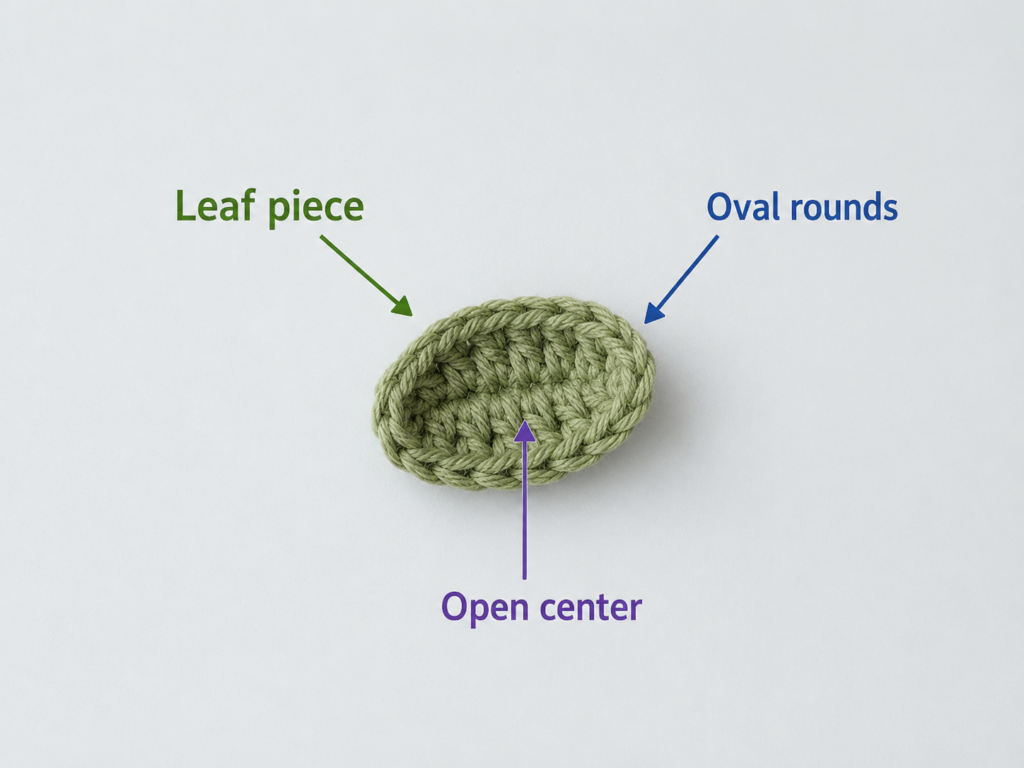
Step 5: Crochet the Sage-Green Leaf
The leaf begins with a short foundation chain. You will crochet down one side of the chain, place several stitches in the final chain, and then return along the opposite side.
With sage-green yarn:
Ch 8.
Beginning in the second chain from the hook:
- Sc in next ch.
- Hdc in next ch.
- Dc in next 2 chs.
- Hdc in next ch.
- Sc in next ch.
- 3 sc in the final ch.
Do not turn.
Rotate the work slightly and continue along the unused loops on the opposite side of the starting chain:
- Sc in next available ch loop.
- Hdc in next.
- Dc in next 2.
- Hdc in next.
- Sc in final available loop.
- Sl st to finish.
Fasten off, leaving approximately an 8-inch yarn tail for sewing.
The result should be a small elongated leaf with a gently pointed end.
Beginner tip:
When you reach the final foundation chain and make three single crochets into it, the extra stitches naturally turn you around the tip.
Common mistake to avoid:
Turning the work as though beginning a new row.
Instead, rotate around the end and use the remaining loops on the opposite side of the same foundation chain.
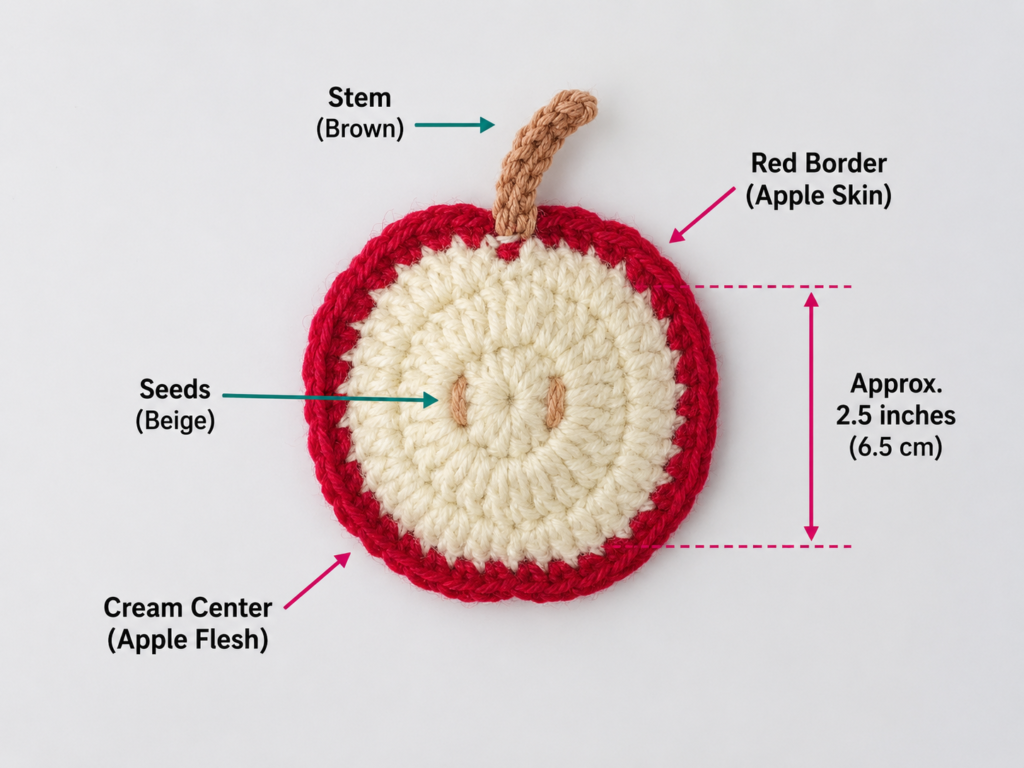
Step 6: Add Optional Decorative Highlight Stitches
This step is optional, but a tiny embroidered detail can give each apple extra personality.
Thread approximately 12 inches of creamy ivory yarn onto a tapestry needle.
On the upper-left area of the apple, make one or two short vertical stitches approximately 1/4–1/2 inch long.
Do not pull them too tightly. The embroidery should sit on the surface without puckering the crochet fabric.
Secure the tails on the wrong side.
For the cleanest coordinated garland, repeat the highlight in approximately the same location on every apple.
Other classroom-friendly alternatives include:
- A tiny embroidered initial.
- A short white highlight.
- A simple smiling face for an early-years classroom.
- No added detail for a more minimalist style.
Beginner tip:
Insert the needle between crochet stitches whenever possible instead of splitting individual yarn strands.
Common mistake to avoid:
Pulling surface embroidery extremely tight.
This can distort the apple and create an unwanted indentation.
Step 7: Sew the Leaf Beside the Stem
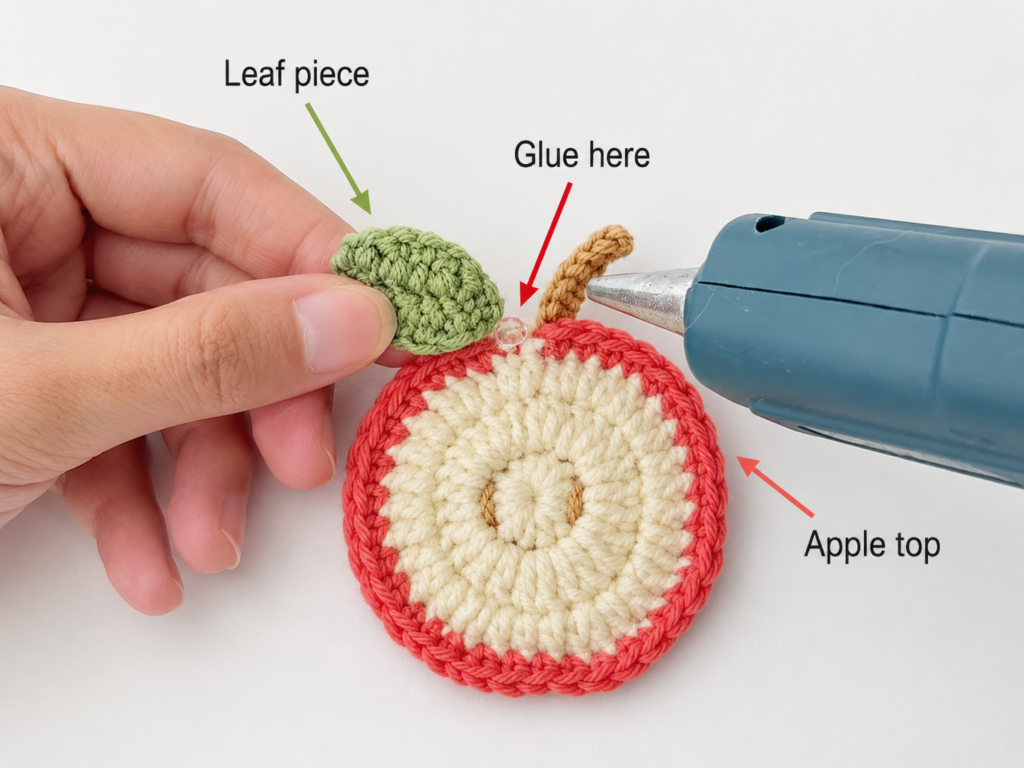
Place the leaf beside the caramel stem.
Angle it slightly rather than positioning it perfectly horizontal. A small diagonal leaf usually gives the apple a natural silhouette.
Thread the long sage yarn tail onto your tapestry needle.
Sew only the lower third of the leaf to the apple. Leaving the pointed end unattached creates a little dimension.
Make several small stitches through:
- The base of the leaf.
- The upper stitches of the apple.
- Back through the leaf base.
Secure the yarn on the wrong side and weave in the remaining tail.
Beginner tip:
Before sewing, rotate the leaf in several directions and choose the placement you like best.
Common mistake to avoid:
Sewing every edge of the leaf completely flat.
That is not wrong, but leaving the pointed end slightly free gives the finished motif a softer, more dimensional appearance.
Step 8: Make Five Matching Apples
Your first apple is now complete.
For a balanced five-motif classroom garland, make:
- Apple 1: Deep coral red.
- Apple 2: Muted golden yellow.
- Apple 3: Deep coral red.
- Apple 4: Muted golden yellow.
- Apple 5: Deep coral red.
Use the same sage leaves and caramel stems throughout.
After finishing each apple, compare it with the first motif.
Do not worry about a difference of a few millimeters. Handmade crochet naturally has small variations. The important point is to prevent one apple from becoming dramatically larger because of changing yarn weight, hook size, or tension.
Beginner tip:
Work production-line style when making repeats:
- Crochet all five apple bodies.
- Add all five stems.
- Crochet all five leaves.
- Sew all leaves.
- Weave in the remaining tails.
Many crocheters find repeated steps easier and faster when completed in batches.
Common mistake to avoid:
Changing yarn brands without checking thickness.
Two yarns may both be labeled medium #4 yet behave somewhat differently. Make a test motif before combining substantially different yarns in one garland.
Step 9: Crochet the Hanging Cord
Using creamy ivory yarn:
Ch 180 loosely.
Lay the chain flat without stretching it and measure.
For this tutorial, aim for approximately 50–55 inches.
Your individual chain length may differ because chain gauge varies significantly between crocheters.
Make the cord longer or shorter as needed.
Once satisfied:
- Fasten off.
- Leave approximately 10 inches of yarn at both ends.
- Use those tails later to form hanging loops, or weave them in and attach separate loops.
Beginner tip:
Do not make the cord extremely tight. A tightly chained cord can twist and may pull the apple motifs into awkward angles.
Optional stronger cord
For a more substantial garland:
- Ch to your desired length.
- Turn.
- Sl st loosely into every chain back across.
This creates a thicker, less stretchy cord.
Step 10: Arrange and Attach the Five Apples
Place the cream cord horizontally on a large table or clean floor.
Arrange all five apples below it before sewing anything.
Start by placing:
- One apple in the exact center.
- One apple on either side of the center motif.
- The final two apples near the outer sections.
Aim for approximately 8–10 inches between apple centers, depending on your garland length.
Step back and inspect the arrangement.
Once satisfied, attach each apple by sewing the upper end of its stem to the cream cord with three or four small secure stitches.
Alternatively, sew through both the stem and a small upper section of the apple for additional stability.
Check that:
- Each apple faces forward.
- The motifs hang at approximately the same height.
- The leaves are not trapped behind the cord.
- Spacing looks intentional.
Secure every sewing tail on the wrong side.
Step 11: Create the Hanging Loops
At each end of the cord, form a small loop approximately 2–3 inches long.
Secure it firmly with a tapestry needle.
The finished garland can then be placed on suitable classroom hooks or another secure hanging system.
Keep the decoration out of reach of very young children if long cords could present an entanglement risk, and ensure all wall-mounting hardware is appropriate for the surface and environment.
Pattern Notes or Stitch Notes
Turning chain rules
The beginning chain in the apple rounds does not count as a stitch.
Do not accidentally crochet into it when counting the round.
Stitch counts
Apple body:
- Round 1: 10 sts.
- Round 2: 20 sts.
- Round 3: 30 sts.
- Final shaping round: Work across all 30 existing stitches as instructed.
Repeat pattern
For a five-apple garland, complete the entire motif five times.
Suggested sequence:
Coral – Gold – Coral – Gold – Coral
Joined-round note
The main apple body is worked in joined rounds.
After completing each of the first three rounds, slip stitch to the first actual stitch.
Right side and wrong side
The outward-facing surface is the right side.
Use the wrong side for:
- Hiding yarn tails.
- Securing embroidery.
- Finishing leaf-attachment knots.
- Securing the garland cord.
Size adjustment notes
To make smaller apples
Use lighter yarn and an appropriately smaller hook.
To make larger apples
Use thicker yarn and a compatible larger hook.
This is usually simpler than changing the entire shaping sequence.
To make a longer garland
Add more apples and extend the crochet cord.
For an odd number of motifs, position the first apple in the center and arrange the remaining motifs outward symmetrically.
To make a short classroom-door decoration
Use three apples instead of five.
Common Beginner Mistakes
1. Losing track of stitches in the first rounds
Problem: The apple body begins cupping or becomes irregular.
Fix: Count at the end of every round. Do not continue until the stitch count is correct.
2. Counting the beginning chain as a stitch
Problem: The motif gradually gains unintended stitches.
Fix: Remember that the beginning ch 1 does not count as a stitch in this pattern.
3. Making the magic ring too loose
Problem: A visible hole remains in the apple center.
Fix: Pull the starting tail firmly after completing Round 1, then weave the tail securely into the wrong side.
4. Pulling the magic ring excessively hard
Problem: The center puckers or the yarn breaks.
Fix: Close it firmly but gradually rather than jerking the tail.
5. Adding increases in the wrong locations during the shaping round
Problem: One side becomes wider than the other.
Fix: Count carefully and use a marker at the halfway point if necessary.
6. Making the leaf too loose
Problem: The leaf becomes floppy and much larger than expected.
Fix: Maintain firm, comfortable tension or try a hook 0.5 mm smaller for the leaf only.
7. Pulling embroidery details too tightly
Problem: The apple surface puckers.
Fix: Let decorative yarn rest naturally on the surface.
8. Attaching apples before testing the layout
Problem: Spacing becomes uneven.
Fix: Arrange every motif on a flat surface and measure the spacing before sewing.
9. Using an overly tight garland chain
Problem: The cord twists and refuses to hang naturally.
Fix: Chain more loosely or use a slightly larger hook for the cord.
10. Skipping the finishing stage
Problem: Motifs curl and yarn tails remain visible.
Fix: Weave in every end carefully and lightly block the motifs before assembling the garland.
How to Customize This Crochet Project
Change the yarn colors
The apple does not have to be traditional red.
Try:
- Rainbow colors for a preschool classroom.
- Red and green for a traditional school theme.
- Mustard, rust, and cream for fall.
- Pink, peach, and sage for a softer classroom.
- School colors for a personalized teacher gift.
Add letters
Create one apple for each letter of a short word such as:
READ
LEARN
CREATE
GROW
Small felt letters or carefully embroidered letters can be attached to the center of each motif.
For a completely crochet-based project, surface-slip-stitch simple initials or symbols.
Make a number-line garland
Create ten or more apple motifs and add one number to each.
This transforms the decor into a decorative visual learning aid.
Keep numbers large, simple, and easy to see from a distance.
Use the apples individually
A single motif can become:
- A bulletin-board embellishment.
- A classroom-door decoration.
- A teacher-gift tag.
- A library-corner decoration.
- A backpack appliqué.
- A bookmark topper.
- A desk decoration.
- A classroom reward-board accent.
Add a border
A contrasting single crochet border can make each apple more graphic.
Good combinations include:
- Coral apple with cream border.
- Gold apple with brown border.
- Green apple with ivory border.
Test the border on one motif first because an additional round changes the size and can soften the original apple shaping.
Add texture
Use the original tutorial as written for your first garland.
For later versions, experiment with:
- Back-loop-only details.
- Surface slip stitches.
- Small embroidered seeds.
- French knots.
- Speckled yarn.
- Tweed yarn.
Avoid extremely fuzzy yarn for a first attempt because identifying individual stitches becomes more difficult.
Create matching classroom decor
Once you have the apple motif, repeat the color palette in:
- Pencil bunting.
- Crayon garlands.
- Crochet letters.
- Book-themed appliqués.
- Small storage baskets.
- Bulletin-board borders.
Keeping one palette across multiple handmade projects can make the classroom decor feel coordinated rather than random.
Finishing Instructions
Fastening off
After each component is completed:
- Cut the yarn, leaving at least a 6-inch tail.
- Pull the cut end completely through the active loop.
- Tighten gently.
Weaving in ends
Thread each tail onto a tapestry needle.
On the wrong side:
- Weave through several stitches.
- Change direction.
- Weave through several more stitches.
- Trim the remaining yarn close to the fabric.
Avoid simply tying a large exposed knot and cutting immediately beside it.
Blocking
Blocking is optional but useful when making multiple flat motifs.
For cotton or washable acrylic yarn:
- Check the yarn manufacturer’s care instructions.
- Lightly dampen the apple.
- Shape it by hand.
- Pin the outer curves if necessary.
- Allow it to dry completely before assembly.
Do not aggressively stretch the motif.
Your goal is to make all five apples lie flat and appear reasonably consistent.
Shaping
Use your fingers to emphasize:
- The top notch.
- Rounded shoulders.
- Full side curves.
- Lower indentation.
- Leaf angle.
Small adjustments can make the apple silhouette significantly clearer.
Washing and care
Always follow the care information on the yarn label.
For classroom decorations with multiple sewn components, gentle hand washing and flat drying are conservative care options when permitted by the specific yarn used.
Make sure the garland is completely dry before storing it.
Storage
At the end of the school year:
- Remove the garland carefully.
- Lay it flat.
- Avoid folding sharply across the apples.
- Place it in a clean container or fabric storage bag.
This helps protect the shapes for the next school year.
Quick Printable-Style Summary
Project: Easy Crochet Apple Classroom Garland
Skill level: Easy / Advanced Beginner
Finished motif size: Approximately 4–4.5 inches wide
Finished garland length: Approximately 50–55 inches
Yarn: Medium-weight #4 cotton or smooth acrylic
Hook: 4.0 mm / G-6
Main stitches: Ch, sl st, sc, hdc, dc
Apple starting method: Magic ring
Apple Round 1: 10 hdc
Apple Round 2: 2 hdc in every stitch — 20 sts
Apple Round 3: Alternate 1 hdc and an increase — 30 sts
Shaping: Use short and tall stitches around all 30 stitches to create apple curves and indentations.
Stem: Ch 7, sc back along 6 chains.
Leaf: Ch 8, work along both sides of the foundation chain.
Number of motifs: 5
Suggested color arrangement: Coral, Gold, Coral, Gold, Coral
Garland cord: Approximately 180 loose chains or desired length
Finishing: Weave in ends, block motifs if necessary, arrange evenly, sew stems securely to cord.
FAQ
1. Are crochet classroom decor patterns good beginner projects?
Many small classroom-decor motifs can be beginner-friendly because they use familiar stitches and repeatable shapes. This particular apple garland uses basic stitches with some simple shaping, which aligns broadly with the lower project levels described by the Craft Yarn Council.
2. What yarn is best for crochet classroom decorations?
Smooth cotton and acrylic yarns are both practical choices. For this tutorial, medium #4 yarn provides a substantial motif with visible stitch definition. The Craft Yarn Council identifies medium yarn as category #4 in its standard yarn-weight system.
3. Can I make the apple garland without knowing the magic ring?
Yes. As an alternative, chain 2 and work the first 10 half double crochets into the second chain from the hook.
The center may look slightly different, but the rest of the tutorial can continue normally.
4. Why is my crochet apple curling?
Minor curling can occur before blocking.
More severe curling may be caused by:
- Tight tension.
- An incorrect stitch count.
- A very tight center.
- Too few increases.
Count the stitches and gently flatten the motif before deciding whether it needs to be remade.
5. How many apples should I use for classroom bunting?
Five works well for a compact display.
For wider spaces, try:
- 3 apples for a door.
- 5 apples for a reading corner.
- 7–9 apples for a bulletin board.
- More motifs for a long wall.
Measure the actual display area before crocheting the cord.
6. Can I make this garland in school colors?
Absolutely. Change the apple-body colors while keeping the leaf and stem colors consistent, or use the school’s entire color palette throughout the motifs.
A limited repeating palette generally produces a more coordinated result than randomly assigning every apple a different color.
7. Can I use these apple motifs for something other than a garland?
Yes. The individual flat motifs can be used as decorative appliqués, bulletin-board embellishments, teacher-gift tags, wall decor, bag decorations, or other craft components.
Conclusion
This easy crochet apple garland turns a small collection of basic stitches into practical handmade classroom decor.
The first apple teaches you the entire construction process: start with a magic ring, expand a flat circle, use different stitch heights to create the apple silhouette, crochet a small stem and leaf, and finish with optional embroidery. Once you understand that sequence, the remaining motifs become a relaxing repeat.
The real advantage of this project is flexibility. Five apples can decorate a small reading corner, three can brighten a classroom door, and a much longer chain can stretch across a bulletin board. Change the palette to match school colors, add initials, embroider numbers, or create one apple for each letter in a short classroom word.
For beginners, focus first on consistency rather than perfection. Count every round, compare each new apple with your first motif, and arrange everything before permanent assembly. Slight handmade variations are natural; what matters is that the finished garland feels deliberate, cheerful, and cohesive.
Save the tutorial for back-to-school season, teacher-gift planning, or your next handmade classroom-decor project.





