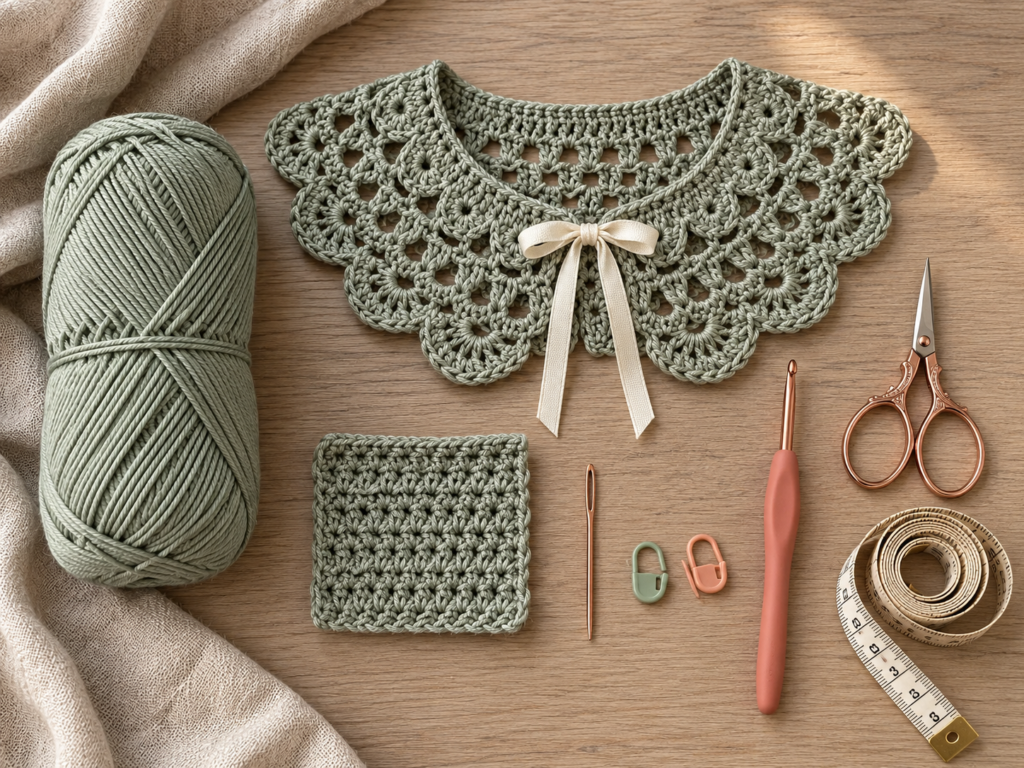
A plain blouse can look completely different with one little handmade detail around the neckline. That’s what I love about crochet collars. They add texture and personality without requiring you to crochet an entire sweater or cardigan.
If you’ve been looking for an easy crochet collar pattern, this detachable lace version is a lovely place to start. It has a neat, comfortable neckband, three rows of airy crochet lace, and simple ties that allow you to wear it with different outfits.
You won’t need complicated stitches, special shaping techniques, or a sewing machine. The design uses chains, single crochet, double crochet, and slip stitches. If you already know these basics, you’re ready to begin.
In this step-by-step tutorial, I’ll walk you through measuring the neckline, making the foundation band, creating the lace pattern, keeping the stitches evenly spaced, and finishing your collar so it sits nicely when worn.
The result is a lightweight, vintage-inspired accessory that looks beautiful over a simple dress, linen blouse, or knitted sweater.
What You’ll Learn
By the end of this tutorial, you’ll know how to:
- Measure and adjust the length of a crochet collar.
- Create a stable foundation using basic crochet stitches.
- Make decorative lace arches using chain stitches.
- Work into chain spaces instead of individual stitches.
- Increase the width of a lace collar without complicated shaping.
- Count your stitches and keep the lace symmetrical.
- Add simple crocheted ties.
- Block and shape a finished collar.
- Customize the design with different yarns, colors, and edging.
This is a confident beginner crochet project. If you can make a chain, single crochet, and double crochet, you can follow the pattern.
Crochet Collar Pattern Details
| Detail | Information |
|---|---|
| Skill level | Confident beginner |
| Project type | Detachable lace collar |
| Construction | Worked flat in turned rows |
| Yarn | Sport-weight (#2) cotton |
| Hook | 3.5 mm (US E/4) |
| Estimated yarn | 70–110 yards (64–101 m) |
| Estimated time | 2–4 hours |
| Foundation chain | 98 chains for sample size |
| Pattern rows | 5 |
| Closure | Two crocheted ties |
| Approximate neck edge | 17.6 inches (44.8 cm) at target gauge |
| Approximate lace depth | 2.5–4 inches (6–10 cm), depending on tension and blocking |
| Crochet terminology | US |
Important sizing note: The finished measurements are estimates based on a target gauge of 22 single crochet stitches per 4 inches. This is a newly written pattern, not a documented test-crocheted sample, so make a gauge swatch and check the neckband against your intended neckline before continuing.
Materials You’ll Need
One of the nice things about this project is that it doesn’t require much yarn. You may already have suitable cotton left over from another crochet project.
Yarn
Choose approximately 70–110 yards of sport-weight cotton yarn.
Mercerized cotton is a good option because it produces defined stitches and holds decorative lace shapes nicely after blocking.
For this tutorial, imagine a soft dusty sage color. It gives the collar a delicate appearance while allowing the individual stitches to remain visible in photographs.
Other beautiful choices include ivory, oatmeal, pale blue, dusty rose, or muted lavender.
Avoid very fuzzy yarn for your first attempt. A smooth cotton makes it much easier to see where your hook should go.
Crochet Hook
Use a 3.5 mm (US E/4) crochet hook.
If your stitches are very tight, try a 3.75 mm or 4 mm hook. If they are extremely loose, try a smaller hook.
The correct hook is the one that gives you an even neckband and flexible lace without making the fabric floppy.
Additional Supplies
- Small sharp scissors.
- Blunt tapestry needle for weaving in ends.
- Two locking stitch markers.
- Flexible measuring tape.
- Rustproof blocking pins.
- Blocking mat or clean towel.
- Optional narrow satin ribbon for a different closure.
- Optional small button if you prefer a button fastening.
You do not need every optional item. The basic version uses crocheted ties, so a button and ribbon are unnecessary.
Crochet Abbreviations Used
This pattern uses US crochet terms.
| Abbreviation | Meaning |
|---|---|
| ch | Chain |
| sc | Single crochet |
| dc | Double crochet |
| sl st | Slip stitch |
| st / sts | Stitch / stitches |
| sk | Skip |
| sp | Space |
| rep | Repeat |
| RS | Right side |
| WS | Wrong side |
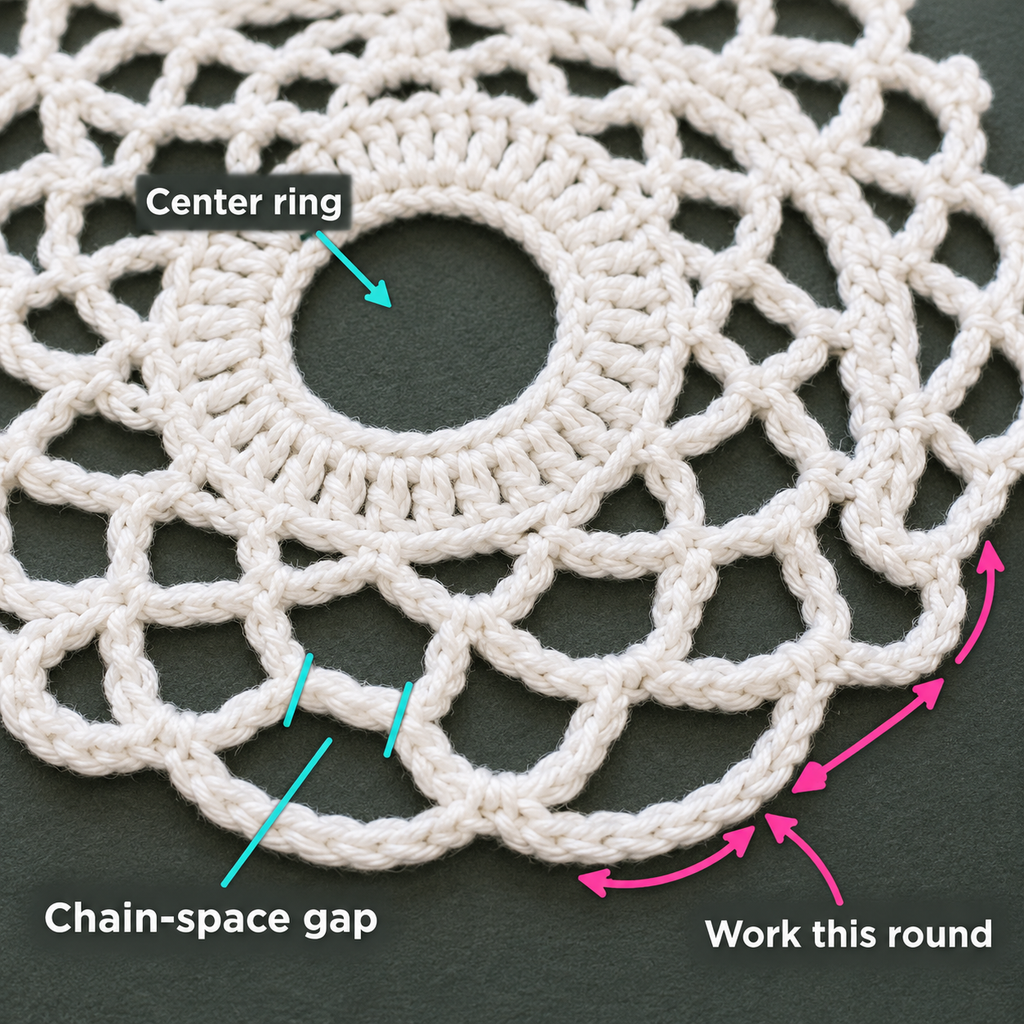
A chain space is the opening underneath a group of chain stitches. When the pattern tells you to work into a chain space, insert your hook beneath the chain arch rather than into one individual chain.
US and UK Crochet Terms
Be careful when following tutorials from different countries.
A US single crochet is called a double crochet in UK terminology. A US double crochet is called a treble crochet in UK terminology.
All instructions below use US terms consistently.
Before You Start
1. Measure the Neckline
The first measurement you need is the length of the inner collar edge.
Choose a blouse or sweater that you would like to wear with your collar. Lay it flat and use a flexible measuring tape to follow the neckline from one front opening, around the back, to the other front opening.
For a detachable collar, measure the path where you want the crochet to sit rather than relying only on your neck circumference.
You can also use a piece of string to trace the neckline and then measure the string.
For this sample, we’re aiming for an inner collar edge of approximately 17.6 inches.
If your garment has a wider neckline, you may need a longer foundation chain.
2. Make a Small Gauge Swatch
Gauge simply means how many stitches fit into a certain measurement.
For the sample sizing, use a target of approximately 22 single crochet stitches per 4 inches (10 cm).
To check your gauge, crochet a small rectangle using the same yarn and hook. Make it larger than 4 inches wide so you can measure the center without including the edges.
If you get fewer stitches than the target, your stitches are larger, so your collar will be longer. If you get more stitches, your stitches are smaller, so your collar will be shorter.
You can adjust the hook or the foundation count.
Don’t worry about matching the target perfectly. What matters most is that the finished band fits the neckline you want.
3. Learn to Count Your Stitches
Look at the top of a completed crochet row. Each single crochet or double crochet stitch has a small V shape.
Those V shapes are what you count.
The turning chains in this pattern do not count as stitches. This keeps the edges easier to understand.
Place a stitch marker at the beginning of a row if you tend to lose track of your first stitch.
4. Keep Your Tension Relaxed
The lace portion of the collar should be soft and flexible.
If you pull every chain very tightly, the arches may become too small, and the collar can curl or bunch.
Try to keep your chain stitches similar in size. Let the yarn slide smoothly through your fingers.
5. Understand the Collar Shape
This design is made from the inner neckline outward.
The first two rows create the neckband. The following three rows use progressively longer chain arches to add width and allow the outer edge to spread around the neckline.
You will work back and forth, turning at the end of each row.
Both sides of this simple lace are wearable. You can choose the side with the neatest-looking stitches as the right side.
Step-by-Step Crochet Collar Tutorial
Step 1: Make the Foundation Chain
Start with a slip knot and place it on your 3.5 mm crochet hook.
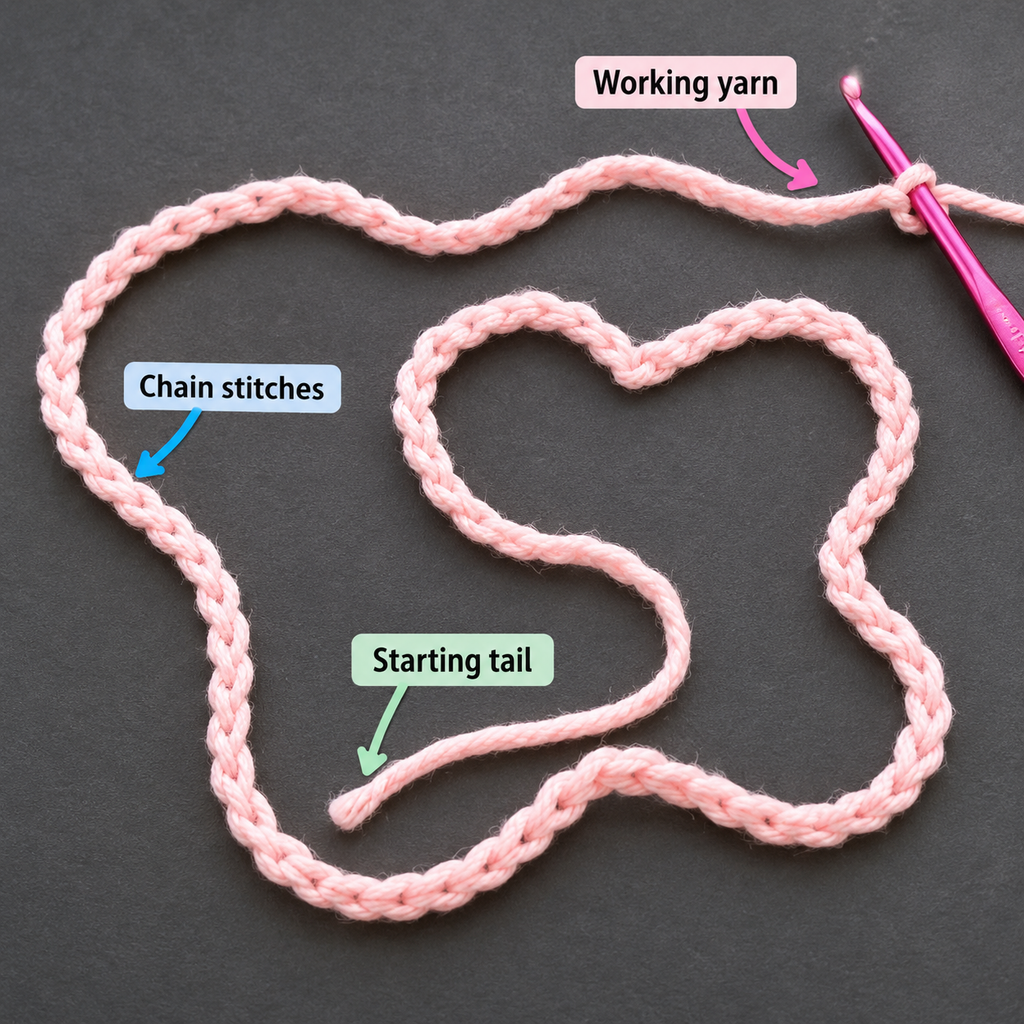
Make 98 chain stitches.
Try not to pull the chains too tightly. The foundation should be flexible enough to curve comfortably around a neckline.
Once you’ve finished, lay the chain on your table and gently straighten it.
It should form a long, narrow strand without twisting.
If the chain is difficult to see, stretch it slightly between your fingers. Each stitch should have a recognizable V shape.
Count your chains carefully before moving to the next step.
Beginner tip: Place a stitch marker every 20 chains while counting. Remove the markers once you have confirmed the total.
Common mistake to avoid: Don’t count the loop currently sitting on your hook as a chain stitch.
Step 2: Crochet the First Neckband Row
Now we’re going to turn that long chain into a proper crochet fabric.
Row 1:
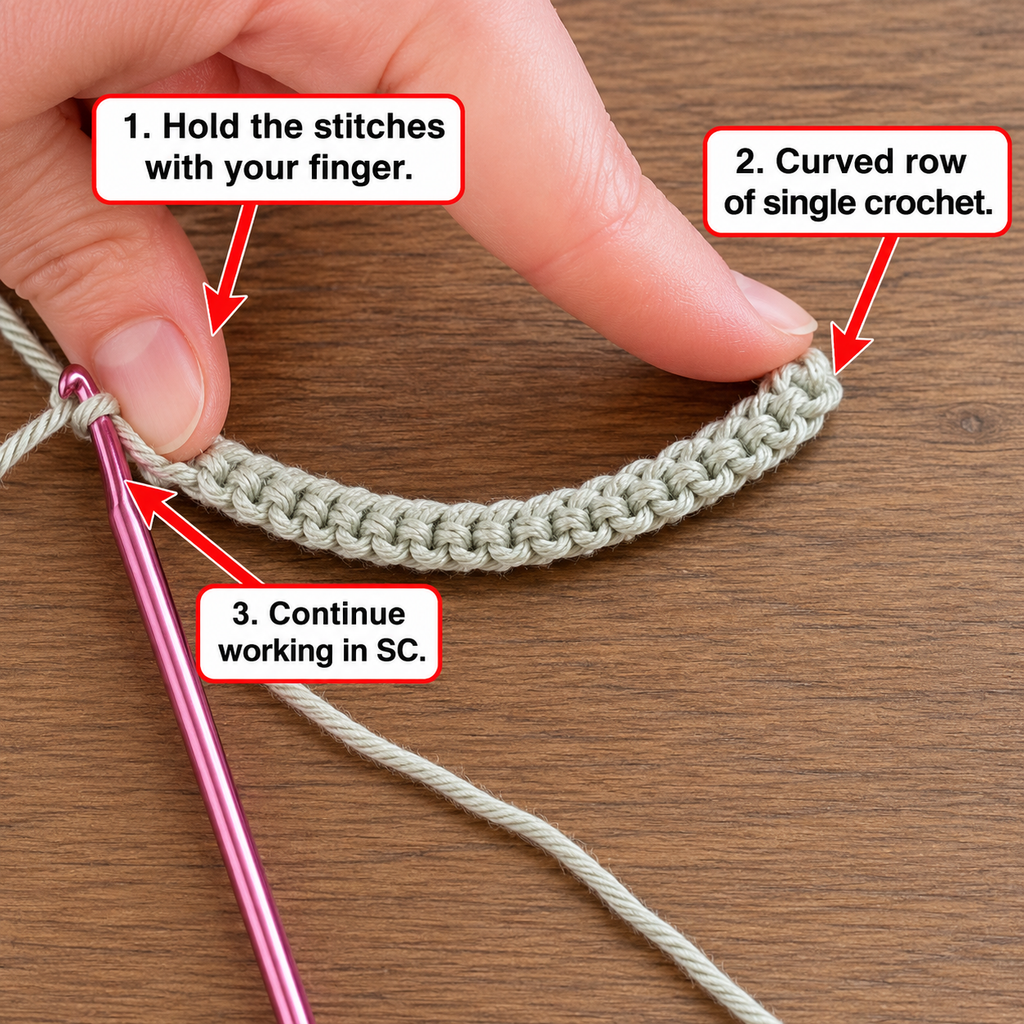
Work 1 single crochet into the second chain from your hook.
Continue making 1 single crochet in every chain across.
At the end of the row, you should have 97 single crochet stitches.
Your work should look like a narrow strip with a slightly textured edge.
The single crochet row gives the collar a stable foundation and helps prevent the neckline from stretching too much.
When you finish, check your stitch count.
If you have 96 stitches instead of 97, look carefully at the beginning and end of the row. Missing the last chain is a common beginner mistake.
Beginner tip: Insert your hook under the appropriate chain loops consistently. A uniform foundation is more important than crocheting quickly.
Common mistake to avoid: Don’t work into the turning loop or accidentally make two single crochets in the same foundation chain.
Step 3: Add a Double Crochet Row
The next row adds a little height and gives the neckband a more finished appearance.
Row 2:
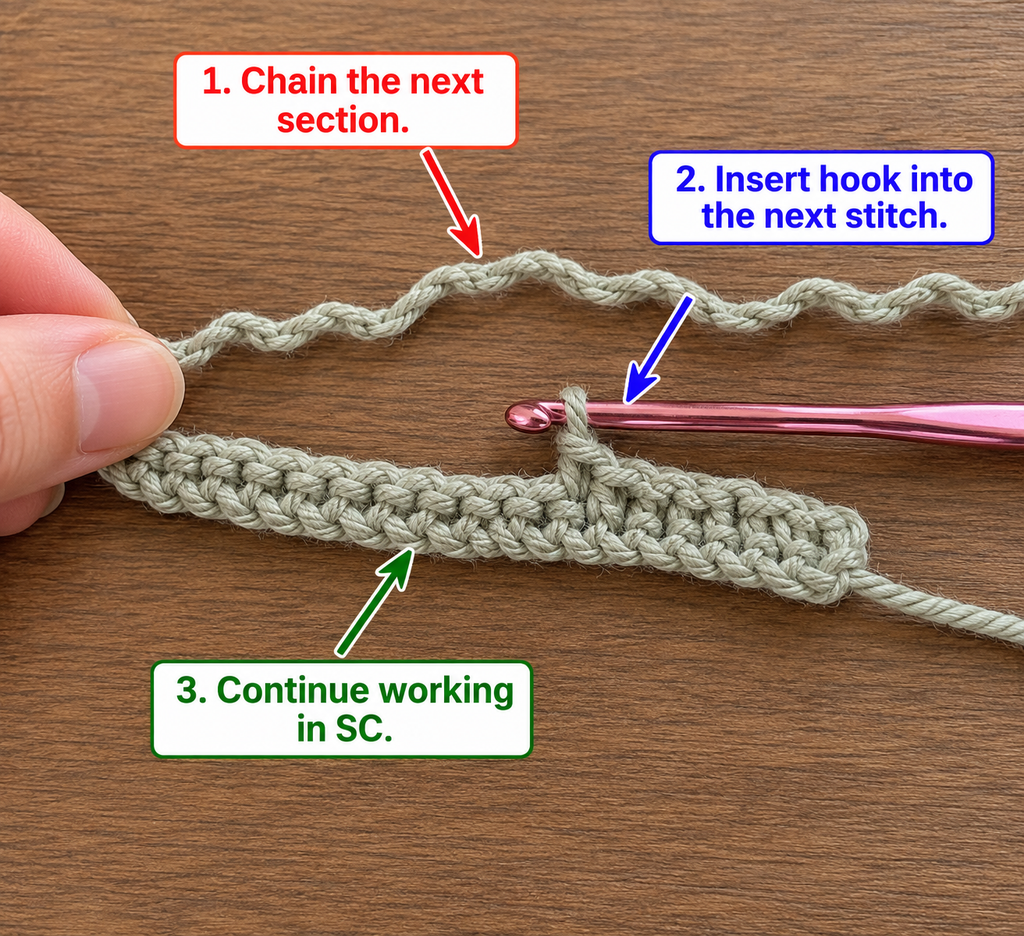
Chain 2 and turn your work.
The chain 2 is only a turning chain. It does not count as a double crochet stitch.
Work 1 double crochet into the first single crochet.
Continue making 1 double crochet in every stitch across the row.
You should finish with 97 double crochet stitches.
To make a double crochet:
- Yarn over your hook.
- Insert the hook into the next stitch.
- Yarn over and pull up a loop.
- Yarn over and pull through two loops.
- Yarn over and pull through the remaining two loops.
When the row is finished, you’ll have a two-row neckband.
The taller double crochet stitches also create a nice visual transition between the solid neckline and the lace arches that come next.
Beginner tip: Count the first few double crochet stitches before continuing. This helps you avoid adding an extra stitch beside the turning chain.
Common mistake to avoid: Don’t treat the turning chain as a separate double crochet. Doing so will give you 98 stitches instead of 97.
Step 4: Check the Neckband Before Adding Lace
This is a good moment to stop and check the size.
Lay the neckband on a flat surface and curve it gently into the shape of a neckline.
Measure along the inner edge.
At the target gauge, the sample band should measure approximately 17.6 inches.
If the band is much shorter than you need, it is better to adjust it now than after completing all the lace rows.
If it is slightly longer, remember that the crocheted ties will allow you to adjust how closely it sits around the neckline. However, ties cannot fully correct an oversized collar.
Look at the two front ends. They should be approximately the same height and should not have extra stitches sticking out.
You may notice that the band naturally curves a little. That’s fine.
The next rows will add more room around the outer edge.
Beginner tip: Try placing the neckband over the blouse you plan to wear it with. This is often more helpful than relying on a measurement alone.
Common mistake to avoid: Don’t stretch the neckband tightly while measuring. You want the relaxed measurement, not the maximum possible length.
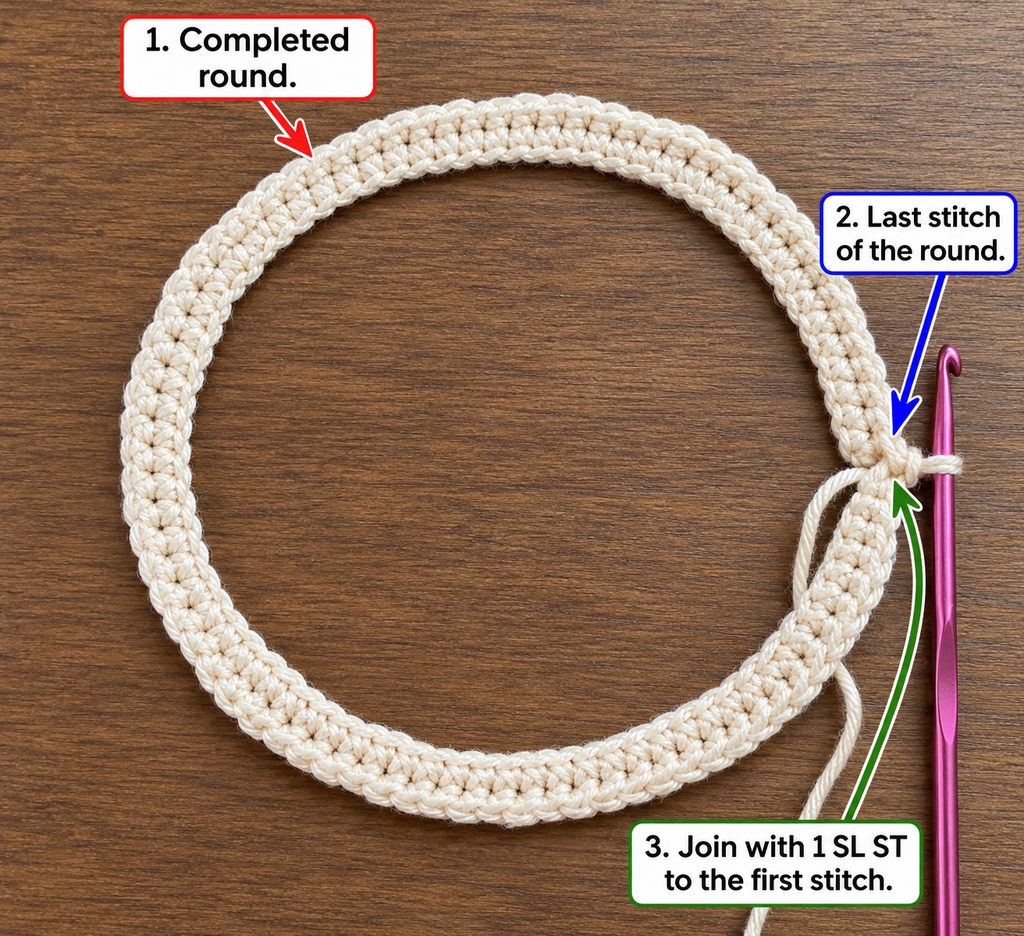
Step 5: Crochet the First Row of Lace Arches
Now comes the decorative part.
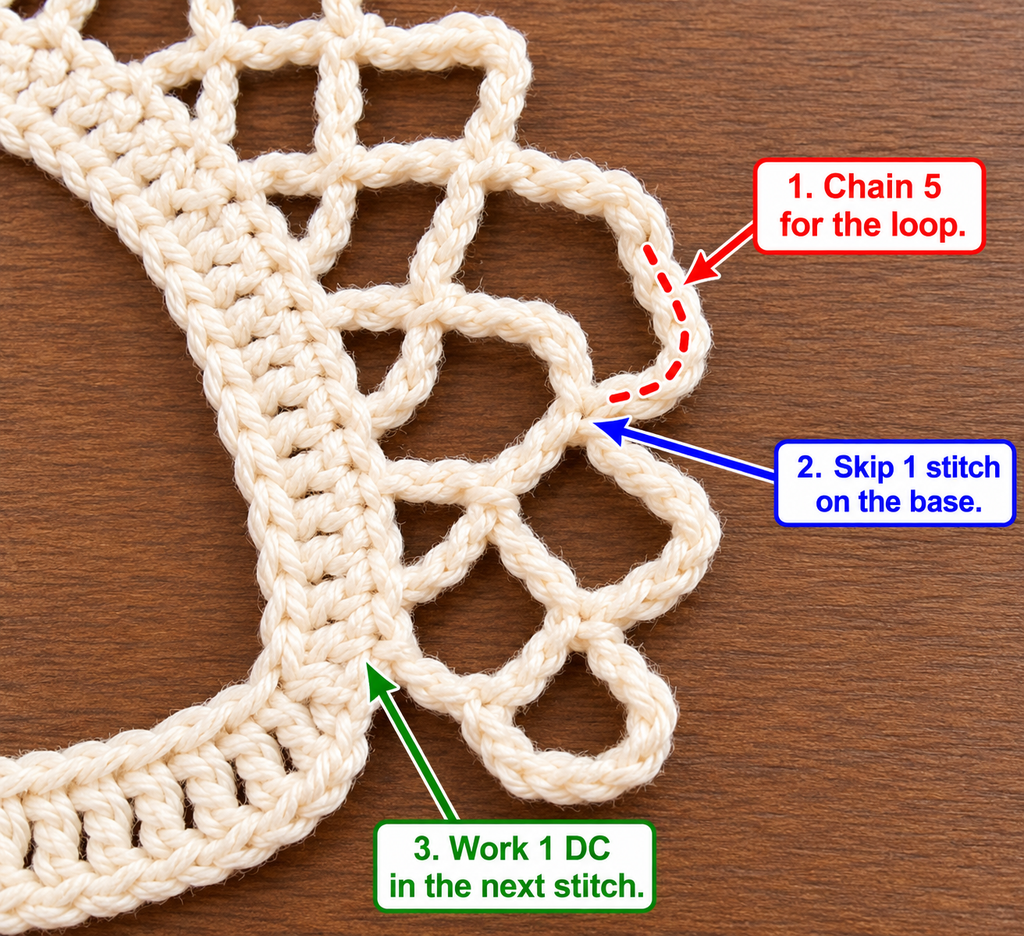
Instead of crocheting into every stitch, we’ll use chain stitches to make open loops along the outer edge.
These loops are called chain arches.
Row 3:
Chain 1 and turn.
Work 1 single crochet into the first double crochet stitch.
Then repeat the following sequence:
Chain 5, skip the next 3 double crochet stitches, and work 1 single crochet into the next double crochet stitch.
Repeat this sequence 24 times.
At the end, you should have:
- 24 chain-five arches.
- 25 single crochet anchor stitches.
- The final single crochet in the last double crochet of the row.
Each chain arch forms a little open space between two single crochet stitches.
Don’t worry if the lace looks a little uneven while you’re working. The loops often settle into a more regular shape once the row is finished.
Beginner tip: Count each group of five chains aloud. It is surprisingly easy to make four or six chains when you’re concentrating on the next attachment point.
Common mistake to avoid: Don’t skip four double crochet stitches. The repeat requires you to skip exactly three and work into the fourth.
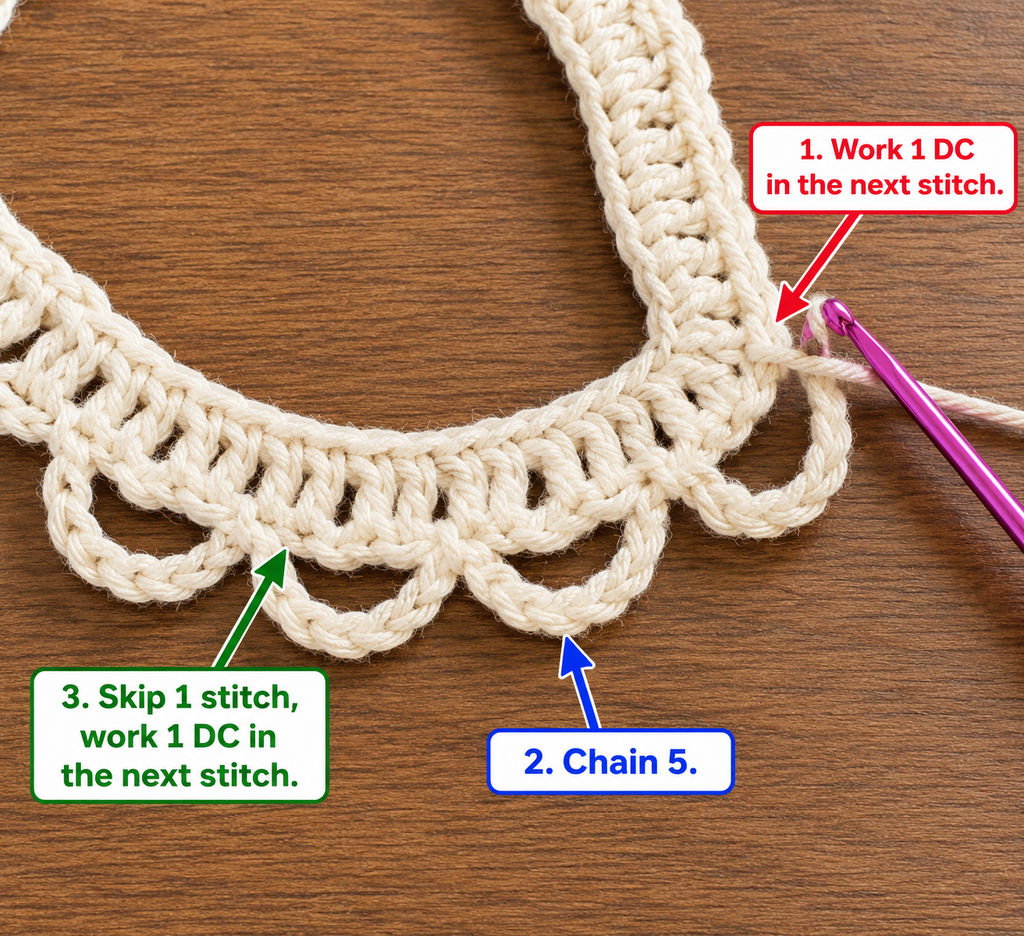
Step 6: Check the First Lace Row
Before starting the next row, lay the collar flat again.
You should see 24 evenly spaced loops along the outer edge of the neckband.
They should be similar in height and width.
Some loops may lean slightly to one side. That is normal because crochet chains have their own natural twist.
The important thing is that every arch contains five chains and is attached at the correct interval.
Look closely at the ends of the collar.
Both ends should finish with a single crochet anchor stitch rather than an unfinished chain loop.
If one side has an extra arch, go back and check your skip-three repeat.
This is also a good time to inspect your yarn tension. If several loops look dramatically smaller than the others, they may have been worked too tightly.
Beginner tip: Place a stitch marker through every fifth arch while counting. It makes the total easier to confirm.
Common mistake to avoid: Don’t confuse the solid stitches beneath the arches with the arches themselves. Count the open spaces, not the stitches in the neckband.
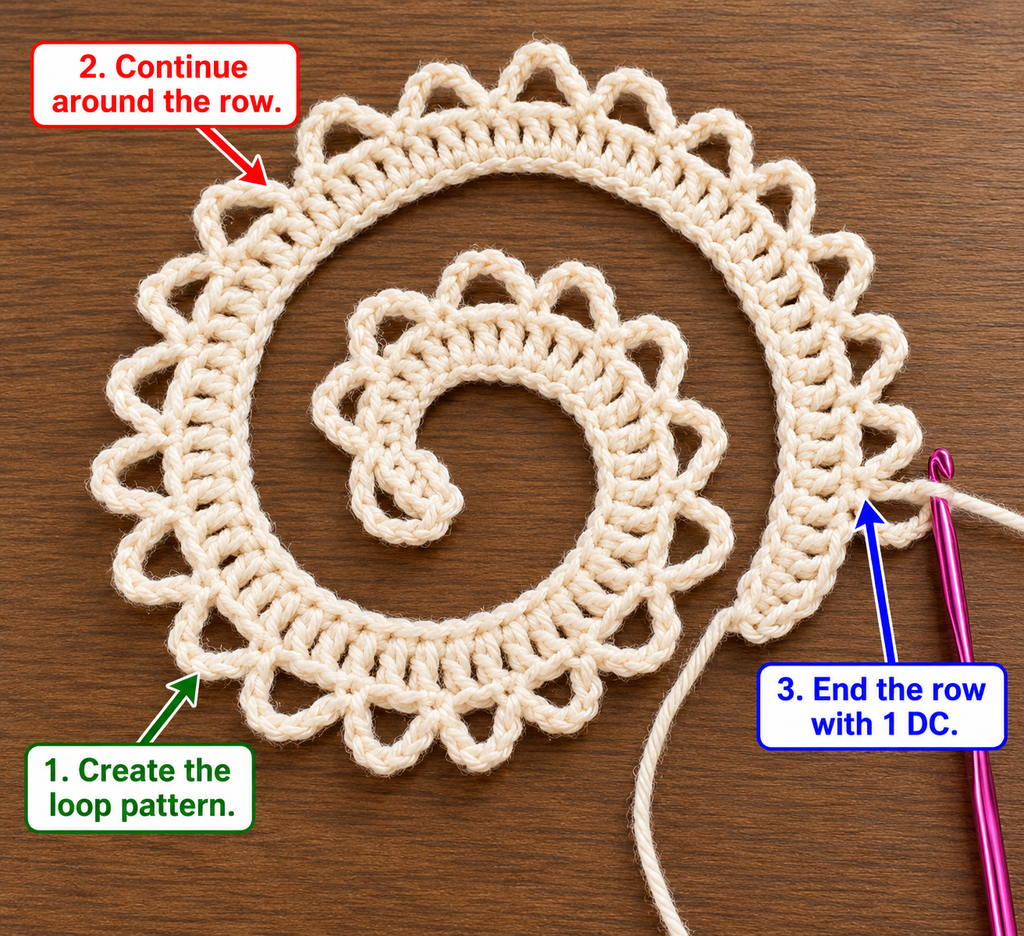
Step 7: Make the Second Lace Row
For the next row, we’re going to make slightly larger arches.
This adds room around the outside of the collar and helps the fabric spread into a curved shape.
Row 4:
Chain 1 and turn.
Work 1 single crochet into the first single crochet stitch.
Then repeat:
Chain 6 and work 1 single crochet into the next chain-five space.
Repeat this across all 24 chain-five spaces.
After working into the last chain-five space, chain 6 once more and work 1 single crochet into the final single crochet at the end of the previous row.
You should have:
- 25 chain-six arches.
- 26 single crochet anchor stitches.
Notice that you are now working into the spaces beneath the chain arches rather than into individual chain stitches.
Insert your hook underneath the entire arch, yarn over, and complete the single crochet.
This is one of the most useful techniques to learn when making crochet lace.
Beginner tip: If you can’t tell where to place your hook, gently lift the previous row with your fingers. The opening beneath each arch should be easy to identify.
Common mistake to avoid: Don’t insert your hook into the middle chain stitch unless a pattern specifically tells you to. This design uses the entire chain space.
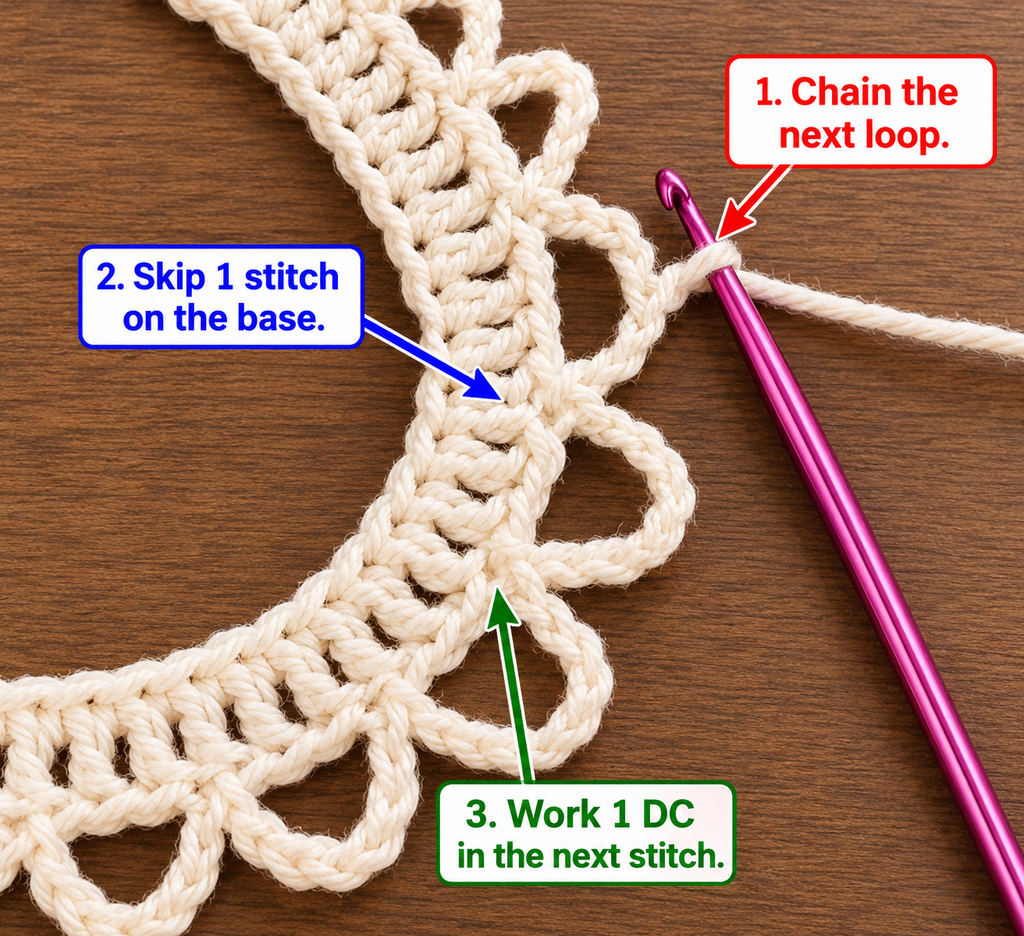
Step 8: Crochet the Third and Final Lace Row
We’re almost finished with the main collar.
The final row uses slightly longer chains to create a soft, airy outer edge.
Row 5:
Chain 1 and turn.
Work 1 single crochet into the first single crochet stitch.
Then repeat:
Chain 7 and work 1 single crochet into the next chain-six space.
Repeat this across all 25 chain-six spaces.
After the last chain-six space, chain 7 and work 1 single crochet into the final single crochet at the end of the previous row.
You should now have:
- 26 chain-seven arches.
- 27 single crochet anchor stitches.
The collar should have three visible layers of openwork arches.
The inner arches are smaller, while the outer arches are longer.
This gradual change gives the collar more circumference along its outer edge without requiring complicated increase stitches.
Lay the piece flat and gently arrange the lace into a curved shape.
The outer arches should spread naturally rather than pulling the neckband into a tight circle.
Beginner tip: If the last row looks slightly wavy, don’t immediately unravel it. The lace may settle after gentle wet blocking.
Common mistake to avoid: Don’t add extra chain stitches to individual arches just to make them look larger. Keep every repeat consistent.
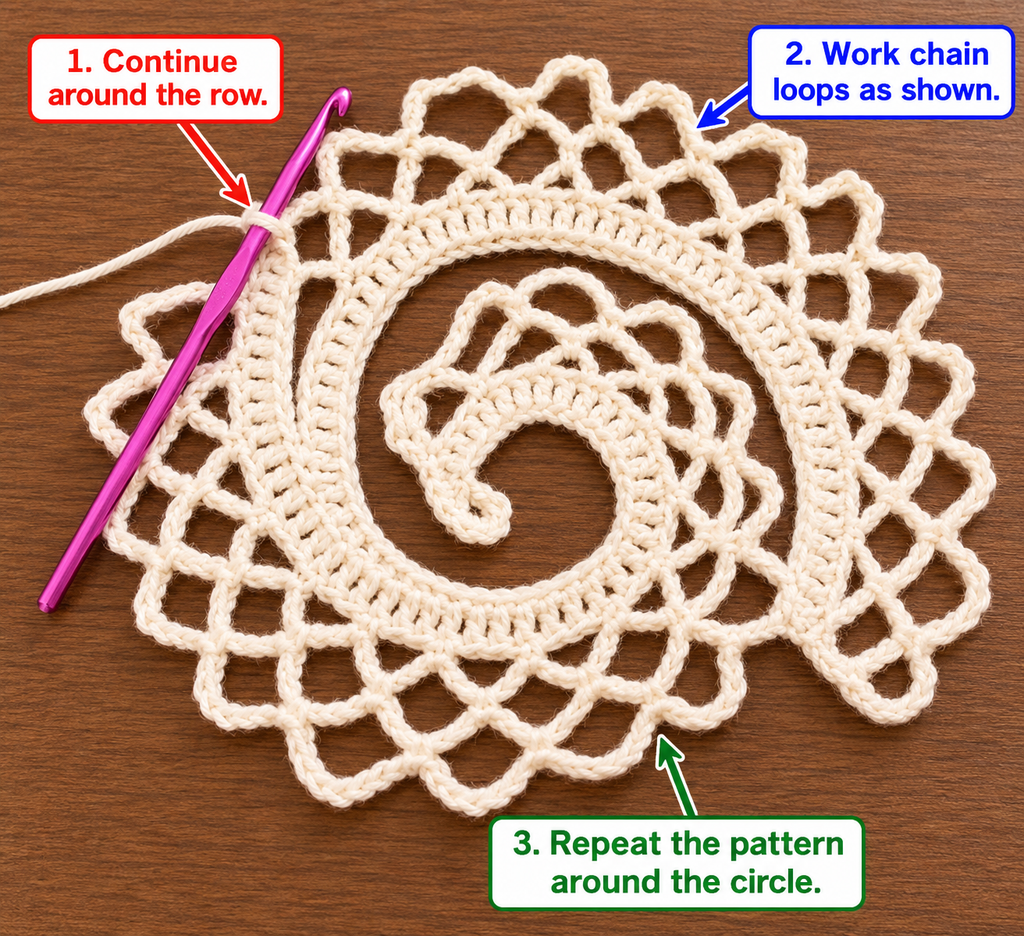
Step 9: Inspect the Lace and Correct Uneven Stitches
Before fastening off, spend a minute looking closely at your finished lace.
You should be able to identify three separate rows of chain spaces.
The single crochet anchor stitches connect one row to the next.
If you look from the neckband toward the outer edge, the arches become gradually larger.
Count the spaces in each row:
| Lace row | Expected arches |
|---|---|
| Row 3 | 24 |
| Row 4 | 25 |
| Row 5 | 26 |
If your numbers are correct and the collar lies comfortably around a neckline, you’re ready to finish.
If the lace curls sharply inward, check whether your chains are unusually tight.
If the outer edge is excessively loose, your chain tension may be much larger than your stitch tension.
A small difference is normal. Large differences are worth correcting before you fasten off.
Beginner tip: Photograph the collar flat at this stage. A picture can make uneven sections easier to notice.
Common mistake to avoid: Don’t pull the outer arches into a perfectly straight line. This is a curved accessory, not a rectangular scarf.
Step 10: Add Crocheted Ties
A detachable collar needs a way to stay in place.
For this design, we’ll use two narrow crocheted ties. They’re simple to make and don’t require sewing on a button.
First, fasten off the working yarn from Row 5, leaving a tail long enough to weave in securely.
Turn the collar so the foundation-chain edge is at the top.
Join your yarn with a slip stitch at one upper front corner of the neckband.
First tie:
- Chain 55.
- Slip stitch into the second chain from the hook.
- Work 1 slip stitch into each remaining chain back toward the collar.
- Slip stitch into the same neckband corner to secure the tie.
- Fasten off, leaving a tail for weaving in.
Repeat at the opposite upper front corner.
You now have two matching ties.
If you prefer a longer bow, add more chains to both ties.
If you prefer a smaller, understated knot, make the ties shorter.
Beginner tip: Work the slip stitches loosely. Tight slip stitches can make the ties twist.
Common mistake to avoid: Attach the ties to the upper neckband corners, not the bottom edge of the lace. Otherwise, the collar may pull out of shape when tied.
Pattern Notes and Stitch Counts
Here is a quick explanation of how the pattern works.
Turning Chains
The chain 1 at the beginning of lace rows does not count as a stitch.
The chain 2 at the beginning of the double crochet row also does not count as a stitch.
Work the first stitch into the first actual stitch of the previous row.
Why the Lace Gets Wider
The lace begins with 24 chain-five arches.
The next row has 25 chain-six arches.
The final row has 26 chain-seven arches.
These additional arches and longer chains provide more room around the outer edge.
You are not making a flat rectangular strip. You are creating an expanding openwork shape that can curve around a neckline.
Stitch Count Summary
| Row | Instructions summary | Result |
|---|---|---|
| Foundation | Chain 98 | 98 chains |
| Row 1 | Single crochet across | 97 sc |
| Row 2 | Double crochet across | 97 dc |
| Row 3 | Ch-5 arch repeat | 24 arches |
| Row 4 | Ch-6 arch repeat | 25 arches |
| Row 5 | Ch-7 arch repeat | 26 arches |
Right Side and Wrong Side
Because the collar uses simple stitches and open chain spaces, both sides have a similar appearance.
Choose the side that looks neater to you as the right side.
When adding ties, make sure both are attached to matching corners.
Common Beginner Mistakes and How to Fix Them
1. The Collar Is Too Tight Around the Neck
Why it happens: Your foundation chain is too short, or your stitches are tighter than the sample gauge.
How to fix it: Measure the neckband before beginning the lace. If it is too short, restart with a longer foundation chain using the size-adjustment formula below.
Do not rely on stretching the finished collar to make it fit.
2. The Collar Curls Instead of Lying Flat
Why it happens: Your chain arches may be too tight, or the fabric may need blocking.
How to fix it: Relax your chain tension and gently arrange the collar on a flat surface. Try blocking before deciding whether to remake it.
If the curling is severe, check the chain counts and whether you skipped any arches.
3. One Side Is Longer Than the Other
Why it happens: An extra stitch or missing stitch may have changed the edge.
How to fix it: Check that Row 1 and Row 2 each contain 97 stitches and that each lace row ends at the correct final anchor.
4. The Lace Holes Are Different Sizes
Why it happens: Your tension changes while making chains.
How to fix it: Practice making groups of five, six, and seven chains with the same relaxed hand position.
Try not to tighten the last chain before the single crochet anchor.
5. The Lace Looks Too Loose
Why it happens: The hook may be too large for the yarn, or the chain stitches may be unusually long.
How to fix it: Try a smaller hook or work your chains more consistently.
A little looseness is part of lace, but the fabric should still hold a recognizable shape.
6. The Collar Doesn’t Look Symmetrical
Why it happens: One or more arches may have been skipped or repeated.
How to fix it: Count the arches in each row. The sample should have 24, 25, and 26 arches.
Check both ends before making corrections.
7. The Crocheted Ties Twist
Why it happens: The slip stitches may be too tight.
How to fix it: Use relaxed tension or a slightly larger hook when working back along the chain.
8. The Edges Look Untidy
Why it happens: Turning chains and final stitches may have been placed inconsistently.
How to fix it: Make sure turning chains are not counted as stitches, and work into the correct first and last stitch of every row.
How to Customize This Crochet Collar Pattern
Once you’ve completed your first collar, you can use the same basic method to create different looks.
Change the Yarn Color
Ivory and cream are beautiful for a traditional lace collar.
Dusty pink creates a soft romantic look, while sage green feels natural and understated.
Black cotton gives the design a more dramatic vintage appearance.
You could even make several collars in different colors and wear them with the same blouse.
Adjust the Size
The sample foundation produces 97 single crochet stitches.
For the first lace row to work evenly, the number of single crochet stitches should follow this formula:
Foundation single crochet stitches = 4 × number of first-row arches + 1
You then need one additional starting chain.
For example:
| Size variation | Starting chains | Row 1 stitches | Row 3 arches |
|---|---|---|---|
| Shorter collar | 90 | 89 | 22 |
| Sample collar | 98 | 97 | 24 |
| Longer collar | 106 | 105 | 26 |
At the target gauge of 22 sc per 4 inches, these bands measure approximately 16.2, 17.6, and 19.1 inches respectively.
These are starting points, not universal clothing sizes. Always measure the actual neckline.
Try Different Yarn Weights
Sport-weight cotton creates a delicate but manageable collar.
A finer fingering-weight cotton can produce a lighter lace effect, although you will need to recalculate the foundation chain.
DK cotton makes a bolder collar with more visible texture.
If you change yarn weight, make a new swatch and adjust the foundation count to match the desired neckline.
Add a Contrasting Border
For a subtle color detail, use a contrasting yarn for the final row of lace.
Ivory and sage, cream and dusty rose, or black and white are attractive combinations.
Make sure the second yarn has a similar thickness so the edge doesn’t become uneven.
Add Decorative Picots
If you’re comfortable with basic lace, you can experiment with tiny picots along a separate finishing edge.
A simple picot is often made by chaining three and slip stitching into the first chain.
However, adding picots changes the edge appearance and may affect how it lies. Test a small section before working around the entire collar.
Make a Wider Collar
You can experiment with an additional row of larger chain arches.
Start by testing a small section rather than assuming another full row will lie flat.
An extra row may need adjustments to the number and length of arches.
Use a Ribbon Closure
Instead of crocheted ties, thread a narrow satin ribbon carefully through the spaces between the double crochet posts of the neckband.
Bring the ribbon ends to the front and tie them into a bow.
Choose a ribbon narrow enough to pass through without distorting the stitches.
Turn It Into a Handmade Gift
A crochet collar makes a lovely gift for someone who enjoys vintage-inspired clothing or handmade accessories.
You can pair it with a plain blouse, wrap it in tissue paper, and include a small note with the yarn fiber and washing instructions.
Finishing Instructions
Finishing is what makes a small crochet project look polished.
Fasten Off Securely
After completing the final lace row and both ties, make sure all working yarn ends are secured.
Cut the yarn, leaving tails long enough to weave in.
Pull the final loop through gently to secure the end.
Weave In the Ends
Thread a yarn tail onto your tapestry needle.
Weave it through several stitches on the wrong side of the neckband, change direction, and weave through a few more stitches.
Avoid pulling so tightly that the fabric gathers.
Trim the remaining yarn only after the end feels secure.
Wet Block the Collar
Blocking helps the lace open and settle into its intended shape.
First, check the yarn label for care instructions.
If your cotton yarn allows it, gently wet the collar in cool or lukewarm water.
Remove excess water by pressing it between clean towels. Do not twist or wring the lace.
Lay the collar on a blocking mat or towel.
Arrange the inner edge into a smooth neckline curve.
Spread the lace arches evenly and use rustproof pins if needed.
Let the collar dry completely before removing the pins.
Important: Blocking improves stitch alignment and shaping, but it cannot reliably correct major stitch-count errors or an incorrectly sized foundation.
Washing and Care
Hand washing is a gentle choice for delicate cotton crochet accessories, provided the yarn label permits it.
Use a mild detergent and avoid rubbing the lace aggressively.
After washing, reshape the collar and dry it flat.
Avoid hanging it while wet because the weight of the water may stretch the openwork.
Store the collar flat or loosely folded to prevent the lace from becoming distorted.
Quick Printable-Style Crochet Collar Pattern Summary
Project: Easy detachable crochet lace collar
Skill level: Confident beginner
Yarn: Approximately 70–110 yards sport-weight cotton
Hook: 3.5 mm
Other supplies: Scissors, tapestry needle, measuring tape, stitch markers, blocking supplies
Starting chain: Ch 98
Row 1: Sc in second ch from hook and every ch across. (97 sc)
Row 2: Ch 2, turn. Dc in every sc across. Turning ch does not count. (97 dc)
Row 3: Ch 1, turn. Sc in first dc. Ch 5, sk 3 dc, sc in next dc. Rep 24 times. (24 ch-5 spaces)
Row 4: Ch 1, turn. Sc in first sc. Ch 6, sc in next ch-5 sp. Rep across all 24 spaces. Ch 6, sc in final sc. (25 ch-6 spaces)
Row 5: Ch 1, turn. Sc in first sc. Ch 7, sc in next ch-6 sp. Rep across all 25 spaces. Ch 7, sc in final sc. (26 ch-7 spaces)
Fasten off.
Ties: Join yarn to each upper front neckband corner in turn. Ch 55, sl st in second ch from hook and each remaining ch back to the collar, secure, and fasten off.
Finishing: Weave in ends, wet block according to yarn care instructions, and shape the lace into a smooth curve.
Size adjustment: Change the starting chain in multiples of four, keeping the foundation single crochet count equal to 4n + 1.
Frequently Asked Questions About Crochet Collar Patterns
1. Can a beginner crochet a collar?
Yes. A beginner who already understands chains, single crochet, and double crochet can make this design.
The most important skills are counting stitches and recognizing chain spaces.
If this is your first lace project, practice a few chain arches on a small swatch before starting the collar.
2. What yarn is best for a crochet collar?
Smooth cotton yarn is an excellent choice.
Sport-weight mercerized cotton gives good stitch definition and produces a lightweight collar with a tidy appearance.
Fingering-weight cotton can make finer lace, while DK cotton creates a slightly heavier accessory.
The best yarn depends on whether you want delicate lace or a more structured look.
3. How do I make a crochet collar bigger?
Measure the neckline you want to fit and adjust the foundation chain.
For this pattern, increase the foundation chain by four stitches at a time.
Each four-chain increase adds four single crochet stitches to Row 1 and one additional arch to the first lace row.
Make sure the neckband fits before working the lace.
4. Why does my crochet collar curl?
Curling can happen when chain stitches are too tight, the stitch counts are incorrect, or the fabric has not been blocked.
Check the arch counts first.
Then gently arrange the collar on a flat surface and see whether the lace relaxes.
If the collar still curls dramatically after blocking, your tension or shaping may need adjustment.
5. Can I make a crochet collar without a button?
Absolutely.
This design uses crocheted ties, so you don’t need a button or any special fastening.
You can also use narrow ribbon ties if you prefer a softer decorative finish.
6. Is a crochet collar the same as a Peter Pan collar?
Not exactly.
A Peter Pan collar usually has a rounded shape, often with two rounded front sections.
Crochet collars can have many different shapes, including pointed, scalloped, ruffled, rounded, and openwork lace designs.
This tutorial creates a detachable lace collar with a curved shape rather than a traditional two-piece rounded Peter Pan collar.
7. How do I keep a crochet collar looking neat after washing?
Follow the care instructions on your yarn label.
For washable cotton, gently hand wash when appropriate, remove excess water with a towel, and reshape the collar while damp.
Lay it flat to dry.
You can use rustproof blocking pins to help the lace arches dry evenly.
How to Wear Your Finished Crochet Collar
One of the best things about a detachable crochet collar is how easy it is to style.
Try it over a simple ivory blouse for a soft vintage look.
A dark sweater creates a stronger contrast and makes the lace stand out.
You can also wear the collar over a round-neck dress, provided the neckline shape and size work together.
Tie the closure comfortably rather than tightly. The collar should rest on your clothing without pulling against your neck.
Conclusion
A handmade crochet collar is a small project that can make a big difference to an outfit.
With a few basic stitches, a little patience, and some careful counting, you can create a delicate accessory that looks lovely over dresses, blouses, and sweaters.
This easy crochet collar pattern is also a wonderful introduction to chain-space lace. Once you understand how the arches work, you’ll find the same technique useful for decorative borders, scarves, shawls, and other crochet accessories.
If you enjoyed making this collar, save the tutorial to your favorite crochet Pinterest board so you can find it again when you’re ready to experiment with another color or size.
And if you’re looking for another small project, try making a crochet flower brooch or a matching lace cuff to wear with your new collar.





