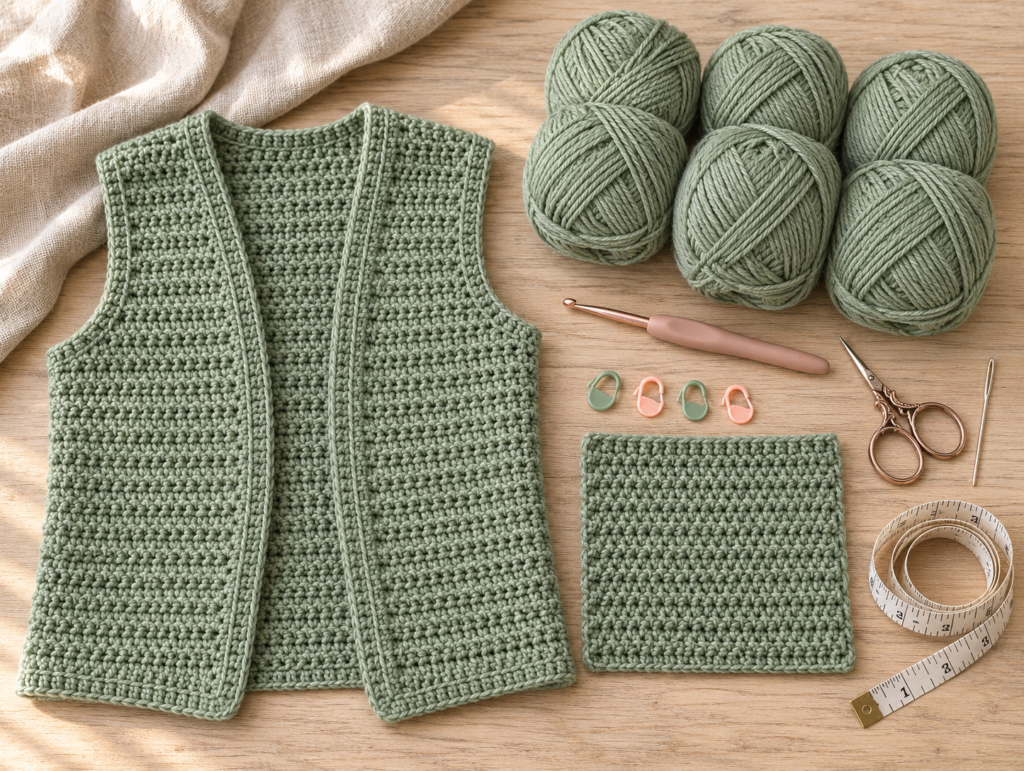
A handmade crochet vest is one of those pieces you can wear again and again. Layer it over a simple T-shirt in spring, a cotton blouse in summer, or a long-sleeve top when the weather turns cooler.
And the best part? You don’t need to know how to crochet complicated clothing to make one.
This easy crochet vest pattern is designed around three simple rectangles. You’ll crochet one back panel, make two matching front panels, sew a few short seams, and finish everything with a neat border.
There are no sleeves to shape, no complicated stitch combinations to memorize, and no tricky decreases.
If you can make a chain and work half double crochet stitches, you already know the most important techniques.
In this beginner-friendly tutorial, we’ll work through the entire process, from choosing the right yarn and measuring your body to crocheting the panels and assembling your finished vest.
The pattern is designed to be adjustable, so you can create a vest that suits your preferred length and fit.
Whether you’re making your first wearable crochet project or looking for something relaxing to work on over the weekend, this simple design is a practical place to start.
What You’ll Learn
By the end of this tutorial, you’ll know how to:
- Choose suitable yarn for a comfortable crochet vest.
- Measure your body and plan the vest’s finished dimensions.
- Crochet flat rectangular panels using half double crochet.
- Keep your stitch count consistent and your edges straight.
- Join the shoulders and sides without bulky seams.
- Leave comfortable armhole openings.
- Add a clean single crochet border.
- Finish and care for your handmade garment.
This pattern uses US crochet terminology throughout.
Crochet Vest Pattern at a Glance
Difficulty
Beginner
Time
8–14 hours
Hook
5.5 mm
Yarn
Worsted #4
Construction
3 rectangles
Main stitch
Half double crochet
Materials You’ll Need
The right materials make your first crochet garment much easier.
For this pattern, choose a smooth worsted-weight yarn that lets you see each stitch clearly.
Yarn: Approximately 600–1,000 yards of category 4 worsted-weight yarn for many adult sizes, with actual requirements depending on the measurements, gauge, and yarn. This is a planning estimate, not a tested yardage specification.
A cotton-acrylic blend is a practical choice because it combines softness with relatively easy care.
Crochet hook: 5.5 mm (US I/9), or whichever size gives you a comfortable fabric and your chosen gauge.
Additional tools: Scissors, blunt yarn needle, measuring tape, four locking stitch markers, and blocking pins or a suitable blocking surface if needed.
For the tutorial sample, we’ll use dusty sage green yarn throughout. A single color makes the panels easier to compare and keeps the finished vest looking coordinated.
Crochet Abbreviations Used
| Abbreviation | Meaning |
|---|---|
| ch | Chain |
| hdc | Half double crochet |
| sc | Single crochet |
| sl st | Slip stitch |
| st / sts | Stitch / stitches |
| rep | Repeat |
| RS | Right side |
| WS | Wrong side |
| yo | Yarn over |
These abbreviations follow standard US crochet terminology.

Welcome to the Craft Yarn Council
US/UK note: A US half double crochet is called a half treble crochet in UK terminology. A US single crochet is called a UK double crochet.
Before You Start
Understanding the vest construction
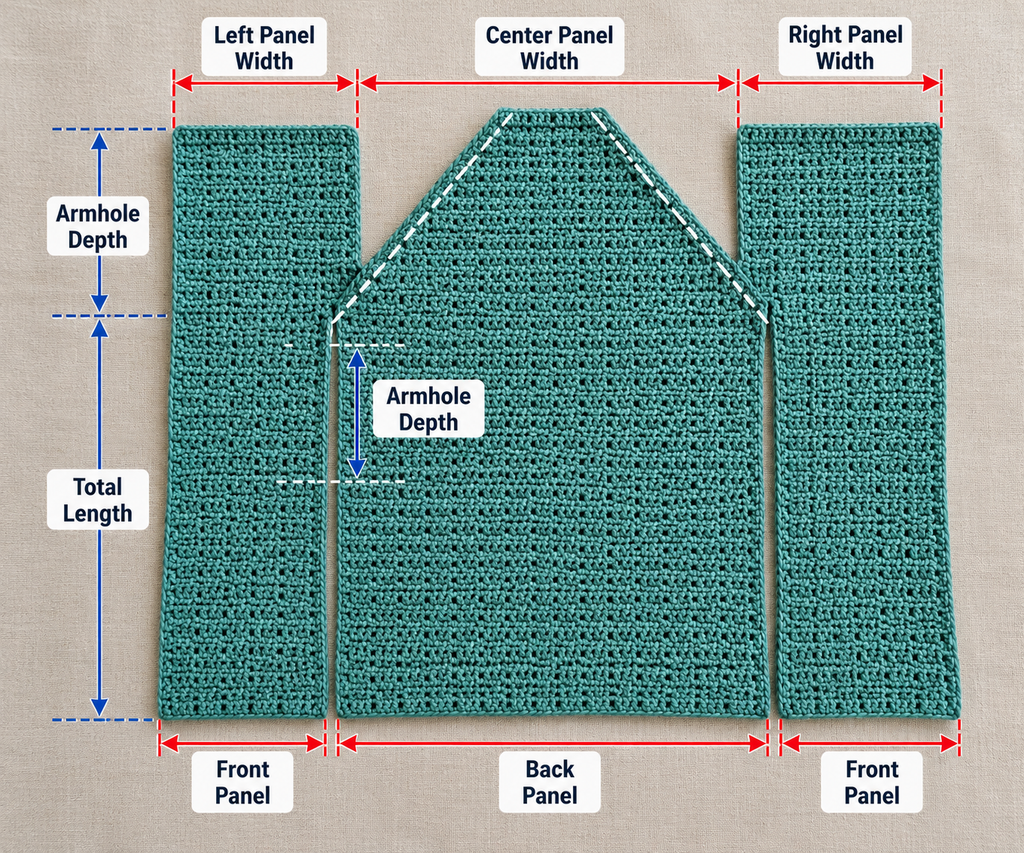
This vest is made from three separate rectangular pieces.
The back panel is one wide rectangle. The two front panels are narrower rectangles, each covering approximately half of the front body width.
After crocheting the panels, you’ll join the shoulders, sew the side seams, and leave openings for your arms.
The center front remains open, creating a relaxed layering vest.
Because there are no shaped armholes or neckline decreases, this design has a boxy fit. It’s especially suitable for beginners who want to learn garment construction without advanced shaping.
Measure yourself first
You’ll need three basic measurements:
Bust circumference: Measure around the fullest part of your chest.
Finished vest length: Measure from your shoulder to where you want the bottom hem to fall.
Armhole depth: Measure vertically from the shoulder to the desired underarm opening.
For a relaxed fit, add approximately 4–6 inches (10–15 cm) of positive ease to your bust measurement.
For example, if your bust measures 38 inches and you want 6 inches of ease:
38 + 6 = 44 inches finished circumference.
For this open-front design, use half that finished circumference as the approximate width of the back panel, and half the back-panel width for each front panel.
This provides an approximate circumference when the two front edges meet. Because the vest is worn open, actual coverage depends on how the panels hang.
Sample measurement plan
Here is a worked example for a 38-inch bust.
| Measurement | Example |
|---|---|
| Body bust | 38 in |
| Desired ease | 6 in |
| Target circumference | 44 in |
| Back panel width | 22 in |
| Each front panel width | 11 in |
| Finished body length | 22 in |
| Armhole depth | 8 in |
These are illustrative measurements, not a tested graded-size chart. Adjust them for the wearer.
Make a gauge swatch
Gauge tells you how many stitches and rows fit within a measured area.
Before starting, crochet a swatch using your selected yarn and hook.
For a useful swatch, make approximately 24 chains and work several inches of half double crochet. Aim for a square larger than 4 inches so you can measure the central section without including uneven edges.
Wash and dry the swatch according to the yarn label, then measure the central 4 inches.
For our worked example, we’ll assume:
- 14 hdc stitches = 4 inches.
- 11 hdc rows = 4 inches.
Your own gauge may be different. Use your measured numbers for the calculations below.
Calculate your stitch count
For a 22-inch back panel at 14 stitches per 4 inches:
22 ÷ 4 × 14 = 77 stitches.
For an 11-inch front panel:
11 ÷ 4 × 14 = 38.5 stitches.
Round to 39 stitches for each front panel.
The foundation chain needs two extra chains because we’ll work the first hdc into the third chain from the hook.
Therefore, for this sample:
- Back panel: chain 79, producing 77 hdc.
- Each front panel: chain 41, producing 39 hdc.
At this gauge, each front panel is approximately 11.14 inches wide, so the combined target circumference is slightly above 44 inches.
Calculate the row count
For a 22-inch vest length at 11 rows per 4 inches:
22 ÷ 4 × 11 = 60.5 rows.
Round to approximately 61 rows, then measure the actual fabric rather than relying only on the row number.
Beginner tip: Your finished measurements matter more than matching the example stitch and row counts exactly.
Step-by-Step Crochet Vest Tutorial
Step 1: Make the foundation chain for the back panel
Begin with a slip knot and place it on your 5.5 mm crochet hook.
For the worked example, chain 79.
Keep your chains relaxed and evenly sized. A foundation chain that is too tight can make the bottom edge of your vest pull inward.
To make a chain stitch, yarn over and pull the yarn through the loop already on your hook.
Continue until you have the required number of chains.
Before moving on, lay the chain on your table and make sure it isn’t twisted.
Beginner tip: If you consistently make tight chains, use a hook 0.5 mm larger for the foundation chain, then switch back to your main hook.
Common mistake to avoid: Don’t count the slip knot or the loop currently on your hook as a chain stitch.
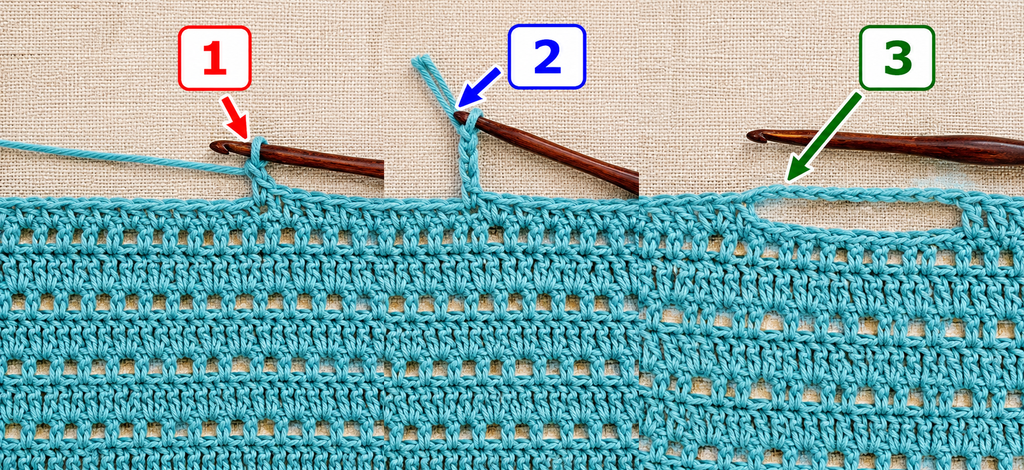
Step 2: Crochet the first row
Now we’ll work half double crochet stitches across the foundation chain.
Row 1:
- Yarn over.
- Insert your hook into the third chain from the hook.
- Yarn over and pull up a loop. You should have three loops on your hook.
- Yarn over again.
- Pull through all three loops.
You’ve completed your first half double crochet.
Work one hdc into every remaining chain.
At the end of the row, you should have 77 hdc stitches for the example back panel.
Count them carefully.
The two skipped chains at the beginning do not count as a separate stitch in this pattern.
Beginner tip: Insert your hook consistently into the same part of each foundation chain to create an even first row.
Common mistake to avoid: Skipping an extra chain will leave you one stitch short. Check your count before continuing.
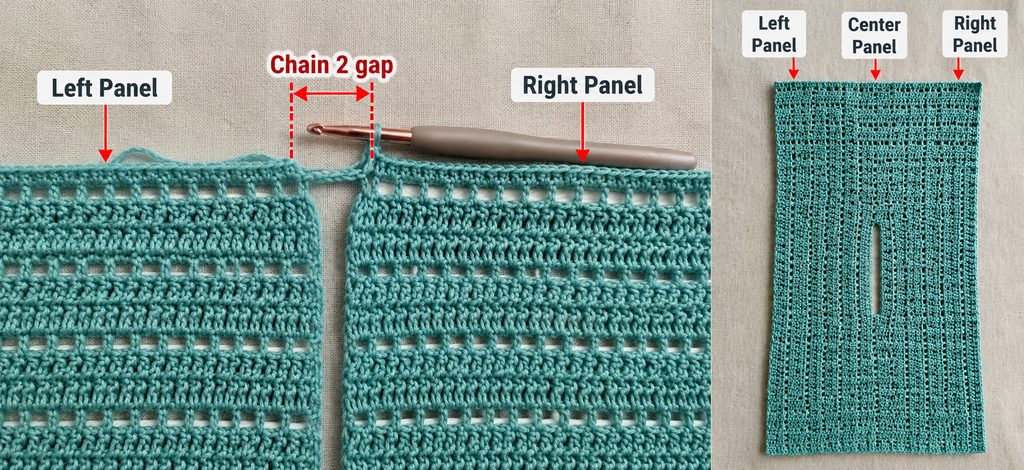
Step 3: Continue crocheting the back panel
Once the first row is complete, it’s time to build the fabric.
Row 2:
Chain 1 and turn.
Work one hdc into the first stitch, then one hdc into every stitch across.
Your stitch count should remain 77.
Rows 3 onward:
Repeat Row 2 until the panel reaches your chosen length.
For our 22-inch sample, this may be approximately 61 rows at the example gauge.
Remember that the chain 1 at the beginning of each row does not count as a stitch.
You must work into the first actual hdc stitch after turning.
As your panel grows, pause every few rows to check the width.
The sides should remain straight, with no unexpected narrowing or widening.
If the panel starts getting smaller, you’re probably missing the last stitch of a row.
If it grows wider, you may be accidentally working into the turning chain.
Beginner tip: Place a stitch marker in the first and last stitch of your row while you’re learning to recognize the edges.
Common mistake to avoid: Don’t stretch the fabric while measuring. Lay it flat and smooth it gently.
When the back panel reaches the desired length, fasten off and leave a yarn tail approximately 18–24 inches long for possible seaming.
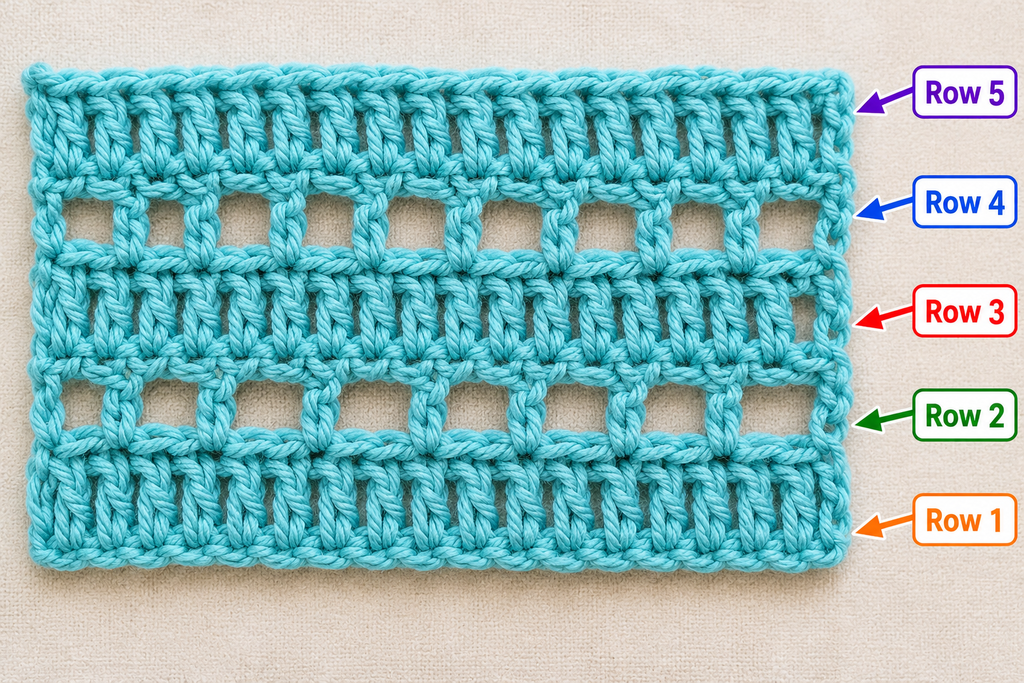
Step 4: Crochet the first front panel
The front panels are made using the same stitch pattern as the back.
The only difference is their width.
For the worked example, chain 41.
Row 1: Work one hdc into the third chain from your hook and each remaining chain.
You should have 39 hdc stitches.
Row 2: Chain 1, turn, and work one hdc in every stitch across.
Remaining rows: Repeat Row 2 until your front panel matches the length of the back panel.
Because the front and back pieces must line up at the shoulders and bottom hem, it’s important to compare their lengths as you work.
Lay the front panel beside the back panel every 10–15 rows.
If both pieces use the same yarn, hook, and tension, their row heights should be similar.
However, small differences in tension can happen, especially if you crochet over several days.
Measure rather than assuming identical row counts will always produce identical lengths.
Beginner tip: Keep the back panel nearby so you can compare the two pieces without repeatedly using your measuring tape.
Common mistake to avoid: Don’t make the front panel the same width as the back. Each front panel should be approximately half the back-panel width for this design.
Step 5: Make the second front panel
Repeat the same instructions to make another matching front panel.
For the sample, chain 41 and work 39 hdc across each row.
Continue until the second front panel reaches the same length as the first.
At this point, you should have three finished rectangles:
- One wide back panel.
- Two narrower front panels of equal width and length.
Place all three pieces flat on your table.
Check that the bottom edges line up and that the two front panels match.
If one front panel is noticeably longer than the other, correct the difference before sewing.
For this straight rectangular design, the two front pieces are interchangeable. You don’t need to crochet separate left- and right-facing shapes.
Beginner tip: Count the rows on both front panels before fastening off.
Common mistake to avoid: Don’t begin seaming until you’re satisfied with the panel measurements. Adjustments are much easier before the pieces are joined.
Step 6: Join the shoulder seams
Now your rectangles will begin to look like a garment.
Lay the back panel flat with its right side facing upward.
Place the two front panels on top of it, right sides facing each other.
Align each front panel with the corresponding outer edge of the back panel.
The two front panels should meet near the center of the back panel, although they will not be sewn together there.
Before sewing, decide how wide you want your neckline.
For the sample back panel, which measures approximately 22 inches across, you might choose a back neckline opening of 8 inches.
That leaves:
(22 − 8) ÷ 2 = 7 inches for each shoulder seam.
Measure 7 inches inward from each outside shoulder edge and mark the stopping points.
Using your yarn needle and matching yarn, sew each front panel to the back along its 7-inch shoulder section.
A mattress stitch or a neat whip stitch works well.
Don’t sew across the center neckline opening.
When both shoulder seams are complete, open the garment and check that the two front panels hang evenly.
Beginner tip: Use stitch markers to hold the shoulder edges together before sewing.
Common mistake to avoid: Don’t sew the entire top edge of each front panel to the back. You must leave the center neckline opening.
Step 7: Mark the armholes and sew the sides
Turn your vest so the wrong sides are facing outward.
Align the outer side edges of each front panel with the corresponding side edge of the back.
Before sewing, decide how deep the armholes should be.
For the worked example, use an 8-inch armhole depth, measured vertically from the shoulder edge.
Place a stitch marker at that point on each side.
Starting at the bottom hem, sew upward along one side edge until you reach the stitch marker.
Stop sewing there.
The unsewn section above the marker becomes your armhole.
Repeat on the opposite side.
Try the vest on carefully before fastening off the seams completely.
You should be able to move your arms comfortably without the fabric pulling tightly under your arms.
If the armhole feels too small, undo a little of the upper side seam.
If it feels too large, extend the seam slightly upward.
Beginner tip: Try the vest on over the kind of shirt you expect to wear underneath it.
Common mistake to avoid: Don’t sew all the way to the shoulder. The upper portion of each side must remain open.
Step 8: Add a simple crochet border
A border gives your handmade vest a more finished appearance.
For this beginner design, we’ll use single crochet.
Turn the vest right side out.
Attach your yarn at the lower corner of one front opening.
Chain 1.
Work single crochet stitches evenly up the first front edge, around the back neckline, and down the second front edge.
Because you’re working into the ends of half double crochet rows, the stitch placement will look different from crocheting across the tops of stitches.
A useful starting point is approximately three single crochet stitches for every four hdc row ends, but the correct spacing depends on your actual row gauge.
If the border ripples, you’ve probably added too many stitches.
If it pulls the front edges inward, you may need more stitches.
At the bottom corners, place additional stitches as needed to turn the corner smoothly.
For a slightly firmer border, work a second row of single crochet.
Fasten off neatly.
Beginner tip: Lay the vest flat after completing the first edging row. The border should sit smoothly without stretching or gathering.
Common mistake to avoid: Don’t force one single crochet into every row end if that makes the edge wavy.
Step 9: Finish the armhole edges
You can leave the armholes without additional edging, but a simple single crochet round helps them look neat.
Attach yarn near the underarm seam.
Chain 1 and work single crochet stitches evenly around the armhole opening.
When working along the vertical row ends, space the stitches so the fabric lies flat.
Join with a slip stitch to the first single crochet.
Repeat around the second armhole.
If you prefer a very simple look, one round is enough.
For a more defined edge, work a second round.
Make sure both armholes have a similar appearance and circumference.
Try the vest on again before fastening off.
Beginner tip: Avoid pulling the yarn too tightly around the underarm area.
Common mistake to avoid: A tight armhole border can make an otherwise comfortable vest difficult to wear.
Step 10: Finish the bottom hem
The bottom hem can be left as it is if your foundation edge looks neat.
However, adding a simple border can make the garment feel more coordinated.
Attach yarn near one bottom corner.
Work single crochet stitches evenly along the bottom edge, following the existing stitch structure.
Continue around the hem as appropriate for the open-front construction, taking care not to accidentally join the two front panels together.
For a clean appearance, use the same yarn color as the main vest.
If you want a contrasting trim, a cream or muted oatmeal shade would pair beautifully with dusty sage.
After finishing, lay the vest flat.
Check that the hem hangs evenly and that the front panels are the same length.
Pattern Notes and Stitch Notes
This pattern uses a straightforward stitch repeat, but a few details are worth remembering.
Turning chain: Chain 1 at the beginning of each hdc row. This turning chain does not count as a stitch.
Stitch count: Maintain the same number of hdc stitches across every row of each rectangle.
Repeat pattern: After the foundation row, repeat one hdc in every stitch across.
Right side and wrong side: Because the panels are worked in turned rows, both sides have a similar appearance. Choose the side you prefer as the right side and keep that choice consistent during assembly.
Panel measurements: The back and front panels should be equal in length. Each front panel should be approximately half the width of the back panel for the open-front design.
Size adjustment: To change the width, calculate the stitch count from your own gauge. To change the length, add or remove rows.
Fit note: Rectangular construction produces a relaxed, boxy silhouette. It does not provide tailored shaping at the waist, neckline, or shoulders.
Common Beginner Mistakes and How to Fix Them
1. The vest gets narrower as you crochet
This usually happens when the last stitch of a row is missed.
Place a stitch marker in the first and last stitch of each row.
Count regularly, especially during the first few inches.
If you notice the problem after only one or two rows, unravel those rows and correct the stitch count.
2. The bottom edge curls
A tight foundation chain can cause curling or pulling.
Try making the foundation chain with a slightly larger hook.
Also check your tension. Pulling every stitch very tightly can make the fabric stiff.
Mild curling may relax after washing and blocking, but a severely tight foundation edge usually needs to be redone.
3. The front panels are different lengths
This can happen if you accidentally add an extra row or if your tension changes.
Count the rows and compare the pieces on a flat surface.
If the difference is small, blocking may help. If it’s significant, adjust the longer or shorter panel before assembly.
4. The armholes feel too tight
The side seams may extend too far upward.
Carefully undo a small portion of each side seam.
Try the vest on again and check whether you can lift your arms comfortably.
Remember that the edging will also take up a little space.
5. The neckline feels too narrow
The shoulder seams may be too long.
Measure the unsewn neckline opening and compare it with the intended fit.
If necessary, undo a few stitches at the inner end of each shoulder seam.
Keep both sides symmetrical.
6. The border looks wavy
Wavy edging usually means too many stitches were added along the row ends.
Remove the border and try again with fewer stitches.
Check the edge every few inches rather than waiting until the entire border is finished.
7. The vest feels stiff
The hook may be too small for the yarn, or the yarn may be too firm for a garment.
For a softer drape, experiment with a slightly larger hook and a flexible cotton-acrylic or acrylic blend.
Always test the fabric before starting a full garment.
How to Customize This Crochet Vest
One of the nicest things about a simple rectangular vest is how easy it is to change its appearance.
Make it longer
Add more rows to all three panels.
For a longer layering vest, extend the hem several inches below your natural waist.
Remember that a longer vest requires more yarn.
Make it cropped
Stop crocheting when the panels reach your preferred cropped length.
A shorter vest can look especially nice over dresses or high-waisted trousers.
Try stripes
Instead of using one color throughout, change yarn colors every few rows.
For example, combine dusty sage, cream, and warm beige for a soft neutral palette.
Keep the stripe sequence identical across all three panels if you want the stripes to line up at the seams.
Add a contrasting border
Use a different yarn color for the neckline, front edges, and armholes.
A cream border creates a classic look, while a darker green gives the vest a subtle tonal finish.
Experiment with texture
Once you’re comfortable with the basic construction, you can try another stitch pattern.
A moss stitch or simple ribbed texture could give the vest a different appearance.
However, changing the stitch pattern also changes the gauge, so recalculate your panel measurements before starting.
Turn it into a thoughtful gift
A handmade crochet vest can make a lovely birthday or holiday gift.
Choose a yarn color the recipient wears often and measure a favorite vest or cardigan to estimate the preferred fit.
For gifts, easy-care yarn is especially useful.
Finishing Instructions
Finishing is the final stage that helps your vest look tidy and comfortable.
Fasten off securely
After your final stitch, cut the yarn, leaving a tail of approximately 6 inches.
Pull the tail through the remaining loop and tighten gently.
Avoid pulling so hard that the final stitch becomes distorted.
Weave in all yarn ends
Thread each loose yarn tail through a blunt tapestry needle.
Turn the vest to the wrong side.
Weave the tail through the backs of several stitches, change direction, and weave through another short section.
Trim the excess yarn only after the end is secure.
Take extra care around the shoulder seams, where the garment experiences movement.
Block your crochet vest
Blocking can help the panels lie flatter and make the seams look more even.
Follow the care instructions for your yarn.
For a washable cotton-acrylic blend, gentle washing and reshaping may be appropriate.
Lay the vest flat on a towel or blocking mat.
Smooth the front panels and back into their intended shape.
Make sure the shoulder seams are even and the bottom hem is straight.
Allow the garment to dry completely before wearing.
Avoid direct heat on acrylic yarn because excessive heat can permanently alter the fibers.
Check the final fit
Once the vest is dry, try it on.
Check that the shoulders sit comfortably, the armholes allow movement, and the front edges hang evenly.
If everything feels right, your vest is ready to wear.
Quick Printable-Style Crochet Vest Pattern Summary
Easy Three-Panel Crochet Vest
Skill level: Beginner
Yarn: Worsted-weight category 4
Hook: 5.5 mm or size required for gauge
Stitches: ch, hdc, sc, sl st
Example gauge: 14 hdc × 11 rows = 4 inches
Example finished length: 22 inches
Construction: One back rectangle, two front rectangles
Back Panel
Chain 79.
Row 1: Hdc in third chain from hook and each chain across. (77 hdc)
Row 2: Ch 1, turn, hdc in each stitch across. (77 hdc)
Repeat Row 2 until approximately 22 inches long.
Front Panels — Make Two
Chain 41.
Row 1: Hdc in third chain from hook and each chain across. (39 hdc)
Row 2: Ch 1, turn, hdc in each stitch across. (39 hdc)
Repeat Row 2 until the front panel matches the back length.
Assembly
Seam approximately 7 inches at each shoulder, leaving an 8-inch center back neckline opening.
Sew the sides from the hem upward, leaving approximately 8 inches open below each shoulder for the armholes.
Finishing
Add single crochet edging around the front opening, neckline, and armholes. Weave in ends and block gently.
This summary describes the 38-inch-bust worked example with approximately 6 inches of ease. For other measurements, recalculate the stitch and row counts using your own gauge. The sample pattern is an original instructional design and has not been physically pattern-tested.
Frequently Asked Questions About Crochet Vest Patterns
Is a crochet vest easy for beginners?
Yes. A simple crochet vest made from rectangular panels is one of the more approachable garment projects.
You can practice basic stitches, learn how to keep your edges straight, and gain experience with sewing crochet pieces together.
The most important skills are making consistent stitches and measuring your work accurately.
How much yarn do I need to crochet a vest?
The amount depends on the size, length, yarn weight, and stitch pattern.
For many adult-sized simple vests in worsted-weight yarn, approximately 600–1,000 yards may be a useful starting estimate.
To estimate more accurately, weigh your gauge swatch, calculate its area, and compare that with the combined area of the planned panels. Add an allowance for edging, seams, and swatching.
What is the best crochet stitch for a vest?
Half double crochet is a practical beginner choice.
It creates a relatively even fabric, works up faster than single crochet, and is simple to count.
Other options include moss stitch, double crochet, and various textured stitch patterns.
The best stitch depends on whether you want a dense, warm vest or a lighter, more open fabric.
Can I crochet a vest without sewing?
Yes. Some crochet vests are made in one piece, using folding, armhole openings, or continuous construction.
However, a three-panel vest is often easier for beginners to understand because each piece has a simple shape.
The small amount of seaming is also useful practice for future crochet clothing projects.
How do I make my crochet vest bigger?
For a wider vest, increase the number of foundation chains according to your gauge.
For a longer vest, crochet additional rows.
Always adjust the back and front panels proportionally so the pieces fit together during assembly.
If you’re making a larger size, also check the shoulder width and armhole depth.
Should I block my crochet vest?
Blocking is helpful but not always essential.
It can smooth uneven edges, relax the fabric, and improve the appearance of seams.
The correct method depends on the yarn fiber. Always follow the manufacturer’s care instructions.
Can I use cotton yarn for a crochet vest?
Yes. Cotton is a popular choice for lightweight crochet clothing.
It has a breathable feel and creates clear stitch definition.
However, some cotton yarns can be heavy or less elastic than acrylic blends, so choose a yarn with a comfortable drape and check your gauge carefully.
Conclusion
Making your first crochet vest doesn’t have to involve complicated shaping or difficult stitches.
With three simple panels, a little patience, and careful measurements, you can create a handmade layering piece that fits your personal style.
The best part of this pattern is its flexibility. Once you’ve made one vest, you can experiment with longer lengths, new colors, different borders, and interesting stitch textures.
Save this tutorial so you can return to the measurements and assembly steps whenever you need them.
And if you enjoy making this vest, a simple crochet cardigan or crochet mesh top would be a lovely next project.





